
Now Reading: Amazon Fire HD 10 2021 Back Camera Replacement Guide
-
01
Amazon Fire HD 10 2021 Back Camera Replacement Guide
Amazon Fire HD 10 2021 Back Camera Replacement Guide
If the rear camera on your Amazon Fire HD 10 (2021) is blurry, not focusing, showing a black screen, or not working at all, replacing the back camera module is the best solution. This guide provides a clear, step-by-step DIY repair process designed for beginners and intermediate users.
Follow the instructions carefully to safely replace the camera and restore full camera functionality to your tablet.
Repair Overview
Repair Type: Rear Camera Replacement
Repair Difficulty: ⭐⭐⭐☆☆ (3 / 5 – Medium)
Estimated Time: 20–35 minutes
Risk Level: Low to Moderate
No soldering is required, but careful handling of connectors is important.
Before You Begin
Compatibility and Model Numbers
- Amazon Fire HD 10 (2021)
- Amazon Fire HD 10+ (2021)
- Amazon Fire HD 10 (2021) Kids Edition
Tools Required
- Heating pad or hairdryer/heat gun
- Plastic pry tool / card pry
- Suction cups
- Phillips #00/#000 screwdrivers
- Tweezers (for connectors)
- B7000 glue or double-sided adhesive (for back cover)
- Rubber bands or bonding clips to secure the back cover
How to Find Tools and Parts
- Heating pad – https://amzn.to/3H0tHzJ
- Portable Heat Gun – https://amzn.to/4mszih1
- Clamps https://amzn.to/3GYJT4w
- STREBITO 142 Piece Repair Tool Kit https://amzn.to/3UO1jUx
- Glue | Adhesive https://amzn.to/46exVxe
- Compatible Parts –
- Battery – https://amzn.to/4mHqdBn
- Screen – https://amzn.to/4osWQEu
- Silicone Work Repair Mat https://amzn.to/45Emz5l
Reasons to Replace the Back Camera
You may need to replace the rear camera if you notice:
- Camera not opening or showing a black screen
- Blurry or out-of-focus images
- Camera app crashing
- Dust or moisture damage inside the camera
- Physical damage after a drop
Protect Your Amazon Fire Tablet
- Tempered Glass For The Screen https://amzn.to/4mduxII
- Best Cases For Your https://amzn.to/45sPXdx
Step-by-Step Amazon Fire HD 10 (2021) Back Camera Replacement
Step 1: Power Off the Tablet
Turn off the Amazon Fire HD 10 completely before starting the repair.
Step 2: Remove the Back Cover
- Create a gap near the charging port or side edge using a plastic pick or card pry tool.
- Gently slide the tool around the edges to release the plastic clips.
- Lift and remove the back cover.
Step 3: Disconnect the Battery
- Locate the battery connector on the motherboard.
- Carefully disconnect it using a plastic spudger to prevent short circuits.
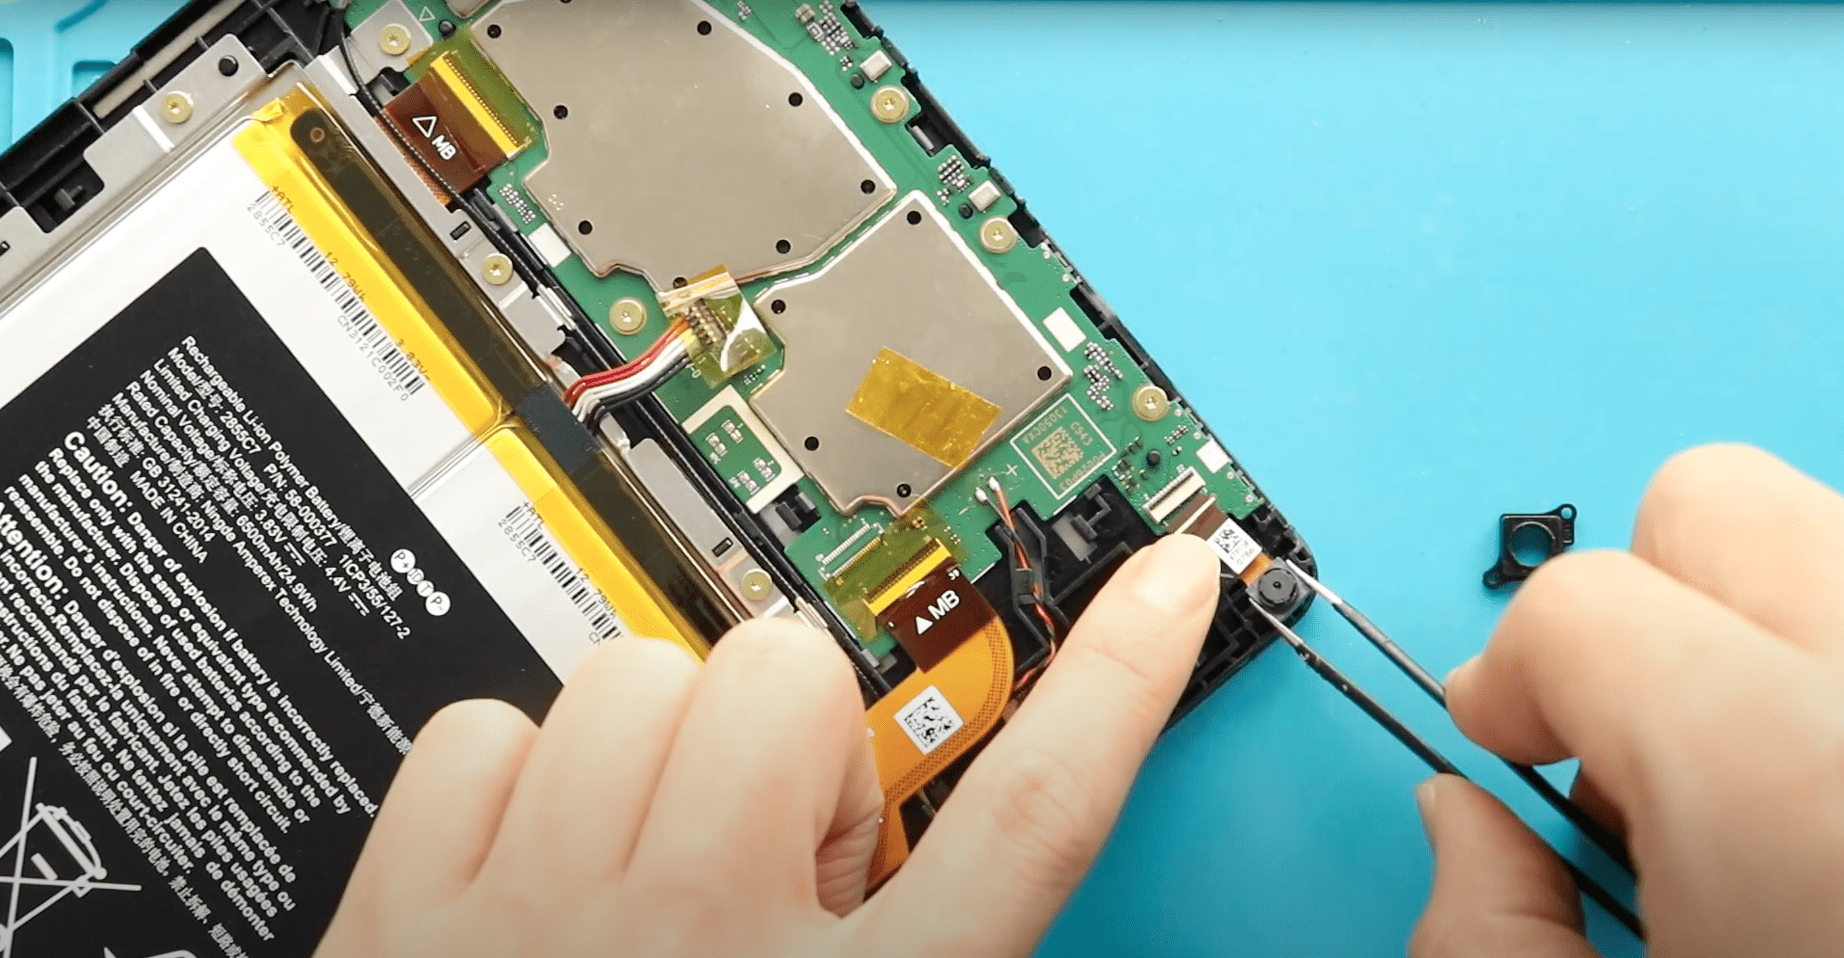
Step 4: Remove the Faulty Back Camera
- Locate the rear camera module on the motherboard.
- Gently disconnect the camera flex cable from its connector.
- Lift and remove the faulty camera module from the housing.
Step 5: Install the New Back Camera
- Place the new rear camera module into position.
- Secure it properly in the housing.
- Reconnect the camera flex cable firmly to the connector.
Step 6: Reassemble the Tablet
- Reconnect the battery connector.
- Align the back cover with the frame.
- Press around the edges until all clips snap back into place.
Frequently Asked Questions (FAQ)
Q: Can I replace the Fire HD 10 back camera myself?
A: Yes. The repair is moderate in difficulty and does not require soldering.
Q: Will replacing the camera erase my data?
A: No. Camera replacement does not affect stored data.
Q: Why is my camera blurry even after replacement?
A: Make sure the protective film is removed from the new camera lens before installation.
Troubleshooting (After The Repair)
Q: Camera not detected after replacement.
A: Recheck the camera flex cable connection and ensure it is fully seated.
Q: Camera app opens but shows a black screen.
A: The connector may be loose or misaligned. Disconnect and reconnect the camera cable.
Q: Rear camera works intermittently.
A: Inspect the flex cable for damage and confirm the connector lock is secure.
Final Thoughts
Replacing the Amazon Fire HD 10 (2021) back camera is a quick and effective repair that restores full camera functionality. With basic tools and careful handling, this DIY repair can be completed safely in under 40 minutes.
For more tablet repair guides, teardown tutorials, and DIY fixes, explore our latest step-by-step repair manuals.
More Related


-
 01Samsung Galaxy A16 5G Battery Replacement | Full DIY Repair Guide
 -
02Samsung Galaxy A16 5G Screen Replacement | Step-by-Step Guide
-
03Google Pixel 6 Power Button Replacement Guide | Volume Button Flex Repair Guide- DIY Repair
-
04Samsung Galaxy A16 5G Back Cover & Camera Lens Frame Replacement Guide | DIY Repair
-
05Why a Heating Pad Is Essential for Mobile Phone Repairs (And How to Use it)
-
06How to Use a Heat Gun or Hair Dryer for Phone/Tablet Repairs
-
07Essential Repair Tools for Phone, Tablet & Laptop Repairs


