
Now Reading: Motorola Moto G Stylus 5G Battery Replacement Guide (2021) XT2131
-
01
Motorola Moto G Stylus 5G Battery Replacement Guide (2021) XT2131
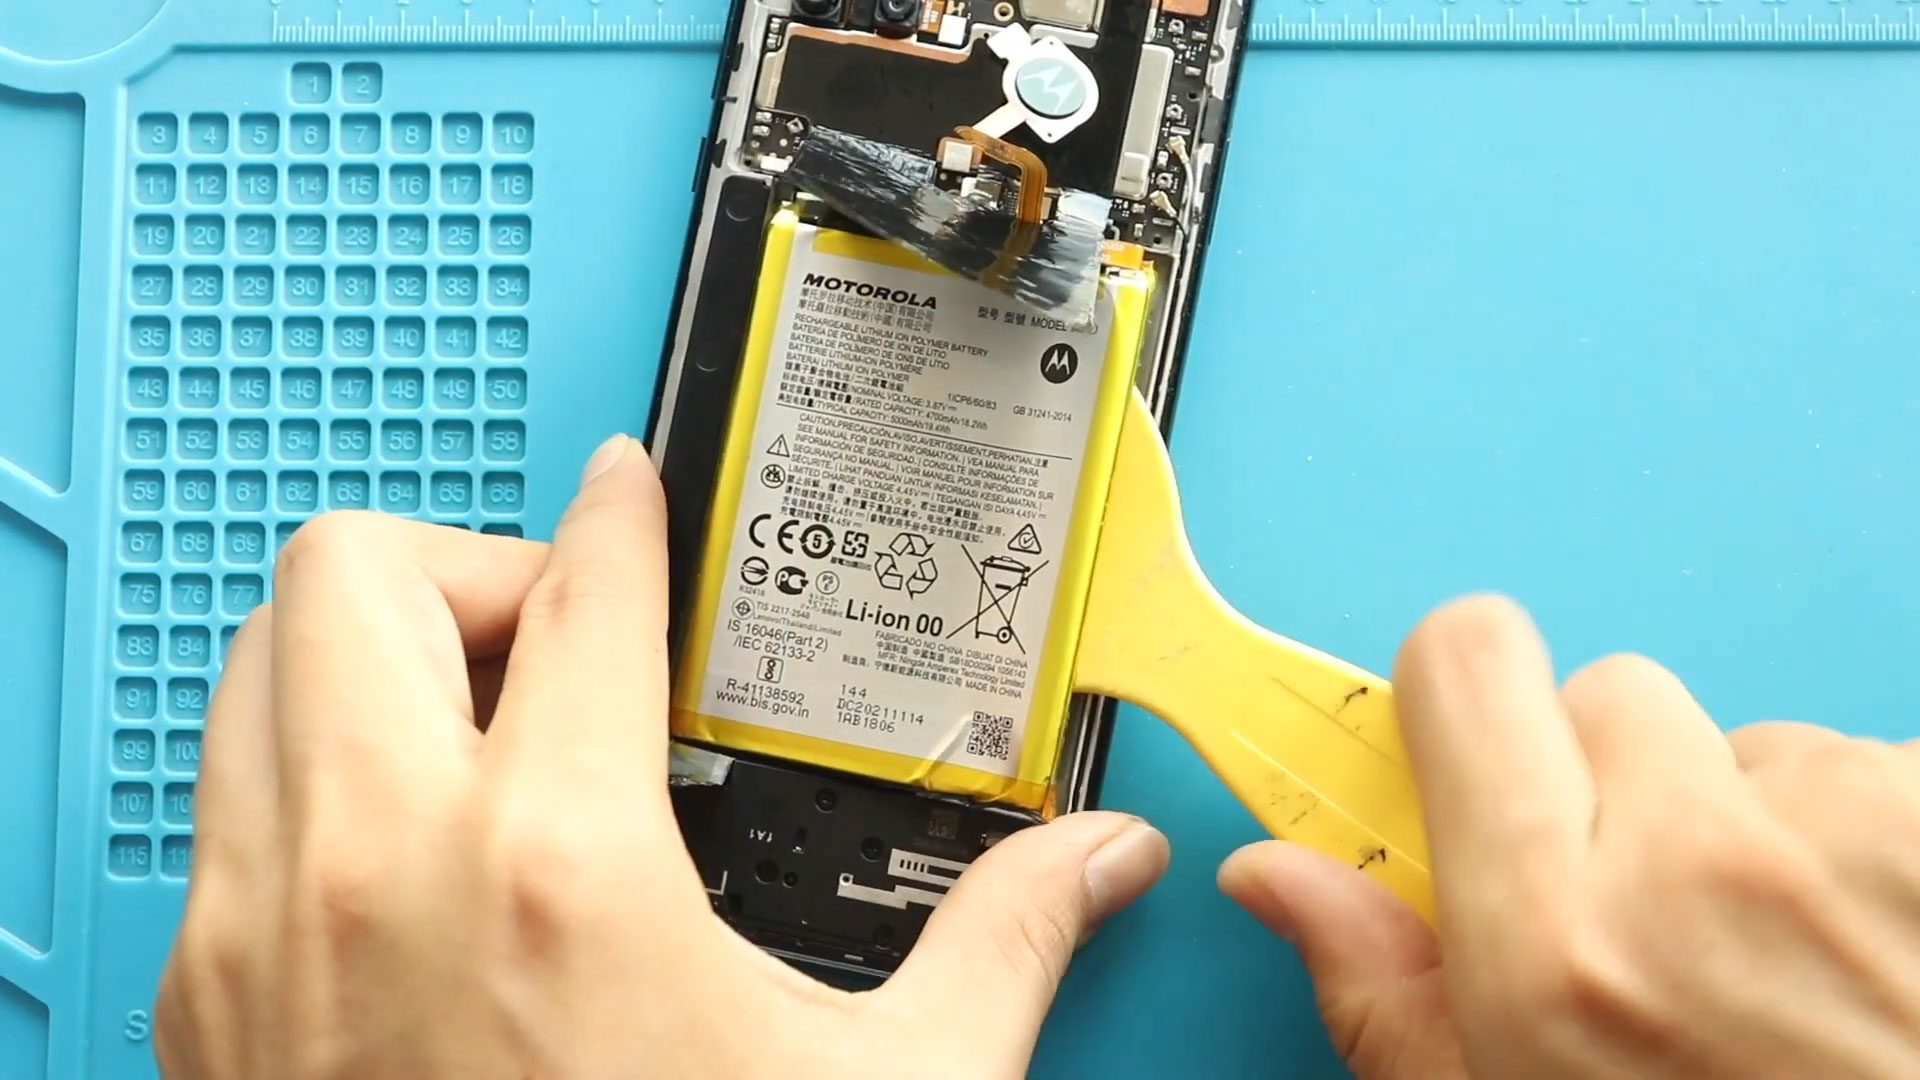
Motorola Moto G Stylus 5G Battery Replacement Guide (2021) XT2131
Hi everyone, welcome back to Geardo 👋
Today, we’ll walk you through a complete, beginner-friendly guide on how to replace the battery on your Motorola Moto G Stylus 5G. If your phone is draining fast, shutting down randomly, or not holding charge, this repair can bring it back to life.
Battery replacement might sound intimidating, but with the right tools and patience, it’s very doable—even for beginners.
🔧 Repair Overview
- Device Type: Smartphone
- Device Model: Motorola Moto G Stylus 5G
- Repair Type: Battery Replacement
⭐ Repair Difficulty: ★★★★★☆☆☆☆☆ (5/10 – Moderate)
⏱️ Time Required: 45 – 60 minutes
🔍 Reasons for Battery Replacement
- Battery drains quickly
- Phone shuts down unexpectedly
- Device overheating
- Battery swelling (very important to fix immediately)
- Charging issues despite working charger
Check The Latest Motorola Phones are in Clearance “up to 60% off” – https://amzn.to/480ho0w
Before You Begin
Compatibility and Model Numbers
- Motorola Moto Stylus 5G (2021)
Model Numbers | XT2131, XT2131DL, XT2131-1, XT2131-3, XT2131-4
Tools Required
- Mobile phone heating pad or hairdryer/heat gun
- Plastic pry tool / card pry
- Suction cups
- Phillips #00/#000 screwdrivers
- Torx T3 / T4 / T5 Screwdriver (Depends on the version)
- Flathead Screwdriver
- Tweezers (for connectors)
- B7000 glue or double-sided adhesive (for back cover)
- Rubber bands or bonding clips to secure the back cover
Using proper tools reduces the risk of damaging the phone.
How to Find Tools and Parts
- Heating pad – https://amzn.to/3H0tHzJ
- Portable Heat Gun – https://amzn.to/4mszih1
- Clamps https://amzn.to/3GYJT4w
- STREBITO 142 Piece Repair Tool Kit https://amzn.to/3UO1jUx
- Glue | Adhesive https://amzn.to/46exVxe
- Compatible Parts –
- Battery – https://amzn.to/46u7VNl
- Screen – https://amzn.to/47LQSbS
- Other Parts – https://amzn.to/3Vp6SZX
- Silicone Work Repair Mat https://amzn.to/45Emz5l
🔋 Step-by-Step Battery Replacement Guide
Step 1: Remove the Back Cover
Heat gently around the edges of the back cover to soften the adhesive.
You can use a heating pad, heat gun, or hairdryer.
Once heated, use a suction cup to lift slightly and insert a plastic pry tool to cut through the adhesive.
Carefully lift the back cover while holding the fingerprint button area.
Step 2: Remove the Logic Board Frame
Unscrew the eight screws securing the top frame.
Gently lift and remove the frame that includes the camera lens housing.
Step 3: Disconnect the Battery
Move the fingerprint button aside and disconnect the battery connector safely.
Step 4: Prepare the Battery for Removal
Peel back the graphite tape and secure it out of the way.
Release any adhesive at the bottom of the battery.
Step 5: Remove the Old Battery
Apply gentle heat under the battery to loosen the adhesive.
Use a plastic pry tool or card to carefully separate the battery.
⚠️ Take your time here—avoid bending or puncturing the battery.
Once loose, gently lift it out.
Step 6: Install the New Battery
Place the new battery into position and secure it with fresh adhesive.
Reapply the graphite tape and secure it properly.
Step 7: Reconnect Components
Reconnect the battery connector.
Reposition the fingerprint button.
Step 8: Reassemble the Phone
Reinstall the logic board frame and tighten the eight screws.
Before closing:
- Ensure enough adhesive is present
- Apply B7000 glue or new adhesive if needed
Place the back cover and press firmly.
Use clips or rubber bands to hold it in place while the adhesive sets.
❓ Frequently Asked Questions (FAQ)
1. Is this repair safe for beginners?
Yes, but it requires patience. Follow each step carefully and avoid using metal tools near the battery.
2. Can I reuse the old adhesive?
It’s not recommended. Always use fresh adhesive for proper sealing.
3. How do I know if my battery needs replacement?
If your phone drains quickly, overheats, or shuts down randomly, the battery is likely worn out.
4. Will replacing the battery improve performance?
Yes, especially if your current battery is degraded. You’ll notice better battery life and stability.
5. Do I need to calibrate the new battery?
Yes. Charge to 100%, then use it down to around 10–15%, and recharge fully once or twice.
Troubleshooting (After The Repair)
1. Phone not turning on after replacement
- Check battery connection
- Ensure connector is properly seated
- Try charging for 10–15 minutes
2. Battery not charging
- Inspect charging port
- Reconnect battery properly
- Try a different charger/cable
3. Back cover not sticking properly
- Apply new adhesive or B7000 glue
- Use clips or rubber bands for pressure
4. Phone overheating after repair
- Ensure battery is properly installed
- Check for pinched cables
- Restart the device
5. Loose components or rattling sound
- Reopen and check screws
- Ensure all parts are seated correctly
Final Thoughts
That’s it! You’ve successfully replaced the battery on your Motorola Moto G Stylus 5G 🎉
Take your time with each step, and don’t rush—this is key to a safe and successful repair. If you run into issues, just revisit the troubleshooting section.
If you found this guide helpful, feel free to share it and help others fix their devices too 👍
Related Guides
Other Moto G Stylus 5G Repair Guides


-
 01Samsung Galaxy A16 5G Battery Replacement | Full DIY Repair Guide
 -
02Samsung Galaxy A16 5G Screen Replacement | Step-by-Step Guide
-
03Google Pixel 6 Power Button Replacement Guide | Volume Button Flex Repair Guide- DIY Repair
-
04Samsung Galaxy A16 5G Back Cover & Camera Lens Frame Replacement Guide | DIY Repair
-
05Why a Heating Pad Is Essential for Mobile Phone Repairs (And How to Use it)
-
06How to Use a Heat Gun or Hair Dryer for Phone/Tablet Repairs
-
07Essential Repair Tools for Phone, Tablet & Laptop Repairs


