Now Reading: iPhone 11 Pro Battery Replacement
-
01
iPhone 11 Pro Battery Replacement

Before we start any repairs on the phone like any other iPhone we have to open the bottom pentalobe screws after that very carefully and gently we will apply the heed around the LCD because iPhone 11 Pro comes with a seal which has a decision between mid frame and a LCD by applying the heat it will loosen up the stickiness and it will become easy to remove the LCD from the frame after that we’re gonna use a suction tool to create a cavity for our guitar pick to start prior opening the LCD make sure when we are prying opening the LCD with the guitar pick the guitar pick does not go in too much and it only cuts in between that adhesive one successfully we have opened the LCD now we can start removing the metal plate which is covering all the connectors we will open the five screws on it
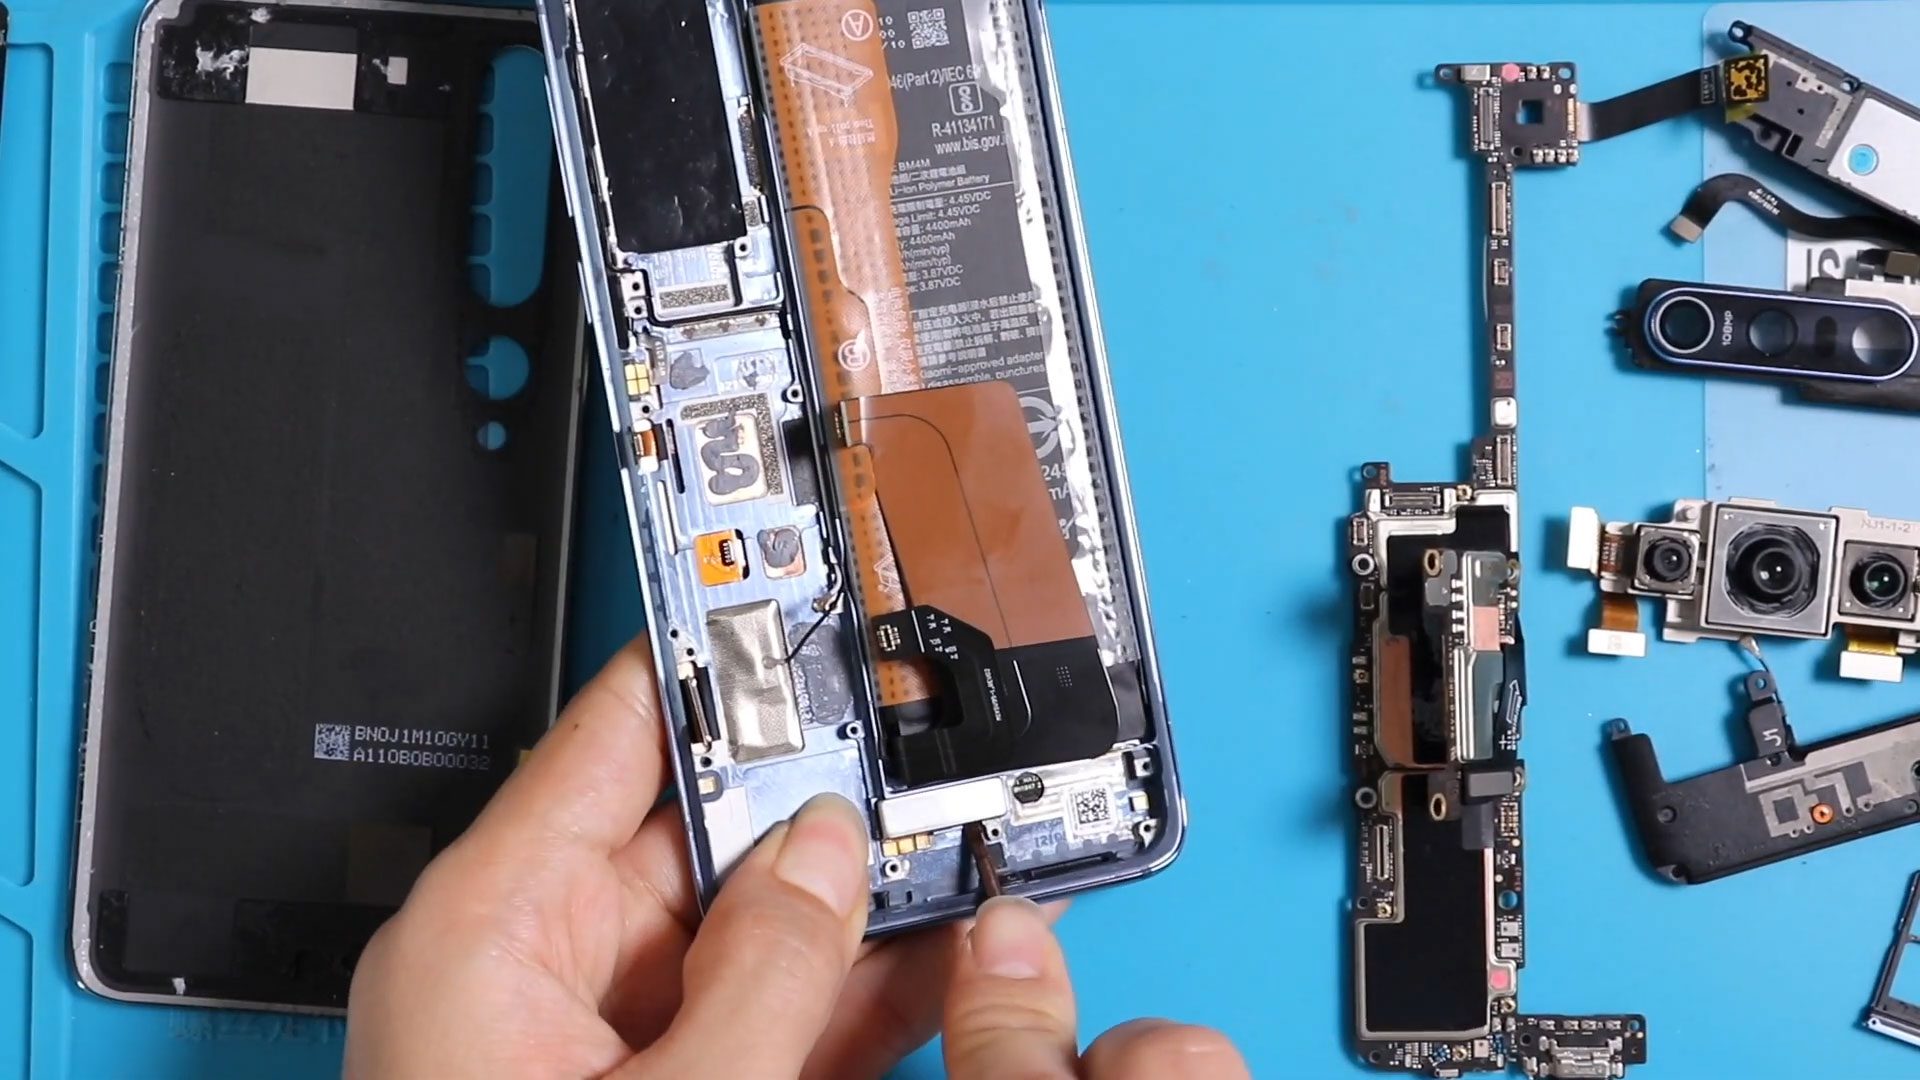
It is always saved that if we remove the connectors from the motherboard of the LCD and keep the LCD on the side out of the way while we are working with any other pairs in the form
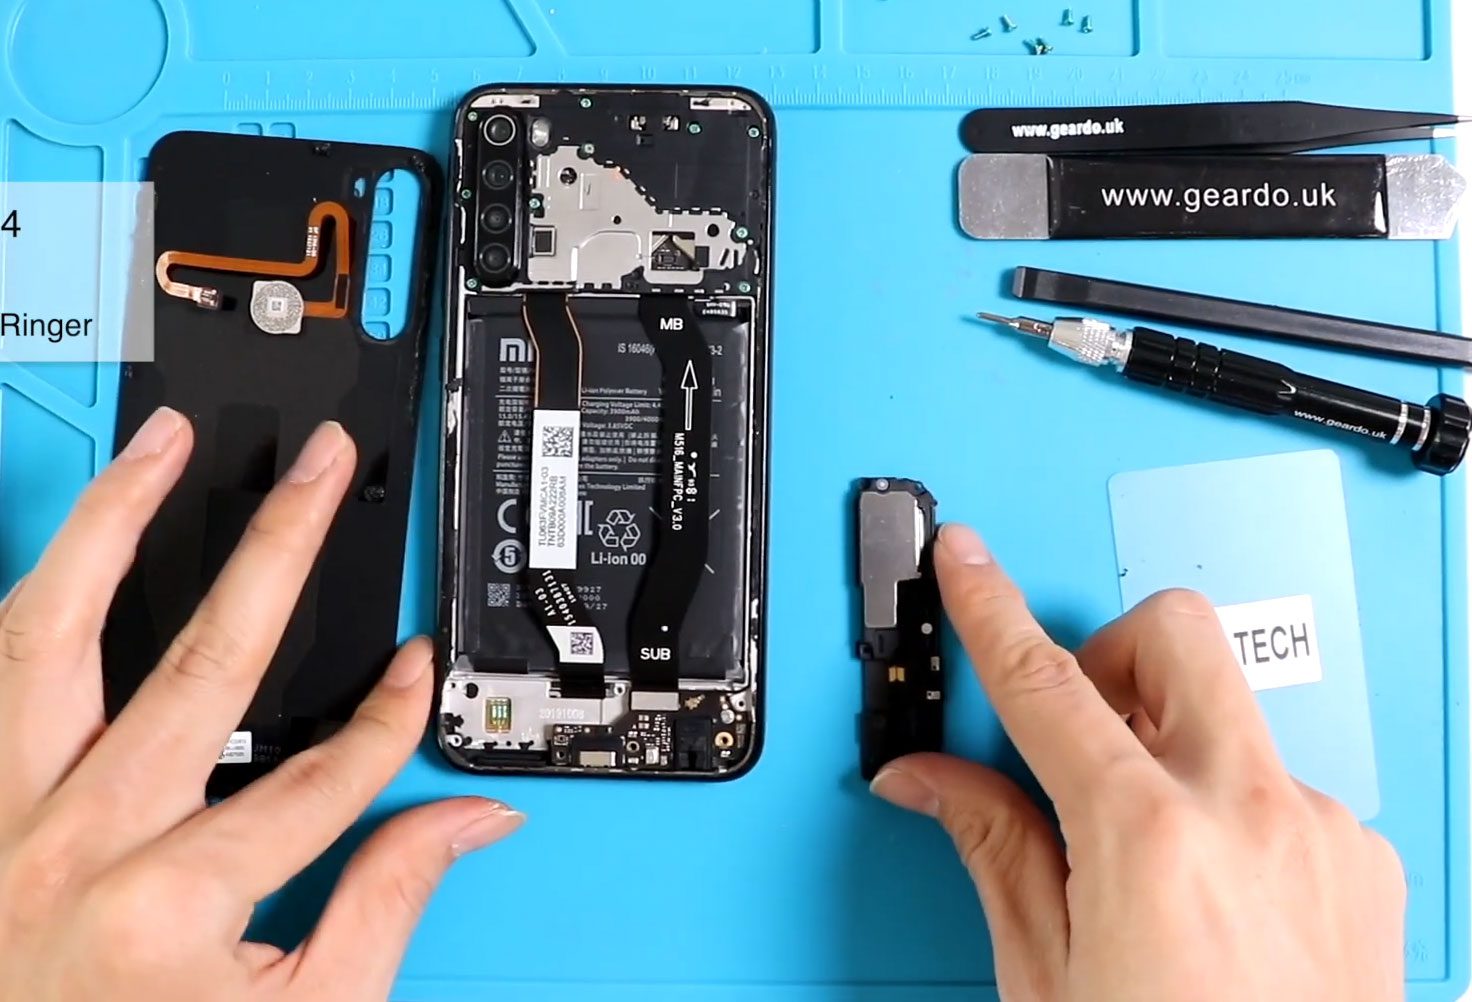
Now we are going to remove the safety plate of battery connector on the motherboard it has two screws using plastic spudger tool we will disconnect the battery let’s remove the other metal plate from the bottom it has four screws as you can see it’s very easy to remove
It will be out of the way and again use the plastic spudger tool to disconnect all the connectors also it is important for us to remove this metal plate on the side which is covering the charging port flex so we can reach the adhesive which is under the battery use the plastic spudger tool to disconnect them
It’s now we can reach the adhesive tape under the battery we start to pull it out carefully slowly take your time patiently try to pull it because once you break here it becomes very difficult to remove once those tapes are being pulled use plastic spreader tool to pick it up because sometime you might have not completely able to remove the adhesive from the battery never use any metal tool near the lithium batteries because they are very easy to blast now simply reverse the whole procedure put the adhesive back on the battery there is this way we can also put that easy cut them and put it in a way that in future if you again want to remove the battery you’re easily able to pull off that adhesive push it down a little bit make it properly sit within the frame start connecting all the connectors back
Put all the metal plates important place whatever we remove from just put them back make sure your charging port is scaled by the metal plate we have removed
Put all the necessary screws and then put the metal plate which was covering the battery connector with two screws
Just reverse the whole method put all the metal plates and screws back on once you’re done you think everything is back safe on connect your LCD back carefully don’t damage the flags just try to put pressure on the connectors not on the cable and connect it back on the motherboard
Now put back the metal plate with a mood put all the five screws back in
Carefully bring the LCD back on the mid frame and work your way around slowly and steady push it back in make sure it is sitting properly turn on the phone and check if it’s working, before screw down the bottom screws.