Now Reading: iPhone 12 Mini Camera Replacement Guide ( Front | Back) – Full DIY Repair Steps
-
01
iPhone 12 Mini Camera Replacement Guide ( Front | Back) – Full DIY Repair Steps

iPhone 12 Mini Camera Replacement Guide ( Front | Back) – Full DIY Repair Steps
Hi everyone, welcome back to DIY Geardo!
In this guide, we’re walking you through the full process of replacing both the front camera and the rear camera on the iPhone 12 Mini. If your camera is blurry, not focusing, showing a black screen, or the phone has suffered impact damage, replacing these modules can restore full functionality.
As always, make sure you have the correct tools ready before starting. A list of recommended tools is provided in the video description on our YouTube channel.
Compatibility and Model Numbers
This repair guide based on iPhone 12 mini mobile phone
Compatible Mode Numbers l A2399, A2176, A2402, A2400
Tools You Need
- Heating pad / heat gun / hairdryer
- Suction cup
- Plastic card pry tools / opening picks
- Phillips PH000 screwdriver
- Pentalobe P2 Screwdriver (for bottom screws)
- Tri-Point Y000 Screwdriver
- Adhesive (B7000 or double-sided frame adhesive)
- Bonding clips or rubber bands (optional but recommended)
How to Find Tools and Parts
- Heating pad – https://amzn.to/3H0tHzJ
- Portable Heat Gun – https://amzn.to/4mszih1
- Clamps https://amzn.to/3GYJT4w
- STREBITO 142 Piece Repair Tool Kit https://amzn.to/3UO1jUx
- Glue | Adhesive https://amzn.to/46exVxe
- Compatible Parts https://amzn.to/47EPojr
- Silicone Work Repair Mat https://amzn.to/45Emz5l
Step 1 — Power Off the Device & Remove External Screws
Begin by switching off your iPhone 12 Mini completely.
Remove the SIM tray, and then undo the two Pentalobe screws located at the bottom of the device. These screws secure the display to the frame.
Step 2 — Loosen the Screen Adhesive
To safely open the device, you must soften the factory adhesive around the display.
You can use:
- A heating pad (recommended),
- A heat gun, or
- A hairdryer on medium heat.
Work evenly around the edges.
Next, place your suction cup tool on the lower portion of the screen. We use a double-sided suction cup, but a regular one works fine too. Create a small gap, then slide in a triangle pick or thin pry card to separate the rubber seal around the frame.
Slowly work around the phone until the screen is fully loosened.

Step 3 — Open the Display Like a Book
Lift the display toward the right side—just like opening a book.
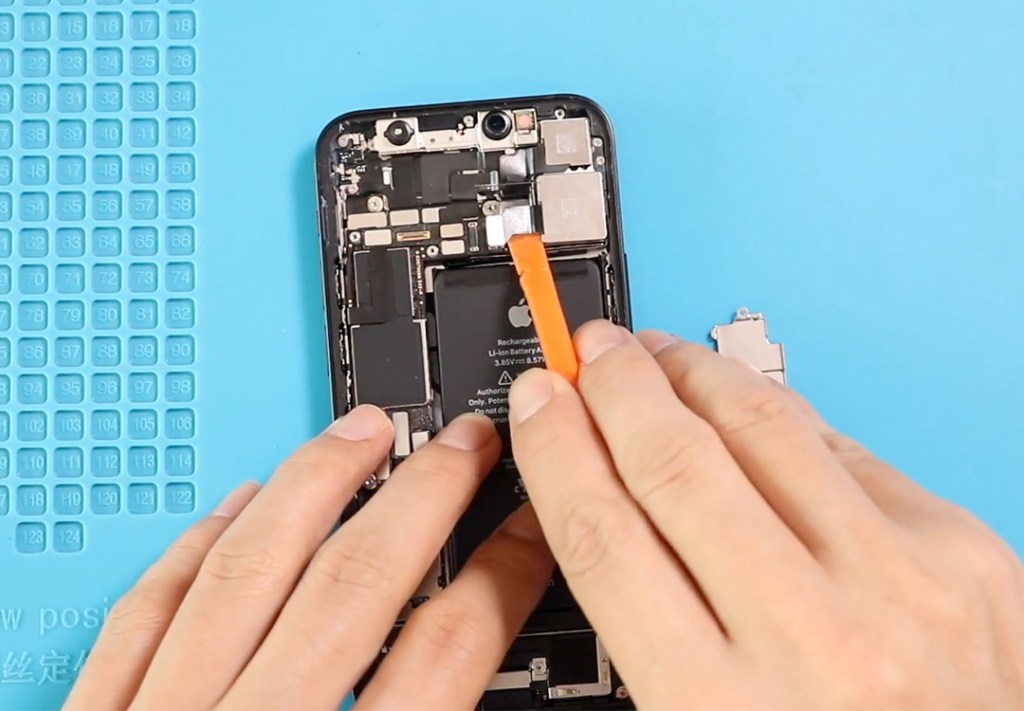
You will see a shield covering the connector area. Remove the screw holding the shield and disconnect the battery connector first. Battery disconnection is important to avoid short circuits.
Step 4 — Disconnect Display & Earpiece Assembly
At the top area, undo the five screws holding the long shield.
Once removed, disconnect the screen flex cable and earpiece assembly plug. Now the display can be fully separated from the body and kept aside.
Step 5 — Remove the Rear Camera Module
To access the rear camera, remove the small shield held by three screws.
Lift the shield away, then disconnect the two rear camera plugs.
Gently remove the faulty or damaged camera module from the frame.
Rear camera issues commonly include:
- Shaking or vibrating viewfinder
- Black camera screen
- Blurry or foggy photos
- “Move iPhone away” portrait error
Replacing the module fixes these problems in most cases.
Step 6 — Remove the Front Camera Assembly
Next, disconnect the three flex plugs for the front camera/Face ID assembly.
Lift the camera module carefully.
(Important: Avoid damaging the flood illuminator or dot projector area, as this can permanently disable Face ID.)
Install your replacement front camera module and align the connectors properly.
Step 7 — Install the New Cameras
Place the new rear camera and reconnect both plugs.
Reinstall the shield and secure it with three screws.
Place the new front camera module and reconnect all three plugs firmly.
Step 8 — Reassemble the Device
Before closing, it’s a good idea to add fresh frame adhesive. This helps restore some dust and splash resistance.
Reconnect:
- The earpiece assembly plug
- The display connector
- The battery plug
Then place both shields back and tighten all screws.
Step 9 — Close the Screen & Final Assembly
Click the top of the display into place first, then press down the sides and bottom edges.
Insert the SIM tray back into the phone.
Finish by securing the two Pentalobe screws at the bottom.
Your camera repair is complete!
Frequently Asked Questions
1. Does replacing the front camera affect Face ID?
Replacing only the camera module is generally safe, but if the dot projector or flood illuminator is damaged, Face ID may stop working.
2. What symptoms indicate a faulty rear camera?
Blurry photos, shaking viewfinder, black camera screen, or portrait mode errors usually indicate a defective rear camera.
3. Can I test the new cameras before sealing the screen?
Yes—and you should. Reconnect the display flex cables, power on the device, test both cameras, then finish closing the phone.
4. Do I need to replace both cameras at once?
No. You can replace either front or rear independently. This guide simply covers both.
5. Will camera replacement affect water resistance?
Yes. Once opened, the phone loses its original waterproof seal. Using new frame adhesive helps, but it will never be fully waterproof again.
Related Guides