
Now Reading: OnePlus Nord N100 Earpiece Speaker Replacement Guide | DIY Repair
-
01
OnePlus Nord N100 Earpiece Speaker Replacement Guide | DIY Repair
OnePlus Nord N100 Earpiece Speaker Replacement Guide | DIY Repair
If your OnePlus Nord N100 earpiece has stopped working, produces muffled audio, or sounds distorted during calls, replacing the earpiece speaker can restore clear and crisp call quality. Over time, earpieces can fail due to dust buildup, accidental drops, moisture exposure, or simple hardware wear and tear.
In this guide, we’ll walk you through the complete process of opening the device, removing the logic board, replacing the faulty earpiece speaker, and closing the phone back up securely. This step-by-step tutorial is beginner-friendly and ideal for anyone performing their own smartphone repairs.
Repair Overview
Device Type: Smartphone
Repair Type: Earpiece Speaker Replacement
Repair Difficulty: ★★★★★☆☆☆☆☆ (5/10 – Moderate)
Estimated Time: 20–30 minutes
Reasons You May Need to Replace the Earpiece Speaker
- Low or muffled audio during calls
- No sound from the earpiece, even at maximum volume
- Static, buzzing, or crackling noises
- Water or liquid damage
- Dust or debris blocking the mesh
- Physical damage after drops
- Loose or broken internal contacts
Replacing the earpiece is an affordable way to bring your call audio back to life.
Before You Begin
Compatibility and Model Numbers
- Oneplus Nord N100
This repair guide based on OnePlus N100
Model Numbers | BE2013, BE2015, BE2011, BE2012
Tools Required
- Mobile phone heating pad or hairdryer/heat gun
- Plastic pry tool / card pry
- Suction cups
- Phillips #00/#000 screwdrivers
- Torx T3 / T4 Screwdriver
- Flathead Screwdriver
- Tweezers (for connectors)
- B7000 glue or double-sided adhesive (for back cover)
- Rubber bands or bonding clips to secure the back cover
Using proper tools reduces the risk of damaging the phone.
How to Find Tools and Parts
- Heating pad – https://amzn.to/3H0tHzJ
- Portable Heat Gun – https://amzn.to/4mszih1
- Clamps https://amzn.to/3GYJT4w
- STREBITO 142 Piece Repair Tool Kit https://amzn.to/3UO1jUx
- Glue | Adhesive https://amzn.to/46exVxe
- Compatible Parts –
- Battery – https://amzn.to/48bXsIP
- Screen – https://amzn.to/4mbcfqK
- Other Parts – https://amzn.to/4n4zZ12
- Silicone Work Repair Mat https://amzn.to/45Emz5l
Protect Your Oneplus Nord N100
- Protector For The Screen https://amzn.to/45Vrf7c
- Best Rated Case https://amzn.to/45Vrf7c
Step-By-Step OnePlus Nord N100 Earpiece Replacement Guide
1. Remove the SIM Tray & Start Opening the Phone
Power off the device completely.
Use a SIM eject tool to remove the SIM tray.
2. Remove the Back Cover
Gently heat the edges of the back cover using a heating pad, heat gun, or hairdryer to soften the adhesive.
Place a suction cup on the back cover, lift slightly, and insert a plastic pry tool.
Slide around all edges to release the adhesive and lift the back cover off.
3. Remove the Mid-Frame
Unscrew all mid-frame screws.
Use a plastic pry card to release the surrounding clips.
Lift the mid-frame away from the device.
4. Remove the Logic Board
Disconnect the necessary flex cables and antenna connectors.
Lift the logic board carefully from the frame, avoiding pressure on components.
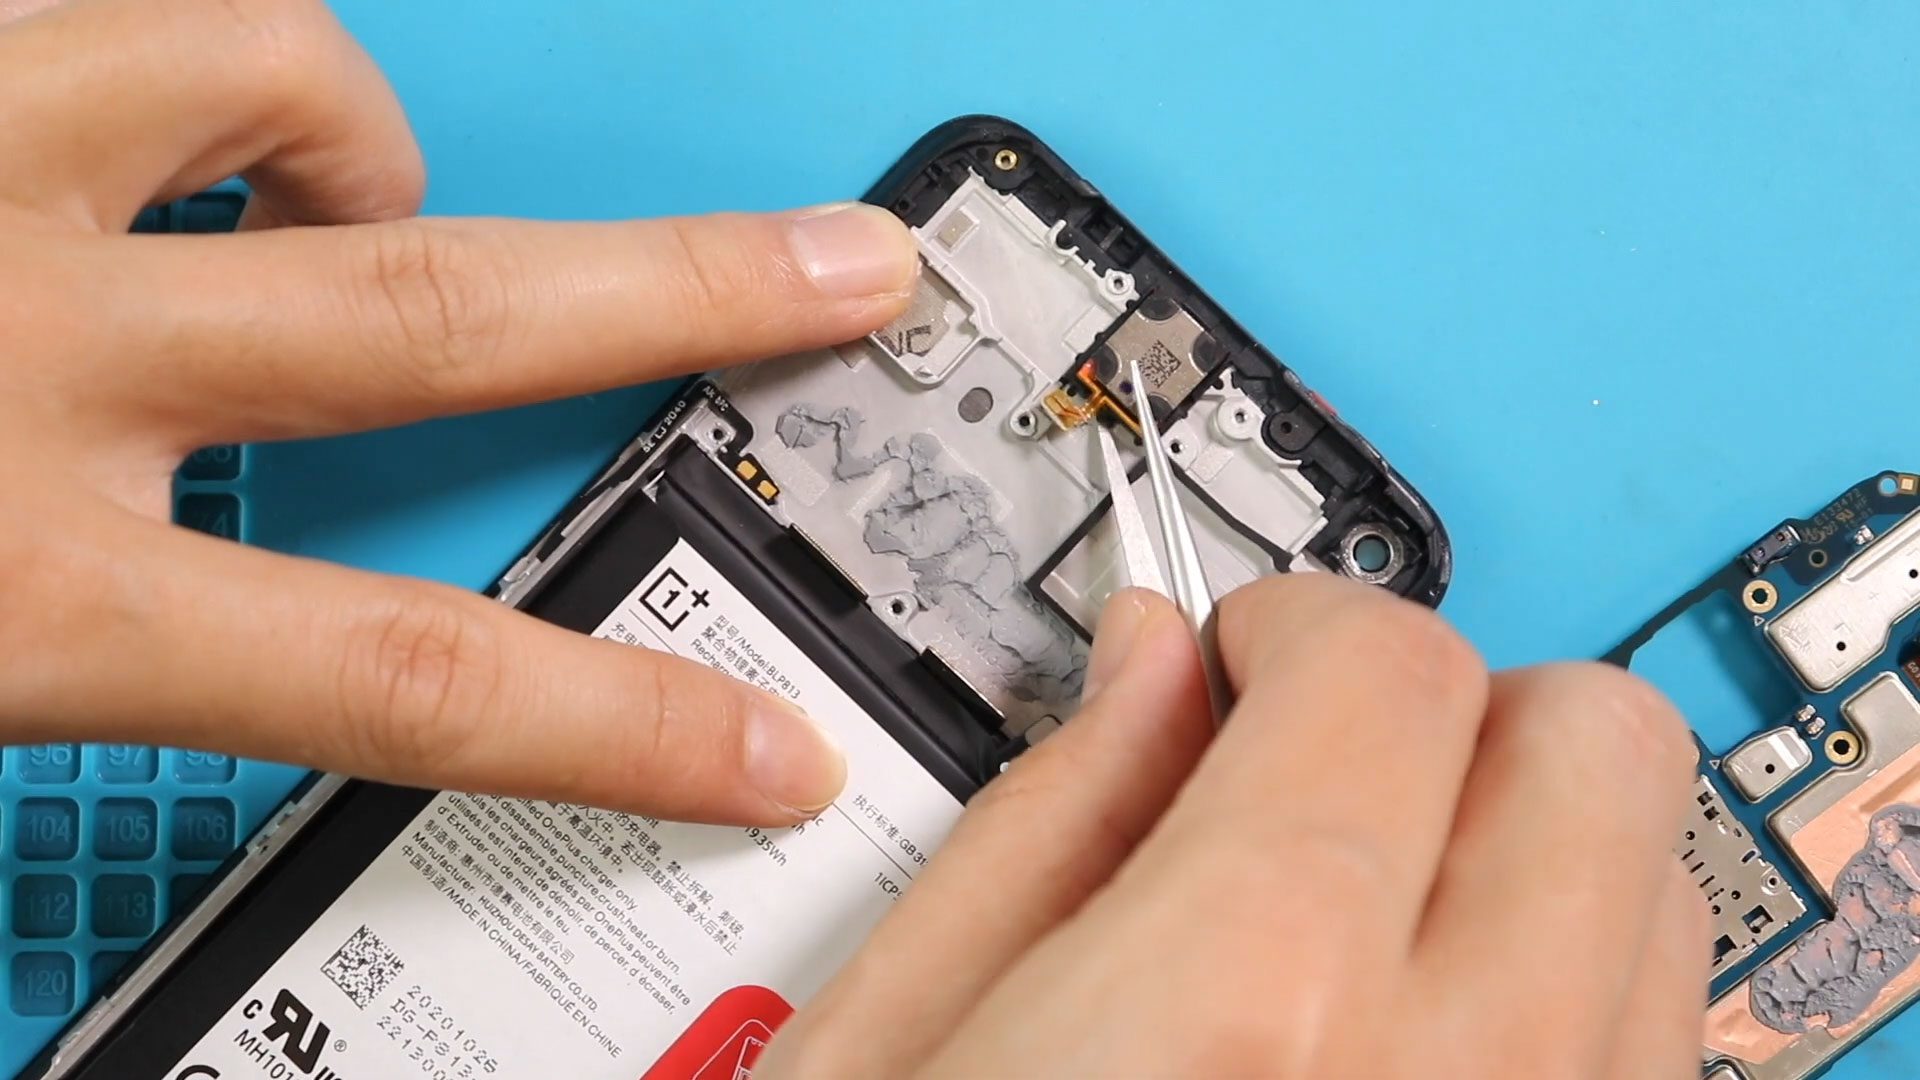
5. Remove the Faulty Earpiece Speaker
Apply a bit of heat over the earpiece area to loosen adhesive.
Use tweezers or a pry tool to gently lift and remove the old earpiece.
6. Install the New Earpiece Speaker
Place the new earpiece into the slot.
Ensure it sits flat and aligned correctly in its housing.
7. Reinstall the Logic Board
Place the logic board back into position.
Reconnect all flex cables and antennas securely.
8. Reinstall the Mid-Frame
Place the mid-frame back into the device and press to engage clips.
Reinstall all screws.
9. Close the Phone & Seal the Back Cover
Check the back cover adhesive.
Apply fresh adhesive or B7000 glue if needed.
Press the back cover firmly around the edges.
Use binding clips or rubber bands to secure the back cover while the glue cures for best results.
Frequently Asked Questions (FAQ)
Q1: What are the common causes of an earpiece speaker failing?
Dust accumulation, water exposure, damaged contacts, or internal component failure are typical causes.
Q2: Will cleaning the mesh fix the problem instead of replacing the speaker?
Sometimes it helps, but if the internal speaker is damaged, replacement is required.
Q3: Can I use aftermarket earpiece parts?
Yes, as long as they are from a reliable supplier.
Q4: Does replacing the earpiece void the warranty?
Yes, opening the phone usually voids any existing warranty.
Troubleshooting After Earpiece Replacement
Q1: The earpiece still isn’t working after replacement.
Check the flex connectors on the logic board—one may be loose or not fully clicked in.
Q2: Audio sounds distorted even after installing the new speaker.
Ensure the earpiece is seated properly and not tilted.
Verify no adhesive or debris is blocking it.
Q3: The phone won’t power on after reassembly.
Check battery connectors, and ensure the logic board connections weren’t disturbed.
Q4: Back cover won’t fully seal.
Add new adhesive and reapply pressure using clips or rubber bands.
Replacing the earpiece speaker on your OnePlus Nord N100 is a moderate-level repair that can significantly improve your phone’s audio performance. With patience, proper heating, and careful disassembly, this repair can be completed successfully at home.
If you found this guide helpful, feel free to share it and leave a comment with your experience.
Related Guides


