
Now Reading: Apple iPad 9 (10.2-inch, 2021) Smart Connector Flex Replacement Guide
-
01
Apple iPad 9 (10.2-inch, 2021) Smart Connector Flex Replacement Guide

Apple iPad 9 (10.2-inch, 2021) Smart Connector Flex Replacement Guide
Hi everyone, welcome back to DIYGeardo.
In this guide, we’ll show you how to replace the Smart Connector flex cable on the Apple iPad 9th Generation (10.2-inch, 2021). If your Smart Keyboard or Smart Connector accessories are not detected, disconnect frequently, or fail to power on, a faulty Smart Connector flex is usually the cause.
The Smart Connector flex is mounted internally and connected directly to the logic board. Replacing it requires screen removal and careful handling of flex cables, but it can fully restore accessory connectivity when done correctly.
Before starting, make sure you have the correct replacement Smart Connector flex and proper repair tools, which you can find in the description. This guide is suitable for DIY repairers and technicians, and we’ll walk you through each step clearly.
iPad 9 Smart Connector Flex Replacement Guide
Repair Overview
- Device: Apple iPad 9 (10.2-inch, 2021)
- Repair Type: Smart Connector Flex Replacement
- Estimated Time: 45–75 minutes
- Repair Difficulty: ★★★★☆ (Moderate to Advanced)
⚠️ Important: This repair requires full display removal. Flex cables and connectors are delicate—work slowly and carefully.
Before You Begin
Compatibility and Model Numbers
This repair guide based on iPad 9, 10.2″-inch, 2021 model. Compatible with Both Wifi and Cellular Edition models.
iPad 9 Generation, A2603, A2604
Required Tools
- Heating pad / heat gun / hairdryer
- Suction cup
- Plastic card pry tools / opening picks/ Tweezers
- Phillips screwdriver #00 / #000
- Adhesive (B7000 or double-sided back cover adhesive)
- Bonding clips or rubber bands (optional but recommended)
Make sure the phone is turned off and the SIM tray is removed (For Cellular Version)before starting.
How to Find Tools and Parts
- Heating pad – https://amzn.to/3H0tHzJ
- Portable Heat Gun – https://amzn.to/4mszih1
- Clamps https://amzn.to/3GYJT4w
- STREBITO 142 Piece Repair Tool Kit https://amzn.to/3UO1jUx
- Glue | Adhesive https://amzn.to/46exVxe
- Compatible Parts –
- Battery – https://amzn.to/4m8zrqi
- Touch Screen – https://amzn.to/3IXxiiC
- LCD Screen – https://amzn.to/40WixTg
- Other Parts – https://amzn.to/41lzman
- Silicone Work Repair Mat https://amzn.to/45Emz5l
Step-by-Step Smart Connector Flex Replacement Guide
Step 1: Heat the Front Screen
Proper heating is required to separate the screen from the body.
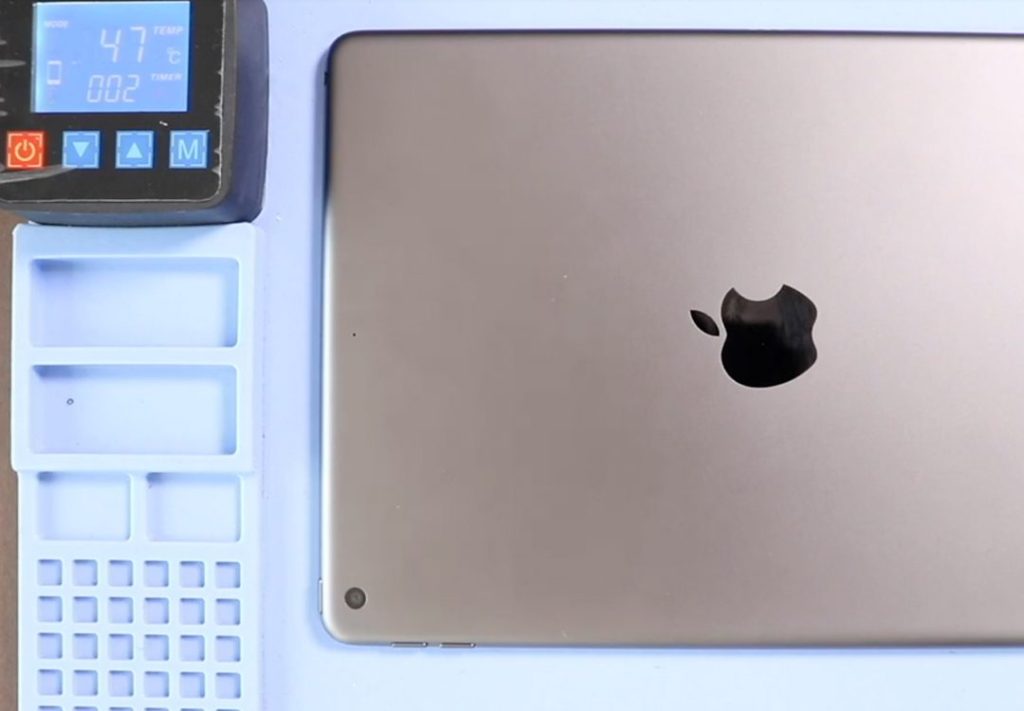
- Use a tablet heating pad and heat the front side of the iPad.
- Select the tablet heating option and allow the heating cycle to complete.
- Alternatively, use a heat gun or hair dryer on low heat.
Step 2: Open the iPad 9
- Attach a suction cup to the edge of the screen and gently lift.
- Insert a plastic card or triangle picker.
- Carefully cut the adhesive around the screen edges.
⚠️ Be gentle—display flex cables are attached to the logic board.
Step 3: Remove the LCD Screen
- Open the screen like opening a book, from left to right.
- Remove any tape covering the LCD screws.
- Undo four screws securing the LCD.
- Lift the LCD to a 90-degree angle from the top.
- Undo three screws, remove the shield, and disconnect the LCD connector.
- Remove the LCD screen from the body.
Step 4: Remove the Touch Screen Digitizer Assembly
- Disconnect both touchscreen connectors.
- Peel back tape and lift the locking tab.
- Disconnect the Touch ID flex cable.
- Remove the digitizer assembly from the body.
Step 5: Remove the Faulty Smart Connector Flex
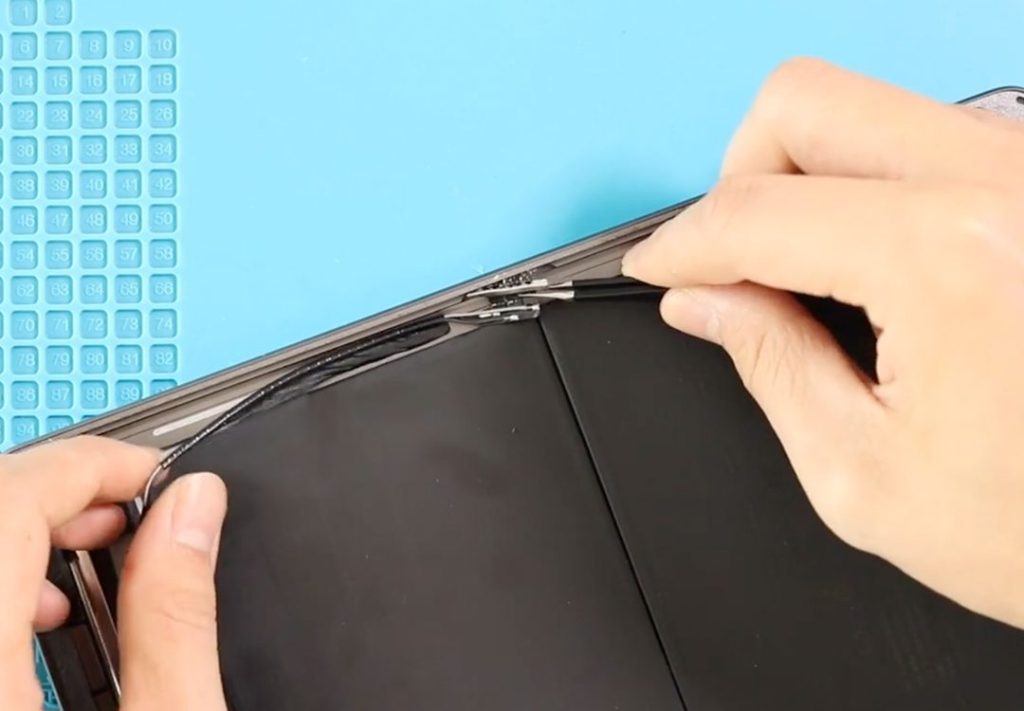
- Locate the Smart Connector flex cable near the connector pin area.
- Disconnect the flex cable from the logic board.
- Gently peel the flex from the frame using a pry tool.
- Apply light heat if necessary to soften the adhesive.
- Remove the faulty Smart Connector flex completely.
Step 6: Install the New Smart Connector Flex
- Align the new Smart Connector flex in the original position.
- Seat the connector pins properly into the frame cutout.
- Press the flex gently into place.
- Connect the flex cable to the logic board.
Step 7: Reinstall LCD & Touch Screen
- Reconnect the Touch ID flex cable.
- Connect both touchscreen connectors.
- Plug in the LCD connector.
- Reinstall the shield and secure it with screws.
- Place the LCD into position and secure it with four screws.
Step 8: Seal the Display
- Ensure enough adhesive is applied around the frame.
- Use B7000 glue or pre-cut adhesive strips.
- Close the digitizer like closing a book:
- Bottom edge first
- Then top
- Press sides evenly
Test the Smart Connector functionality before final bonding if possible.
Use screen bonding clips or rubber bands and leave them in place for some time.
Repair Complete
Power on the iPad and test the Smart Connector using a compatible accessory such as a Smart Keyboard.
We hope you enjoyed the iPad 9 Smart Connector flex replacement guide.
If you have any questions, feel free to leave a comment. Please like, share, and comment on our videos — and don’t forget to hit the subscribe button.
FAQs
1. What does the Smart Connector do on iPad 9?
The Smart Connector allows accessories like keyboards to connect and receive power without Bluetooth pairing.
2. Can I clean the Smart Connector instead of replacing it?
In some cases, cleaning helps, but if the flex is damaged or not detected, replacement is required.
3. Do I need to remove the logic board for this repair?
No, the Smart Connector flex can be replaced without removing the logic board.
4. Is the Smart Connector flex glued in place?
Yes, it is lightly glued. Gentle heat helps during removal.
5. Will this repair affect charging or battery performance?
No, it only affects Smart Connector accessory functionality.
Troubleshooting – After The Repair
1. Smart Keyboard not detected after repair
Recheck the Smart Connector flex connection and alignment.
2. Accessory connects intermittently
The flex may not be seated properly or the connector pins may be misaligned.
3. iPad does not power on after reassembly
Verify battery and display connections before resealing.
4. Screen lifts after closing
Insufficient adhesive or uneven pressure during bonding.


-
 01Samsung Galaxy A16 5G Battery Replacement | Full DIY Repair Guide
 -
02Samsung Galaxy A16 5G Screen Replacement | Step-by-Step Guide
-
03Google Pixel 6 Power Button Replacement Guide | Volume Button Flex Repair Guide- DIY Repair
-
04Samsung Galaxy A16 5G Back Cover & Camera Lens Frame Replacement Guide | DIY Repair
-
05Why a Heating Pad Is Essential for Mobile Phone Repairs (And How to Use it)
-
06How to Use a Heat Gun or Hair Dryer for Phone/Tablet Repairs
-
07Essential Repair Tools for Phone, Tablet & Laptop Repairs


