Now Reading: Samsung Galaxy A15 5G Back Cover & Camera Lens Replacement | Step-by-Step Guide
-
01
Samsung Galaxy A15 5G Back Cover & Camera Lens Replacement | Step-by-Step Guide

Today, we’ll show you how to replace the back cover and camera lens frame on the Samsung Galaxy A15 5G. This guide walks you through each step so you can safely complete the repair at home.
Compatibility and Model Numbers
This repair guide based on Samsung Galaxy A15 5G device, but it also compatible with Galaxy A15 4g and Galaxy M15 models.
Compatible Mode Numbersl SM-A156B, SM-A156B/DS, SM-A156P, SM-A156P/DS, SM-A156U, SM-A156U1, SM-A156U1/DS, SM-A156W, SM-A156P/N, SM-A156P/DSN, SM-S156VL, SM-A156M, SM-A156E, SM-A156E/DSN SM-A155F, SM-A155F/DSN, SM-A155M, SM-A155M/DS, SM-A155P, SM-A155R SM-M156B, SM-M156B/DS, SM-M156B/DSN
Before You Begin
Make sure you have the proper tools mentioned in the description before starting.
Required Tools
- Heating pad / heat gun / hairdryer
- Suction cup
- Plastic card pry tools / opening picks
- Phillips screwdriver
- Adhesive (B7000 or double-sided back cover adhesive)
- Bonding clips or rubber bands (optional but recommended)
Read More Information about Repair Tools
Make sure the phone is turned off and the SIM tray is removed before starting.
How to Find Tools and Parts
- Heating pad – https://amzn.to/3H0tHzJ
- Portable Heat Gun – https://amzn.to/4mszih1
- Clamps https://amzn.to/3GYJT4w
- STREBITO 142 Piece Repair Tool Kit https://amzn.to/3UO1jUx
- Glue | Adhesive https://amzn.to/46exVxe
- Compatible Parts https://amzn.to/4pOwJIM
- Silicone Work Repair Mat https://amzn.to/45Emz5l
Step 1 — Power Off & Remove SIM Tray
- Turn off the phone completely.
- Remove the SIM tray.
Step 2 — Heat the Back Cover
To soften the adhesive:
Option 1: Heating Pad
- Place the back cover facing down.
- Select Mobile Phone Heating and allow the cycle to finish.
Option 2: Heat Gun / Hairdryer
- Warm the edges evenly.
- Avoid overheating to protect internal parts.

Step 3 — Create an Opening
- Place a suction cup at the bottom of the back cover.
- Lift gently to create a small gap.
- Insert a plastic pry card into the gap.
- Slowly slide the card around the edges to cut through the adhesive.
- Take your time—do not force it to avoid damage.
Once the adhesive is loose, gently lift and remove the back cover.
Step 4 — Remove the Camera Lens Frame
- Apply gentle heat to soften the adhesive around the camera lens frame.
- Carefully lift and remove the faulty lens frame.
Step 5 — Install the New Camera Lens
- Position the new camera lens on the back cover.
- Press firmly to secure it.
Note:
You can also purchase a back cover that includes the camera lens pre-installed.
If so, simply skip the lens installation step.
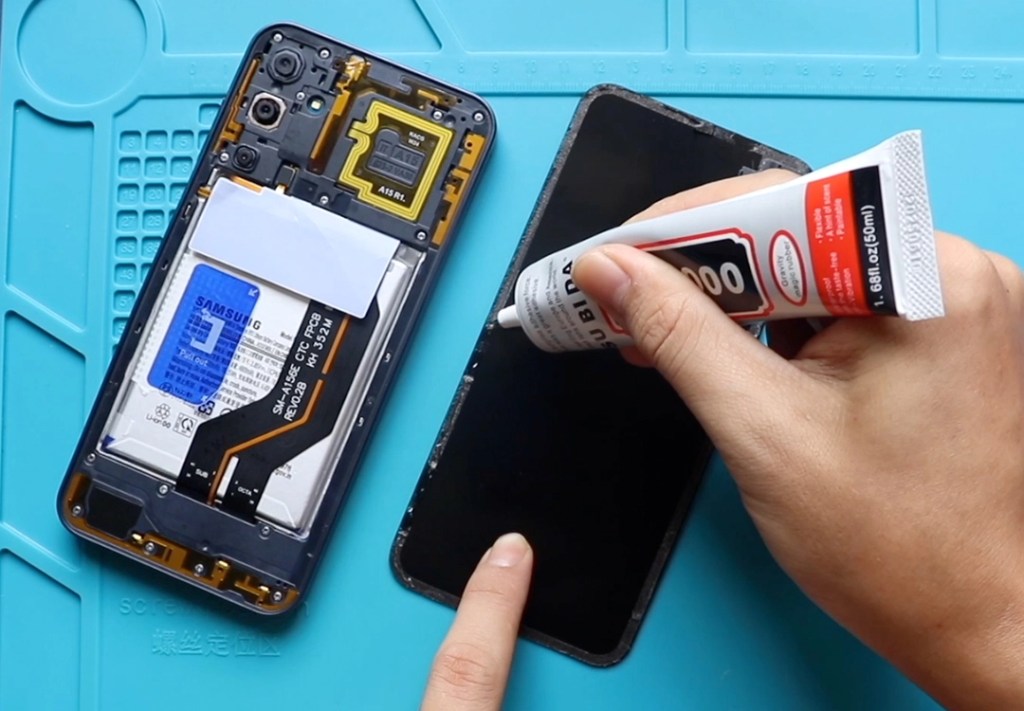
Step 6 — Reattach the Back Cover
Before installing the back cover:
- Check if the adhesive is still strong.
- If needed, apply B7000 glue or use new double-sided adhesive.
Place the back cover on the frame and align it properly.
Step 7 — Apply Bonding Pressure
- Use bonding clips to hold everything in place.
- If clips are not available, use rubber bands to apply even pressure.
- Leave for a while to ensure proper bonding.
Final Step
Your repair is complete!
Hope you enjoyed this repair guide.
If you have any questions, let us know in the comments.
Please like, share, and subscribe for more GEARDO repair guides.
Related Repair Guides