Now Reading: Samsung Galaxy Tab A7 Lite Charging Port Replacement Guide | T220 T225 T227
-
01
Samsung Galaxy Tab A7 Lite Charging Port Replacement Guide | T220 T225 T227
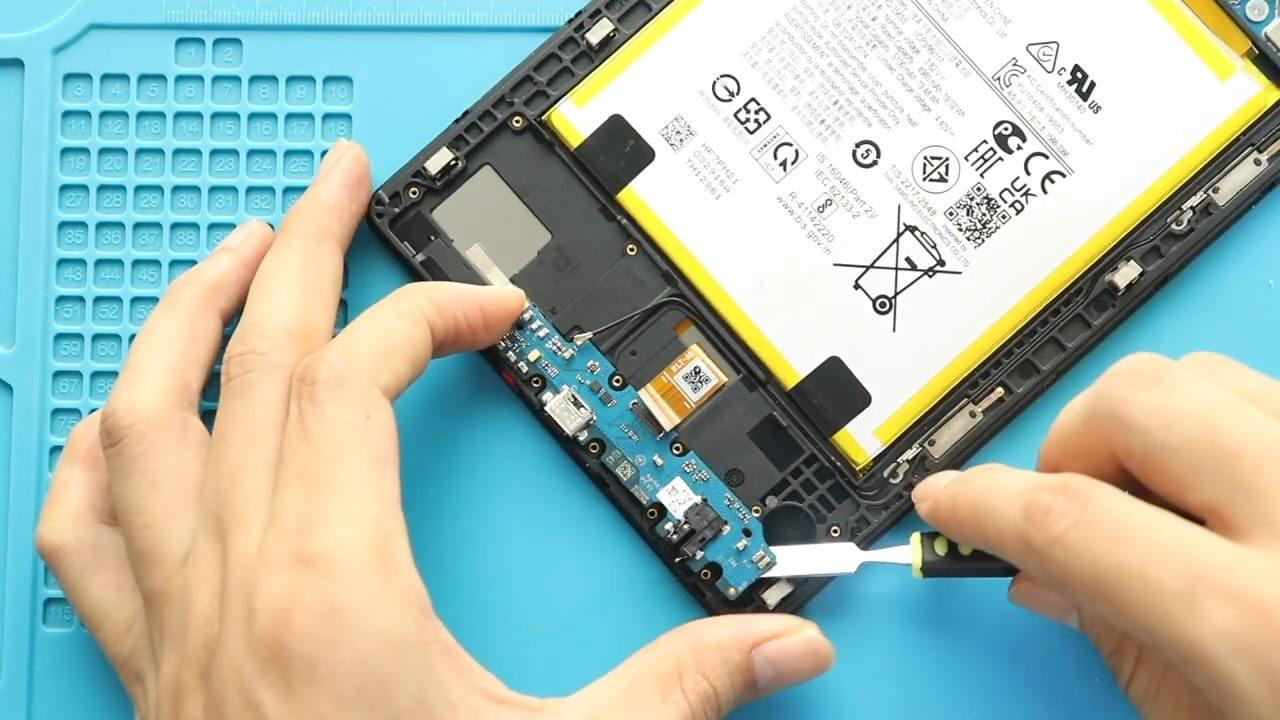
Samsung Galaxy Tab A7 Lite Charging Port Replacement Guide | T220 T225 T227
If your Samsung Galaxy Tab A7 Lite is not charging, charging intermittently, or the headphone jack is not working, the charging port board may be faulty. In this guide, we will show you how to replace the charging port & headphone jack board on Samsung Galaxy Tab A7 Lite models T220 and T225.
This step-by-step guide is suitable for DIY users and beginners with basic repair tools.
Repair Difficulty
Difficulty Level: 🟡 Moderate
Estimated Time: 25–40 minutes
Repair Type: Charging port & headphone board replacement
This repair does not require soldering, but careful handling of connectors and screws is important.
Common Reasons for Charging Port Board Replacement
- Tablet not charging or charging very slowly
- Charging works only at a certain angle
- Loose charging port
- Headphone jack not detecting earphones
- Water or moisture damage
- Physical damage from frequent cable insertion
If you experience any of these problems, replacing the charging port board is the most effective fix.
Before You Begin
Compatibility and Model Numbers
This repair guide based on Samsung Galaxy Tab A7 Lite 8.7-inch 2021 T225 Model.
Also Compatible with Both Wifi and Cellular Edition models.
Model Numbers | SM-T220, SM-T225, SM-T227
Required Tools
- Heating pad / heat gun / hairdryer
- Suction cup
- Plastic card pry tools / opening picks/ Tweezers
- Phillips screwdriver #00 / #000
- Adhesive (B7000 or double-sided back cover adhesive)
- Bonding clips or rubber bands (optional but recommended)
Make sure the tablet is turned off and the SIM tray is removed (For Cellular Version)before starting.
How to Find Tools and Parts
- Heating pad – https://amzn.to/3H0tHzJ
- Portable Heat Gun – https://amzn.to/4mszih1
- Clamps https://amzn.to/3GYJT4w
- STREBITO 142 Piece Repair Tool Kit https://amzn.to/3UO1jUx
- Glue | Adhesive https://amzn.to/46exVxe
- Compatible Parts –
- Battery – https://amzn.to/4oEg2is
- Screen – https://amzn.to/3Hd4vWQ
- Other Parts – https://amzn.to/45lxK2U
- Silicone Work Repair Mat https://amzn.to/45Emz5l
Step-by-Step Charging Port Board Replacement Guide
Step 1: Power Off and Remove SIM Tray
Turn off the tablet completely. Remove the SIM tray using a SIM ejector tool.
Step 2: Remove the Back Cover
Create a small gap near the charging port or SIM tray using a pick or plastic card pry tool.
Carefully slide the pick between the frame and back cover to release the plastic clips. Move slowly around the edges.
Tip: If an edge feels tight, gently widen the gap using a pry tool, then continue releasing the clips.
Once all clips are released, lift and remove the back cover.
Step 3: Remove the Bracket
Locate the metal bracket covering the battery connector. Remove the six screws and lift off the bracket.
Step 4: Disconnect the Battery
Using a plastic pry tool, carefully disconnect the battery plug from the motherboard to prevent short circuits.
Step 5: Remove the Bottom Cover
Move to the bottom of the tablet and remove the protective cover by undoing eleven screws. Keep the screws organized.
Step 6: Disconnect Charging Board Cables
Disconnect the connector cable and carefully unplug the antenna head from the charging port board.
Step 7: Remove the Faulty Charging Port Board
Gently lift and remove the faulty charging & headphone jack board from the frame.
Step 8: Install the New Charging Port Board
Place the new charging & headphone jack board into position. Ensure it sits properly and aligns with the frame.
Step 9: Reconnect Antenna & Cable
Secure the antenna head and reconnect the cable to the new charging board.
Step 10: Reinstall Bottom Cover
Place the bottom cover back into position and secure it using eleven screws.
Step 11: Reconnect Battery & Install Bracket
Reconnect the battery plug. Place the metal bracket back over the connector and secure it with six screws.
Step 12: Test Before Closing
Before closing the device, power it on and test charging and headphone functionality. This step helps confirm the repair was successful.
Step 13: Reattach Back Cover
Slide the back cover into place from bottom to top. Press firmly around the edges until all clips snap securely. Reinsert the SIM tray.
Frequently Asked Questions (FAQ)
Q: Will replacing the charging port board erase my data?
A: No, this repair does not affect your data.
Q: Do I need soldering to replace the charging port?
A: No. The charging port board is modular and does not require soldering.
Q: Can I clean the charging port instead of replacing it?
A: If the issue is caused by dust or lint, cleaning may help. However, if the port is loose or damaged, replacement is recommended.
Q: Is it safe to use an aftermarket charging board?
A: Yes, but quality may vary. Original or high-quality aftermarket parts are recommended.
Troubleshooting (After The Repair)
Q: Tablet still not charging after replacement.
A: Check the charging board connector and ensure it is fully seated. Try a different charging cable and adapter. Also inspect the charging port for debris.
Q: Headphone jack not working after replacement.
A: Ensure the charging port board is correctly installed and the connector cable is properly connected. Test with another headset.
Q: Tablet does not power on after reassembly.
A: Reopen the device and verify the battery connector is connected securely. Check that no cables were pinched during reassembly.