
Now Reading: Samsung Galaxy Tab A8 10.5″ Headphone Jack Replacement Guide | (2021) X200 X205
-
01
Samsung Galaxy Tab A8 10.5″ Headphone Jack Replacement Guide | (2021) X200 X205
Samsung Galaxy Tab A8 10.5″ Headphone Jack Replacement Guide | (2021) X200 X205
The Samsung Galaxy Tab A8 10.5 (2021) includes a dedicated 3.5mm headphone jack for wired headphones and external audio devices. Over time, the headphone jack may stop working due to dust buildup, moisture damage, repeated plug insertion, or physical stress on the audio port.
If your tablet does not detect headphones, plays sound only through speakers, has distorted audio, or works only at a certain angle, the headphone jack is likely faulty. In this DIY repair guide, Geardo explains how to safely replace the headphone jack module on Samsung Galaxy Tab A8 10.5 X200 / X205 models.
This repair does not require soldering, but it does require careful LCD removal and internal component handling.
Repair Difficulty
Difficulty Rating: ⭐⭐⭐⭐☆ (4 out of 5)
Estimated Time: 60–75 minutes
Repair Type: Headphone Jack Replacement
Skill Level: Intermediate
⚠️ Take extra care when removing the LCD screen, as it is the most fragile part of the repair.
Signs You Need a Headphone Jack Replacement
- Headphones not detected when plugged in
- Sound continues through speakers with headphones connected
- Audio cuts in and out when moving the cable
- Distorted or crackling sound in headphones
- Headphone jack feels loose or damaged
Before You Begin
Compatibility and Model Numbers
This repair guide based on Samsung Galaxy Tab A8 10.5-inch 2021 X205 Model.
Also Compatible with Both Wifi and Cellular Edition models.
Model Numbers | SM-X200, SM-X205, SM-X207
Required Tools
- Heating pad / heat gun / hairdryer
- Suction cup
- Plastic card pry tools / opening picks/ Tweezers
- Phillips screwdriver #00 / #000
- Adhesive (B7000 or double-sided back cover adhesive)
- Bonding clips or rubber bands (optional but recommended)
Make sure the tablet is turned off and the SIM tray is removed (For Cellular Version)before starting.
How to Find Tools and Parts
- Heating pad – https://amzn.to/3H0tHzJ
- Portable Heat Gun – https://amzn.to/4mszih1
- Clamps https://amzn.to/3GYJT4w
- STREBITO 142 Piece Repair Tool Kit https://amzn.to/3UO1jUx
- Glue | Adhesive https://amzn.to/46exVxe
- Compatible Parts –
- Battery – https://amzn.to/4fC8rNj
- Touch Screen – https://amzn.to/416eZxY
- Other Parts – https://amzn.to/45jcN8G
- Silicone Work Repair Mat https://amzn.to/45Emz5l
Protect Your Galaxy Tab A8 10.5 2021
- Screen Protector Glass For The Screen https://amzn.to/4mMju9g
- Best Cases For Your Galaxy Tab https://amzn.to/4mdkovq
Step-by-Step Headphone Jack Replacement Guide
Step 1: Power Off the Tablet
Completely power off the Samsung Galaxy Tab A8 before starting the repair.
Step 2: Open the Tablet
- Apply gentle heat around the edges of the LCD screen to soften the adhesive
- Place the tablet screen-side down on a heating pad and select the tablet heating option
- Alternatively, use a heat gun or hairdryer evenly around the edges
Step 3: Remove the LCD Screen
- Use a suction cup to create a small gap between the screen and the frame
- Insert a plastic pry tool or card
- Carefully cut the adhesive around all edges
- Gently lift the screen and slide it downward to rest on the body
Step 4: Disconnect Battery and LCD Connectors
- Remove the metal bracket by undoing the screw
- Disconnect the battery connector first
- Disconnect the LCD connector
- Remove the LCD screen assembly safely
Step 5: Remove the Speaker Cover
- Locate the speaker cover near the bottom of the tablet
- Remove the screws securing the speaker cover
- Carefully lift and remove the speaker cover
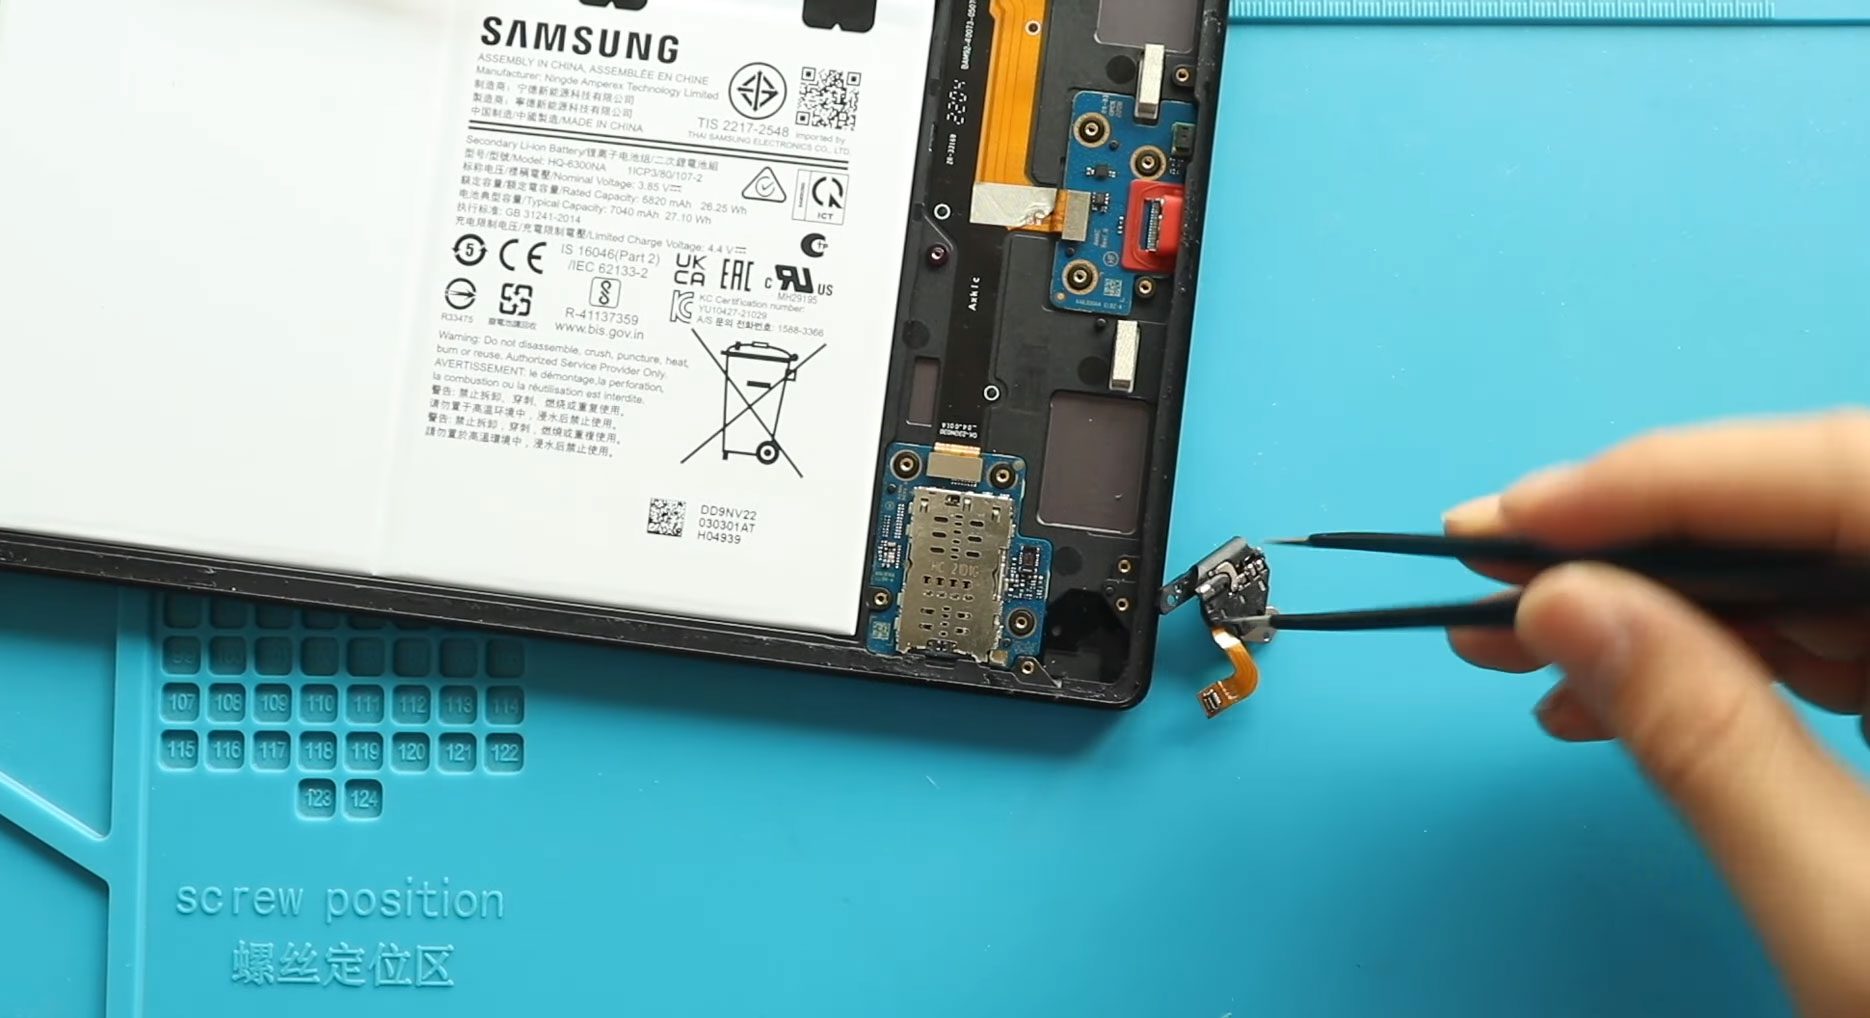
Step 6: Remove the Faulty Headphone Jack
- Locate the headphone jack module
- Disconnect the headphone jack flex cable
- Carefully lift and remove the faulty headphone jack from the body
Step 7: Install the New Headphone Jack
- Place the new headphone jack into position
- Ensure it aligns correctly with the audio port opening
- Connect the headphone jack flex cable securely
Step 8: Reinstall the Speaker Cover
- Place the speaker cover back into position
- Secure it with screws
Step 9: Reconnect LCD and Battery Connectors
- Reconnect the LCD connector
- Reconnect the battery connector
- Ensure all connections are properly seated
Step 10: Test the Headphone Jack
Before sealing the tablet:
- Plug in wired headphones
- Power on the tablet
- Confirm the tablet detects headphones and audio plays correctly
Step 11: Reinstall the LCD Screen
- Apply B7000 glue or double-sided LCD adhesive around the frame
- Slide the screen in from the bottom first, then align the top
- Press gently along the edges
Step 12: Final Closing
- Use bonding clips and leave them on for 30–60 minutes
- If clips are unavailable, use rubber bands until the adhesive cures
Frequently Asked Questions (FAQ)
Is the headphone jack a separate replaceable part?
Yes, it is a modular component connected via a flex cable.
Will replacing the headphone jack erase my data?
No, this repair does not affect internal data.
Is soldering required for this repair?
No soldering is required.
What adhesive should I use to reseal the screen?
B7000 glue or pre-cut double-sided LCD adhesive is recommended.
How long should I wait before using the tablet?
Wait at least 1 hour for the adhesive to cure properly.
Troubleshooting – After The Repair
Q: Headphones are still not detected after replacement. What should I check?
A: Recheck the headphone jack flex cable connection and ensure it is fully seated.
Q: Sound plays through both speakers and headphones.
A: This usually indicates a misaligned or defective headphone jack. Reinstall or replace the module.
Q: The tablet does not power on after reassembly.
A: Verify the battery connector is properly connected.
Q: Audio is distorted in headphones.
A: Test with another headset. If the issue persists, inspect the headphone jack alignment.
Final Thoughts
Replacing the headphone jack on the Samsung Galaxy Tab A8 10.5 (X200 / X205) is an effective way to restore wired audio functionality and avoid costly professional repairs. With patience and the right tools, this repair can be completed successfully at home.
For more tablet and smartphone repair tutorials, visit DIYGeardo.
Related













