
Now Reading: Xiaomi Redmi 10 Battery Replacement Guide | Redmi 10 2022 / Prime
-
01
Xiaomi Redmi 10 Battery Replacement Guide | Redmi 10 2022 / Prime
Xiaomi Redmi 10 Battery Replacement Guide | Redmi 10 2022 / Prime
If your Xiaomi Redmi 10 battery (BN63) drains quickly, shuts down unexpectedly, overheats, or won’t hold a charge, replacing the battery is the most effective solution. Over time, lithium-ion batteries degrade due to regular charging cycles, heat exposure, and age.
In this guide, you’ll learn how to replace the battery on the Xiaomi Redmi 10 safely and correctly. This step-by-step repair tutorial is designed for DIY users and technicians, with clear instructions to help you complete the repair without damaging internal components.
Repair Overview
Device Type: Smartphone
Device Model: Xiaomi Redmi 10
Repair Type: Battery Replacement
Estimated Time: 40–60 minutes
Repair Difficulty ⭐⭐⭐☆☆ (3/5)
Moderate difficulty – requires careful adhesive removal and safe battery handling.
Reasons to Replace the Battery
You may need a battery replacement if you experience any of the following:
- Battery drains quickly
- Phone shuts down at higher battery percentages
- Device overheats during normal use
- Phone does not turn on without charging
- Battery swelling or physical deformation
- Charging percentage stuck or inaccurate
Before You Begin
Compatibility and Model Numbers
- Redmi 10 (2021)
- Redmi 10 (2022)
- Redmi 10 Prime
Model Numbers : 21061119AG, 21061119DG, 21061119AL, 21121119SG, 22011119UY, 21121119VL, 22011119TI
Tools Required
- Mobile phone heating pad or hairdryer/heat gun
- Plastic pry tool / card pry
- Suction cups
- Phillips #00/#000 screwdrivers
- Torx (T2/T3/T4) screwdrivers
- Flathead screwdriver
- Tweezers (for connectors)
- B7000 glue or double-sided adhesive (for back cover)
- Rubber bands or bonding clips to secure the back cover
How to Find Tools and Parts
- Heating pad – https://amzn.to/3H0tHzJ
- Portable Heat Gun – https://amzn.to/4mszih1
- Clamps https://amzn.to/3GYJT4w
- STREBITO 142 Piece Repair Tool Kit https://amzn.to/3UO1jUx
- Glue | Adhesive https://amzn.to/46exVxe
- Compatible Parts –
- Battery – https://amzn.to/4o4KC48
- Screen – https://amzn.to/47AklVA
- Other Parts – https://amzn.to/48JAWrg
- Silicone Work Repair Mat https://amzn.to/45Emz5l
Protect Your Redmi 10 Series
- Best Premium Case https://amzn.to/4neZMTd
- Screen Protector https://amzn.to/4qtDKza
Step-by-Step Xiaomi Redmi 10 Battery Replacement
Step 1: Power Off the Device
Turn off your Xiaomi Redmi 10 completely before starting the repair.
Step 2: Heat the Back Cover
Gently heat around the edges of the rear cover until the adhesive softens.
Using a heating pad, place the back cover side down, select the mobile phone heating option, and wait until the cycle completes.
Alternatively, use a heat gun or hairdryer.
Step 3: Remove the Back Cover
Create a small opening using a suction cup.
Insert a plastic card or pry tool and carefully cut through the adhesive around the edges.
Lift and remove the back cover.
Step 4: Remove the Camera Lens Frame
Undo five screws securing the camera lens frame and remove it carefully.
Step 5: Remove the Midframe Screws
Undo eleven screws securing the midframe.
Step 6: Remove the SIM Tray
Eject and remove the SIM tray from the device.
Step 7: Disconnect the Fingerprint Sensor Flex
Carefully disconnect the fingerprint button flex cable.
Step 8: Separate the Back Cover Frame
Using a plastic pry tool, gently separate the back cover frame.
Work slowly around the edges to disengage the plastic clips.
Step 9: Disconnect the Battery
Disconnect the battery connector to avoid short circuits.
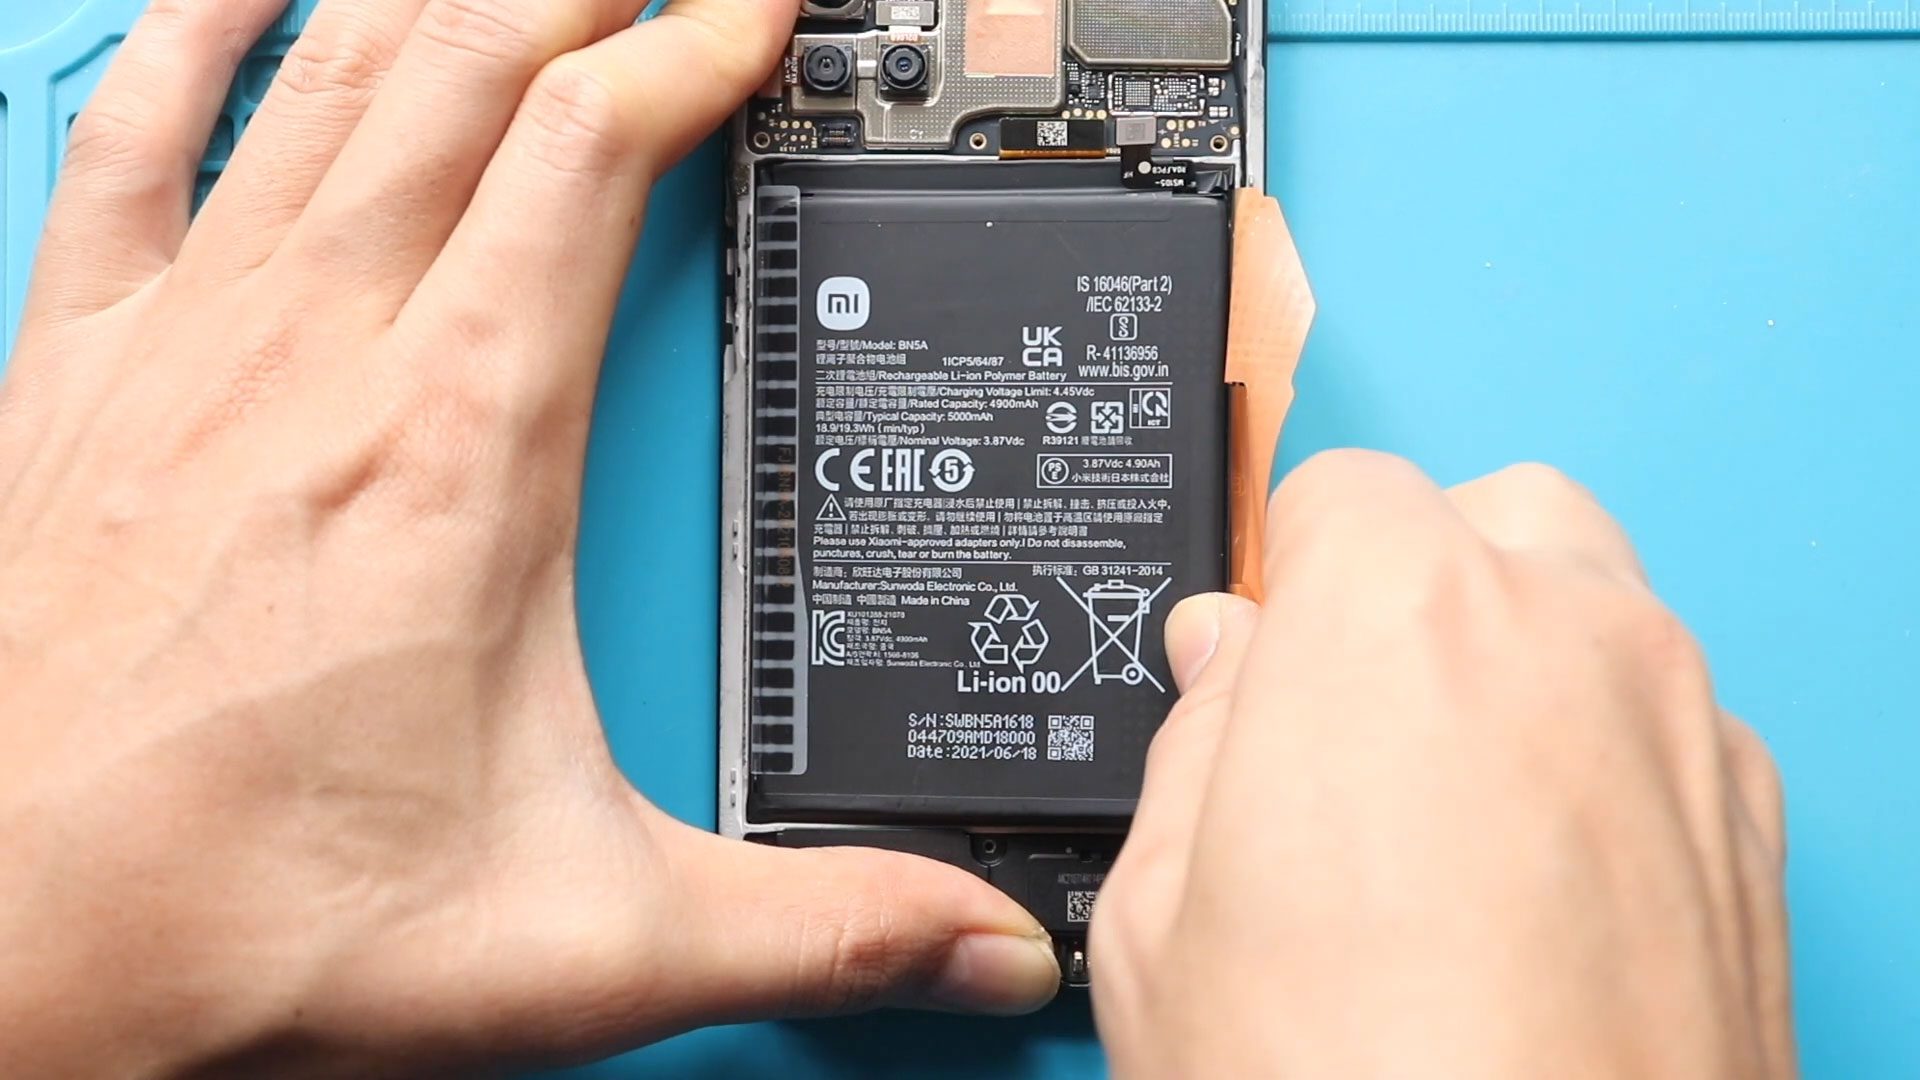
Step 10: Remove the Battery
Relax the adhesive on both sides of the battery using gentle heat.
Pull the battery out from the right-hand side pull tab.
Be gentle and avoid bending or puncturing the battery.
Step 11: Install the New Battery
Place the new battery into the body and secure it using adhesive tapes on both sides.
If the new battery does not include adhesive, remove the orange adhesive strip from the old battery and apply it to the new one.
Step 12: Reassemble the Phone
- Reconnect the fingerprint button flex connector
- Reconnect the battery connector
- Secure the midframe and ensure all clips are fastened
- Insert the SIM tray
- Tighten the eleven midframe screws
- Reinstall the camera lens frame using five screws
Step 13: Reattach the Back Cover
Ensure the back cover has enough adhesive.
If not, apply B7000 glue or new double-sided adhesive.
Place the back cover and secure it using bonding clips or rubber bands.
Leave it for some time to ensure proper adhesion.
Frequently Asked Questions (FAQ)
Q1: Will replacing the battery improve performance?
Yes. A new battery can improve stability, prevent random shutdowns, and restore normal performance.
Q2: Can I reuse the old battery adhesive?
It’s not recommended. Old adhesive may not hold properly and can cause battery movement.
Q3: Do I need to calibrate the new battery?
Yes. After replacement, charge the battery to 100%, then let it discharge to around 10%, and recharge fully once.
Q4: Is it safe to replace the battery myself?
Yes, as long as you follow proper steps, avoid sharp tools, and handle the battery carefully.
Troubleshooting – After Battery Replacement
Q1: Phone not turning on after battery replacement
Check that the battery connector is properly seated and the battery is charged.
Q2: Battery percentage jumping or inaccurate
This is normal initially. Perform one or two full charge cycles to recalibrate.
Q3: Phone overheating after replacement
Ensure the battery is genuine and properly seated. Stop using the device if overheating continues.
Q4: Back cover not sticking properly
Apply additional adhesive and use bonding clips or rubber bands for a longer period.
Related


