Now Reading: Xiaomi Redmi Note 7 Pro Power Volume Button Flex Replacement Guide | (Redmi Note 7)
-
01
Xiaomi Redmi Note 7 Pro Power Volume Button Flex Replacement Guide | (Redmi Note 7)
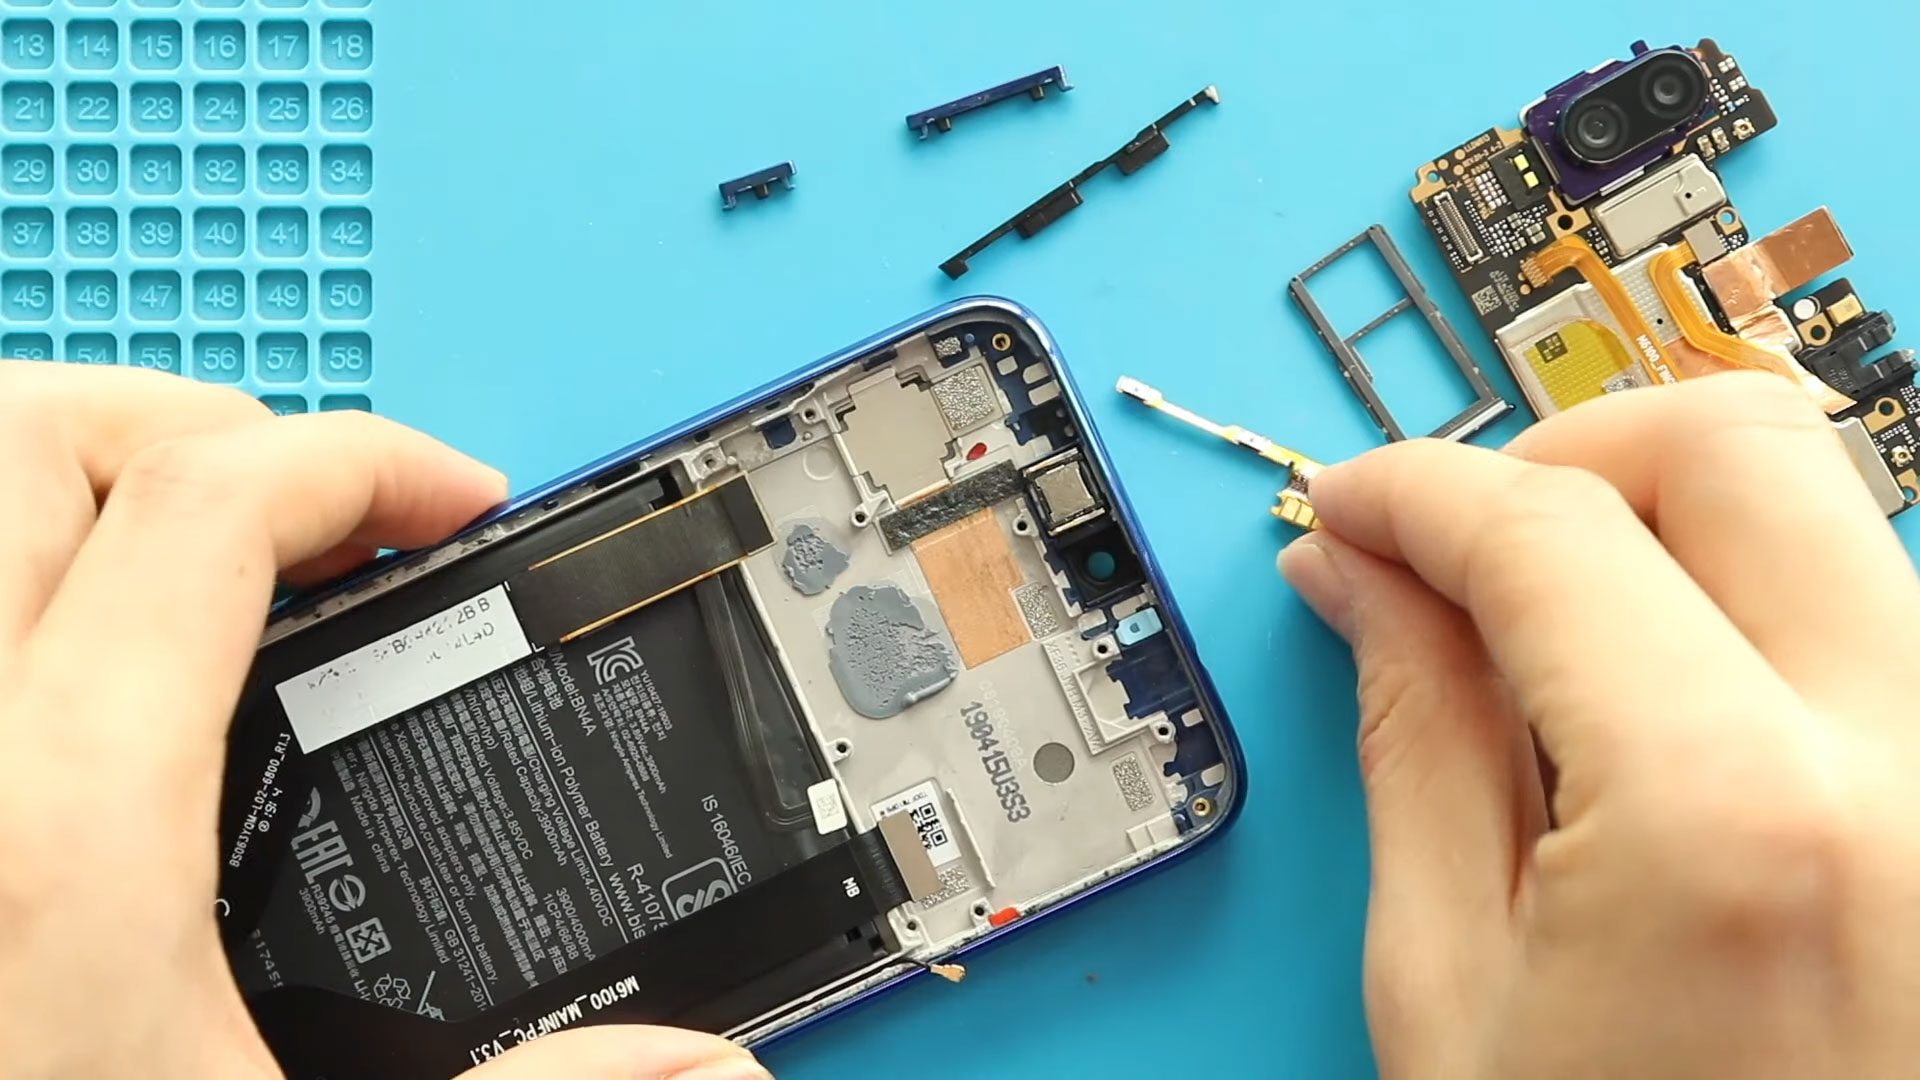
Xiaomi Redmi Note 7 Pro Power Volume Button Flex Replacement Guide | (Redmi Note 7)
Hi everyone, welcome back to Geardo 👋
In this repair guide, we’ll walk you through the process of replacing the power and volume button flex cable on the Xiaomi Redmi Note 7 and Redmi Note 7 Pro smartphones.
If your device is not responding to the power button, volume keys are stuck, or button presses feel inconsistent, the power-volume flex cable is often the root cause. This guide explains how to access and replace the faulty flex safely using standard mobile repair tools.
Both Redmi Note 7 and Note 7 Pro share a similar internal design, making this guide compatible with both models.
Before You Begin
Compatibility and Model Numbers
- Xiaomi Redmi Note 7
- Xiaomi Redmi Note 7 Pro
- Xiaomi Redmi Note 7s
M1901F7G, M1901F7H, M1901F7I, M1901F7S, M1901F7S
What This Repair Fixes
This repair can solve issues such as:
- Power button not responding
- Volume up or down buttons not working
- Buttons working intermittently
- No tactile click when pressing buttons
- Phone cannot be powered on normally
Repair Difficulty
Difficulty Level: ⚠️⚠️⚠️☆☆ (Moderate)
- Requires full rear disassembly
- Logic board removal needed
- No soldering required
Recommended for users with basic to intermediate repair experience.
Tools Required
- Mobile phone heating pad or hairdryer/heat gun
- Plastic pry tool / card pry
- Suction cups
- Phillips #00/#000 screwdrivers
- Tweezers (for connectors)
- B7000 glue or double-sided adhesive (for back cover)
- Rubber bands or bonding clips to secure the back cover
How to Find Tools and Parts
- Heating pad – https://amzn.to/3H0tHzJ
- Portable Heat Gun – https://amzn.to/4mszih1
- Clamps https://amzn.to/3GYJT4w
- STREBITO 142 Piece Repair Tool Kit https://amzn.to/3UO1jUx
- Glue | Adhesive https://amzn.to/46exVxe
- Compatible Parts –
- Battery – https://amzn.to/4rml5ow
- Screen – https://amzn.to/4bY3w9D
- Other Parts – https://amzn.to/4rjlY18
- Silicone Work Repair Mat https://amzn.to/45Emz5l
Protect Your Redmi Not 7/7 Pro
- Screen Protector Glass For The Screen https://amzn.to/4bimOX7
- Best Cases For Your device https://amzn.to/49ZPsK6
Step-by-Step Xiaomi Redmi Note 7 / Note 7 Pro Power Volume Repair
Step 1: Power Off the Device
Completely turn off the phone and remove the SIM tray before starting the repair.
Step 2: Open the Device
Apply gentle heat around the rear cover edges to soften the adhesive. Use a suction cup and plastic pry tool to carefully separate the back cover from the frame.
⚠️ Be cautious while lifting the cover, as the fingerprint sensor is attached.
Step 3: Remove the Rear Cover
Disconnect the fingerprint sensor connector and fully remove the back cover from the phone.
Step 4: Remove Brackets and Disconnect Connectors
Unscrew and remove the protective brackets covering the connectors. Carefully disconnect the battery and other visible flex connectors from the logic board.
Step 5: Disconnect Fingerprint Sensor Flex
Release the fingerprint sensor flex cable completely to prevent damage during further disassembly.
Step 6: Remove Internal Cover
Unscrew and lift the internal protective cover to gain access to the logic board area.
Step 7: Remove the Logic Board
Carefully disconnect all remaining connectors attached to the logic board. Lift the logic board out of the frame slowly, making sure no cables remain attached.
Step 8: Remove the Faulty Power & Volume Flex Cable
Locate the power and volume button flex along the side frame. Gently peel it away from the housing and remove the faulty flex cable from the device.
Step 9: Install the New Power & Volume Flex
Align the new power and volume flex cable properly along the frame. Press it gently into place and ensure the buttons sit correctly in their cutouts.
Step 10: Reinstall the Logic Board
Place the logic board back into position and reconnect all necessary flex cables securely.
Step 11: Reinstall Internal Cover
Secure the internal cover back onto the frame using the original screws.
Step 12: Reconnect Fingerprint Sensor
Reconnect the fingerprint sensor flex cable carefully and ensure the connection is firm.
Step 13: Secure Brackets and Connectors
Reconnect all remaining connectors, including the battery, and reinstall the protective brackets with screws.
Step 14: Close the Device
Before sealing the back cover, ensure there is enough adhesive. Apply B7000 glue or new double-sided adhesive if required. Press the back cover into place and apply even pressure until it is fully secured.
Final Testing
After reassembly:
- Test the power button
- Check volume up and down functionality
- Verify fingerprint sensor operation
- Power cycle the phone
Final Thoughts
Replacing the power and volume button flex cable on the Xiaomi Redmi Note 7 or Note 7 Pro is an effective fix for unresponsive or faulty buttons. By following this guide carefully, you can restore full button functionality without replacing the entire device.
If you found this guide helpful, let us know in the comments.
Don’t forget to like, share, and subscribe to Geardo for more DIY smartphone repair guides
Frequently Asked Questions (FAQ)
Q: What does the power and volume flex cable control on Redmi Note 7 and Note 7 Pro?
A: The power and volume flex cable controls the power button as well as the volume up and volume down keys. If any of these buttons stop responding or work intermittently, the flex cable is usually worn out or damaged and needs replacement.
Q: Are the power and volume buttons combined on a single flex cable?
A: Yes. On both Xiaomi Redmi Note 7 and Redmi Note 7 Pro, the power and volume buttons are integrated into one shared flex cable. Replacing this flex restores functionality to all related buttons.
Q: Is this repair the same for Redmi Note 7 and Note 7 Pro?
A: Yes. Both models share a nearly identical internal layout, so the power and volume flex replacement process is the same for both devices.
Q: Do I need soldering skills to replace the power volume flex?
A: No. The power and volume flex cable is a plug-in component and does not require any soldering, making it suitable for DIY repairs.
Q: How long does the power and volume button repair take?
A: The repair usually takes around 40–60 minutes, depending on your experience and how carefully the phone is disassembled.
Q: Will replacing the power and volume flex affect my data?
A: No. This repair does not affect stored data, apps, or settings on your phone.
Troubleshooting – After The Repair
Q: The power button still does not respond after replacement. What should I check?
A: If the power button is not working after the repair, make sure the power and volume flex connector is fully seated on the logic board. A loose or misaligned connector can prevent the button from responding. Also check that the logic board is positioned correctly and not pressing against the flex cable.
Q: Volume up or down works intermittently after reassembly. Why does this happen?
A: Intermittent button response is often caused by the flex cable not sitting properly in the frame. Reopen the device and ensure the flex cable is aligned correctly along the side housing and that the external buttons are positioned properly over the flex contacts.
Q: The buttons feel stiff or do not click properly. What is the cause?
A: This usually happens if the flex cable is slightly misaligned or if the button caps are not seated correctly in the frame. Adjust the flex cable placement and check that the physical buttons are sitting flat and pressing directly on the flex.
Q: The phone does not power on after reassembly. What should I do?
A: First, confirm that the battery connector is securely connected. Then check that no flex cables were forgotten during reassembly. Connect the charger and leave the phone charging for several minutes before attempting to power it on again.
Q: The fingerprint sensor stopped working after the repair. Is it related?
A: The fingerprint sensor is not part of the power and volume flex, but it can stop working if its connector was not reattached properly. Reopen the phone and reseat the fingerprint sensor flex cable securely.
Q: Can software issues cause power or volume buttons to stop working?
A: In rare cases, software bugs can affect button response, but most power and volume button failures on these models are caused by a damaged or worn flex cable. If the issue persists after replacement, consider checking for software updates or testing with another flex cable.
Related Guides