Now Reading: iPad Pro 12.9-inch Headphone Jack Flex Replacement Guide (1st Generation, 2015)
-
01
iPad Pro 12.9-inch Headphone Jack Flex Replacement Guide (1st Generation, 2015)
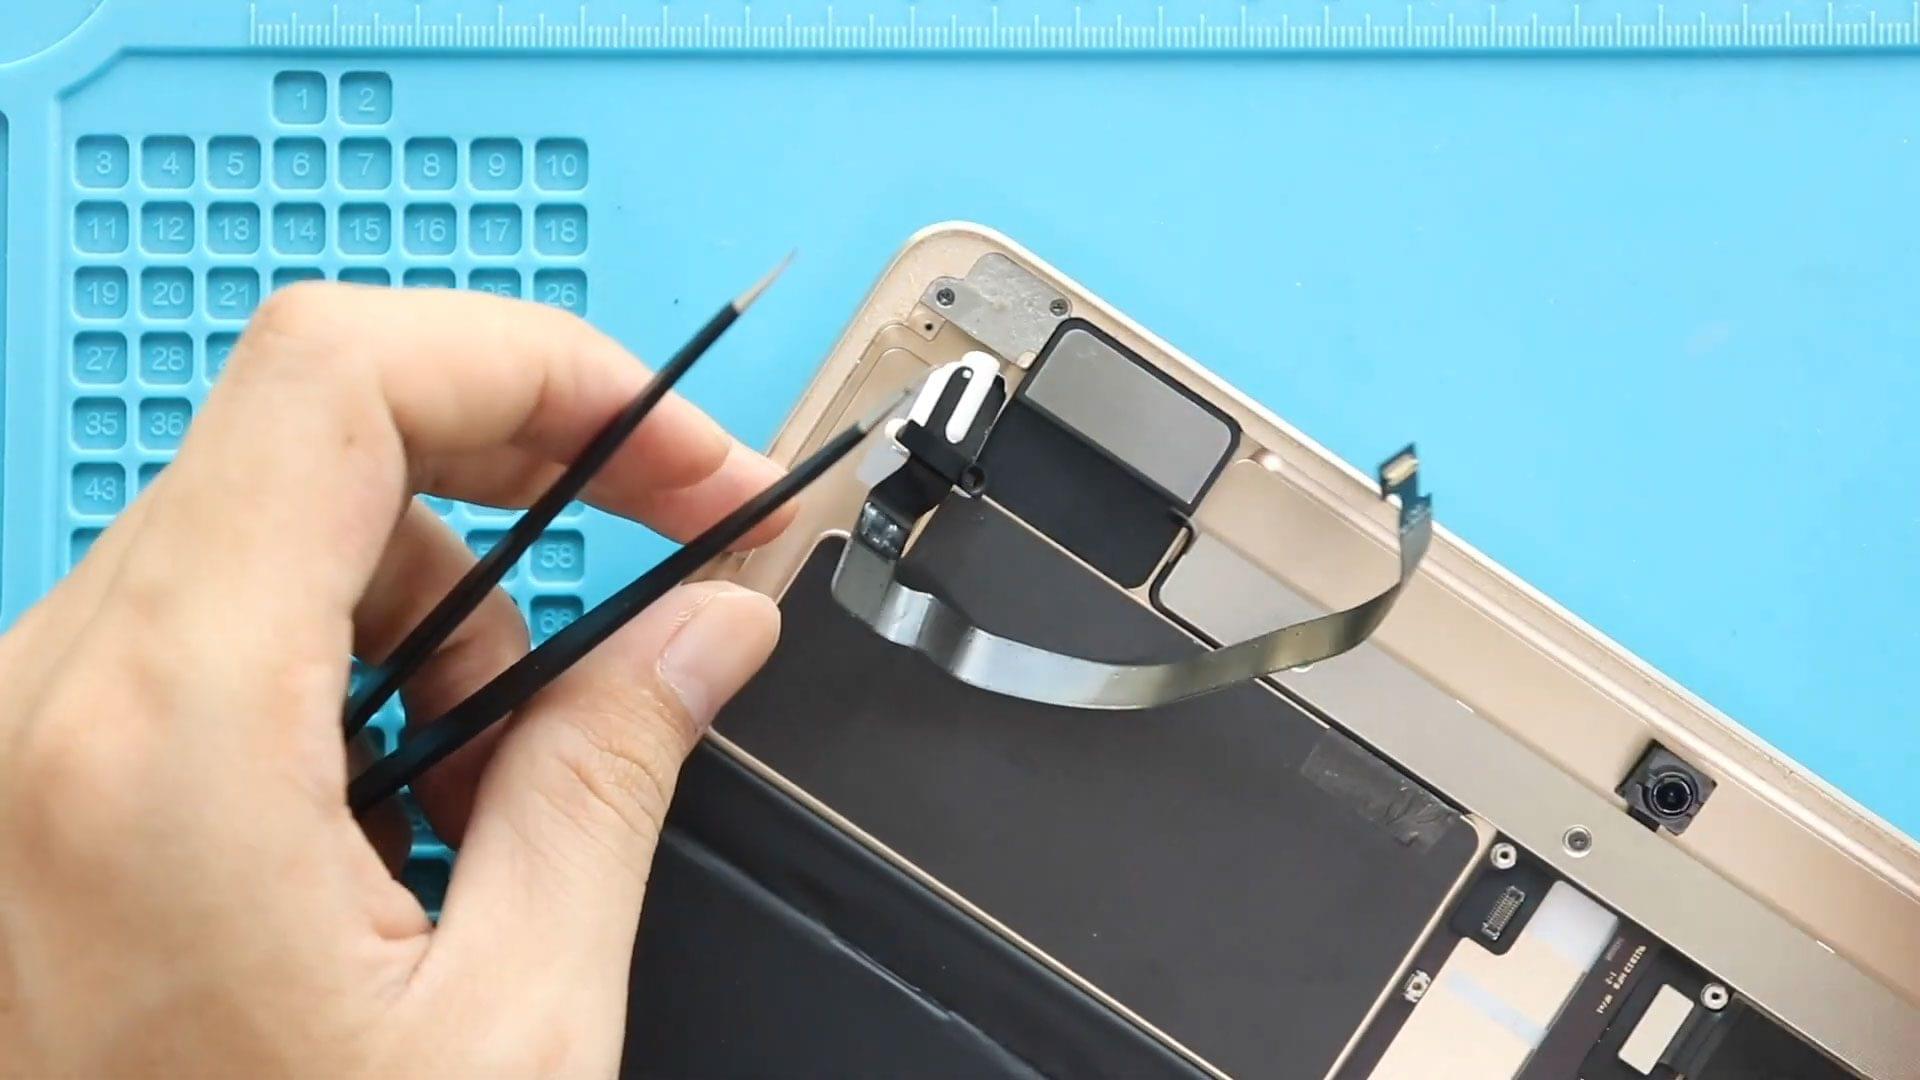
iPad Pro 12.9-inch Headphone Jack Flex Replacement Guide (1st Generation, 2015)
Hi everyone, welcome back to DIYGEARDO
In this guide, we’ll show you how to replace the headphone jack port with flex cable on the iPad Pro 12.9-inch 1st generation. If your headphones are not detected, audio cuts in and out, or the jack feels loose, this repair will help restore proper audio functionality.
As with all iPad repairs, proper heating and careful screen removal are the most critical steps. Take your time and follow each step carefully to avoid damaging internal components.
Reasons for Headphone Jack Replacement
You may need to replace the headphone jack port if you experience:
- Headphones not detected
- No sound through wired earphones
- Audio cutting in and out
- Loose or damaged headphone jack
- Physical damage due to drops
- Dust or moisture damage inside the port
Replacing the headphone jack restores stable wired audio output for headphones and auxiliary devices.
Repair Difficulty
Difficulty Level: 🔧🔧🔧🔧☆ (4/5 – Advanced)
Estimated Time: 60–90 minutes
Recommended For: Experienced DIYers or repair technicians
⚠️ This repair requires full screen removal and logic board access, making it an advanced procedure.
Before You Begin
Compatibility and Model Numbers
This repair guide based on iPad Pro 12.9-inch 2015 Model.
Also Compatible with Both Wifi and Cellular Edition models.
Model Numbers | iPad Pro 12.9-inch 1st Generation, A1584, A1652
Required Tools
- Heating pad / heat gun / hairdryer
- Suction cup
- Plastic card pry tools / opening picks/ Tweezers
- Phillips screwdriver #00 / #000
- Torx T3 Screwdriver
- Adhesive (B7000 or double-sided back cover adhesive)
- Bonding clips or rubber bands (optional but recommended)
Make sure the device is turned off and the SIM tray is removed (For Cellular Version)before starting.
How to Find Tools and Parts
- Heating pad – https://amzn.to/3H0tHzJ
- Portable Heat Gun – https://amzn.to/4mszih1
- Clamps https://amzn.to/3GYJT4w
- STREBITO 142 Piece Repair Tool Kit https://amzn.to/3UO1jUx
- Glue | Adhesive https://amzn.to/46exVxe
- Compatible Parts –
- Battery – https://amzn.to/4gwRF2O
- LCD Screen – https://amzn.to/4mmy5r2
- Other Parts – https://amzn.to/3IwgRK2
- Silicone Work Repair Mat https://amzn.to/45Emz5l
Protect Your iPad Pro 12.9
- Protector For The Screen https://amzn.to/4gvYWzC
- Best Cases For Your iPad https://amzn.to/48pnJ6y
Step-by-Step iPad Pro 12.9 Headphone Jack Replacement Guide
Step 1: Heat the Front Screen
Proper heating is essential to loosen the adhesive.
- Place the iPad on a heating pad
- Heat only the front side
- Select tablet heating mode and wait until heating completes
- Alternatively, apply even heat using a heat gun
Step 2: Lift and Separate the Screen
- Attach a suction cup near the edge of the display
- Gently lift the screen
- Insert plastic card pry tools and cut through the adhesive
- Move slowly and be gentle during this process
⚠️ Flex cables are attached—do not pull forcefully.
Step 3: Open the Screen Safely
- Lift the screen from the top edge to about a 45-degree angle
- Ensure the iPad body remains flat on the table
Step 4: Disconnect the Screen
- Remove three screws securing the LCD connector bracket
- Disconnect:
- LCD connector
- Touch digitizer connector
- The screen can now be fully removed
Step 5: Clean the Frame
- Remove broken glass pieces if any
- Clear unwanted adhesive residue from the frame edges
- Ensure the frame is clean and smooth
Step 6: Remove the Logic Board Bracket
- Remove nine screws securing the logic board bracket
- Carefully unclip and lift the bracket
Step 7: Remove the Faulty Headphone Jack Port
- Disconnect the headphone jack flex connector
- Gently pry the flex cable to release the port from the body
- Locate and remove the screw securing the headphone jack
- ⚠️ This screw is hidden under adhesive
- Carefully pull out the headphone jack port
Step 8: Install the New Headphone Jack Port
- Place the new headphone jack port into position
- Secure it using the original screw
- Ensure the port is aligned correctly in the frame
- Reconnect the flex cable securely
Step 9: Reinstall the Logic Board Bracket
- Place the bracket back into position
- Secure it with nine screws
Reinstalling the Screen
Step 10: Reconnect the Screen
- Lay the iPad body flat on the table
- Insert the screen from the bottom at a 45-degree angle
- Reconnect:
- LCD connector
- Touch connector
- Reinstall the LCD connector bracket
- Secure it with three screws
Step 11: Test the Device
- Power on the iPad
- Test:
- Headphone jack audio
- Display
- Touch functionality
- Proceed only if everything works correctly
Step 12: Apply Adhesive and Seal the Screen
- Apply B7000 glue or LCD adhesive around the frame edges
- Insert the bottom of the screen first, then align the top
- Gently press along the sides until the screen clicks into place
- Use bonding clips or rubber bands to hold the display
- Leave it clamped for some time for proper bonding
Frequently Asked Questions (FAQ)
Q: Why is my iPad Pro headphone jack not working?
A: Common causes include dust buildup, flex cable damage, moisture exposure, or physical port damage.
Q: Can the headphone jack be cleaned instead of replaced?
A: Minor dust issues can be cleaned, but flex or internal damage requires full replacement.
Q: Do I need to remove the screen to replace the headphone jack?
A: Yes. The headphone jack is mounted internally and requires screen removal.
Q: How long should the screen be clamped after sealing?
A: At least 30–60 minutes for best adhesive results.
Troubleshooting (After The Repair)
Q: No sound after headphone jack replacement.
A: Recheck the flex cable connection and ensure it is fully seated.
Q: Headphones are detected but audio is distorted.
A: Make sure the port is aligned correctly and the securing screw is tight.
Q: iPad doesn’t power on after repair.
A: Recheck all screen connectors and the logic board bracket installation.
Q: Screen lifting after repair.
A: Apply additional adhesive and clamp the screen longer.
Final Thoughts
You’ve now successfully completed the iPad Pro 12.9-inch 1st generation headphone jack port with flex replacement🎉
Take your time during heating, logic board access, and reassembly—precision is key for a successful repair.
If you have any questions, feel free to comment, share this guide, and don’t forget to subscribe to GEARDO for more professional repair tutorials.
Related Repair Guides