
Now Reading: iPhone 12 Back Camera Replacement | Step-by-Step DIY Repair
-
01
iPhone 12 Back Camera Replacement | Step-by-Step DIY Repair

iPhone 12 Back Camera Replacement | Step-by-Step DIY Repair
Hi everyone, welcome back to DIY GEARDO.
Today, we’ll show you how to replace the back camera on the iPhone 12. If your rear camera is malfunctioning, blurry, or not recognized, this guide will help you fix it safely.
Before starting, make sure you have the correct tools, which are listed in the description. Using proper tools ensures a smooth repair process and reduces the risk of damage.
Compatibility and Model Numbers
This repair guide based on iPhone 12 mobile phone. But this guide also compatible with iPhone12 Pro mobile phone.
Compatible Mode Numbers l A2403, A2172, A2402, A2404, A2407, A2341, A2406, A2408
Tools You Need
- Heating pad / heat gun / hairdryer
- Suction cup
- Plastic card pry tools / opening picks
- Phillips PH000 screwdriver
- Pentalobe P2 Screwdriver (for bottom screws)
- Tri-Point Y000 Screwdriver
- Adhesive (B7000 or double-sided frame adhesive)
- Bonding clips or rubber bands (optional but recommended)
How to Find Tools and Parts
- Heating pad – https://amzn.to/3H0tHzJ
- Portable Heat Gun – https://amzn.to/4mszih1
- Clamps https://amzn.to/3GYJT4w
- STREBITO 142 Piece Repair Tool Kit https://amzn.to/3UO1jUx
- Glue | Adhesive https://amzn.to/46exVxe
- Compatible Parts https://amzn.to/3Hx6sxo
- Silicone Work Repair Mat https://amzn.to/45Emz5l
Step 1 — Power Off & Remove Screws
Turn off your iPhone 12 completely.
Remove the SIM tray using the eject tool.
Undo the two bottom Pentalobe screws located near the charging port.
Step 2 — Loosen the Display
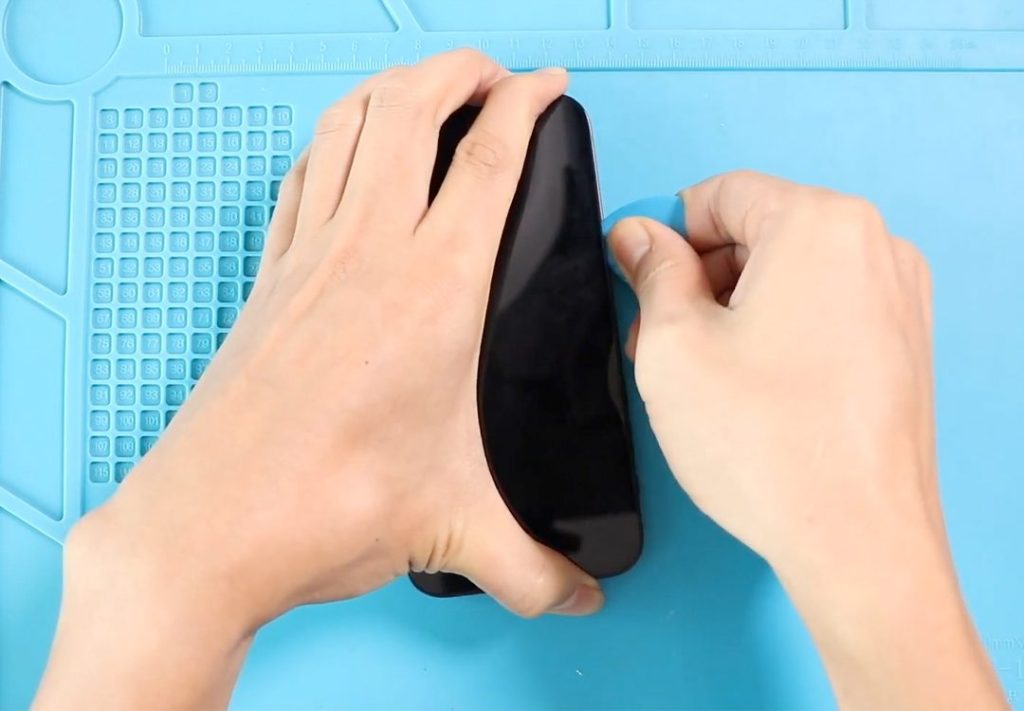
Apply gentle heat to soften the adhesive around the screen. You can use a heating pad, heat gun, or hairdryer. Avoid overheating to protect internal components.
Place a double-sided suction cup at the bottom of the display and gently lift it.
If unavailable, a regular suction cup with a plastic pry tool or triangle picker works as well.
Separate the screen from the frame, keeping the motion like opening a book.
Step 3 — Remove Shields & Disconnect Components
Inside the iPhone, remove the metal shields:
- Bottom shield: Remove 2 screws
- Top shield: Remove 4 screws
Disconnect the following carefully:
- Battery connector
- Earpiece assembly connector
- Both display connectors
Disconnecting the battery first ensures safety during the repair.
Step 4 — Access the Back Camera
Remove the rear camera shield located on the top right by undoing 5 screws.
Gently disconnect the camera connector plugs to release the faulty back camera.

Step 5 — Install the New Back Camera
Place the new back camera into the frame, ensuring all connectors are properly attached.
Secure the camera shield back in place with 5 screws.
Step 6 — Apply Water Seal
Install pre-cut water seal adhesive around the frame. This improves splash and dust resistance but does not fully restore waterproofing.
Step 7 — Reassemble the Phone
Reconnect all components:
- Earpiece assembly
- Both LCD connectors
- Battery connector
- Place the shields back and secure them with screws
Carefully place the display:
- Click the top section first
- Then press sides
- Finally press the bottom to snap it into place
Secure the two bottom Pentalobe screws and insert the SIM tray.
Step 8 — Test the Device
Frequently Asked Questions
Q1: How long does it take to replace the back camera?
A: About 30–40 minutes, depending on your experience.
Q2: Can this fix blurry or unresponsive cameras?
A: Yes, replacing a faulty camera usually resolves focus, recognition, or connectivity issues.
Q3: Is disconnecting the battery necessary for camera repair?
A: Yes, it prevents short circuits and ensures safe handling during the repair.
Related Guides


-
 01Samsung Galaxy A16 5G Battery Replacement | Full DIY Repair Guide
 -
02Samsung Galaxy A16 5G Screen Replacement | Step-by-Step Guide
-
03Google Pixel 6 Power Button Replacement Guide | Volume Button Flex Repair Guide- DIY Repair
-
04Samsung Galaxy A16 5G Back Cover & Camera Lens Frame Replacement Guide | DIY Repair
-
05Why a Heating Pad Is Essential for Mobile Phone Repairs (And How to Use it)
-
06How to Use a Heat Gun or Hair Dryer for Phone/Tablet Repairs
-
07Essential Repair Tools for Phone, Tablet & Laptop Repairs


