Now Reading: iPhone XS Camera Lens Replacement Guide (Step-by-Step DIY Repair)
-
01
iPhone XS Camera Lens Replacement Guide (Step-by-Step DIY Repair)

iPhone XS Camera Lens Replacement Guide (Step-by-Step DIY Repair)
Hi everyone, welcome back to Geardo.
Today, we will show you how to replace the camera lens on the iPhone XS mobile phone.
If your camera lens is scratched, cracked, or affecting photo quality, replacing just the lens is a cost-effective solution. This method ensures there is no damage to the rear camera and helps prevent dust from entering during the repair.
Before starting, make sure you have the right tools to proceed with the repair, which you can find in the description.
Repair Overview
- Device Type: Smartphone
- Device Model: iPhone XS
- Repair Type: Camera Lens Replacement
Repair Difficulty
⭐⭐⭐⭐☆ (4/5 – Advanced)
Estimated Time
45–60 minutes
Reasons for Camera Lens Replacement
- Scratched or cracked camera lens
- Blurry photos due to lens damage
- Dust entering through broken lens
- Cosmetic damage on camera area
- Poor image clarity despite working camera
Before You Begin
Compatibility and Model Numbers
- iPhone XS
This repair guide based on iPhone XS Model.
Model Numbers | A2097, A1920, A2100, A2098
Tools Required
- Heating pad / heat gun / hairdryer
- Suction cup
- Plastic card pry tools / opening picks
- Phillips PH000 screwdriver
- Pentalobe P2 Screwdriver (for bottom screws)
- Tri-Point Y000 Screwdriver
- Adhesive (B7000 or double-sided frame adhesive)
- Bonding clips or rubber bands (optional but recommended)
Using proper tools reduces the risk of damaging the phone.
How to Find Tools and Parts
- Heating pad – https://amzn.to/3H0tHzJ
- Portable Heat Gun – https://amzn.to/4mszih1
- Clamps https://amzn.to/3GYJT4w
- STREBITO 142 Piece Repair Tool Kit https://amzn.to/3UO1jUx
- Glue | Adhesive https://amzn.to/46exVxe
- Compatible Parts –
- Battery – https://amzn.to/4fI15YG
- Screen – https://amzn.to/3VIu2KN
- Other Parts – https://amzn.to/4n2vPq4
- Silicone Work Repair Mat https://amzn.to/45Emz5l
Protect Your iPhone X
2 in 1 Protection for Your iPhone XS https://amzn.to/46apLVC
Step-by-Step iPhone XS Camera Lens Replacement Guide
Step 1: Power Off & Remove Screws
Turn off the phone.
Remove the SIM tray.
Undo the two bottom screws using a Pentalobe screwdriver.
Step 2: Open the Display
Use a suction cup to lift the screen.
If needed:
- Use a plastic pry tool or triangle picker
- Carefully loosen the adhesive around the frame
Step 3: Open the Screen
Lift the display gently like opening a book.
Remove five screws and take off the protective shield.
Disconnect:
- Touch connector
- LCD connector
- Earpiece assembly connector
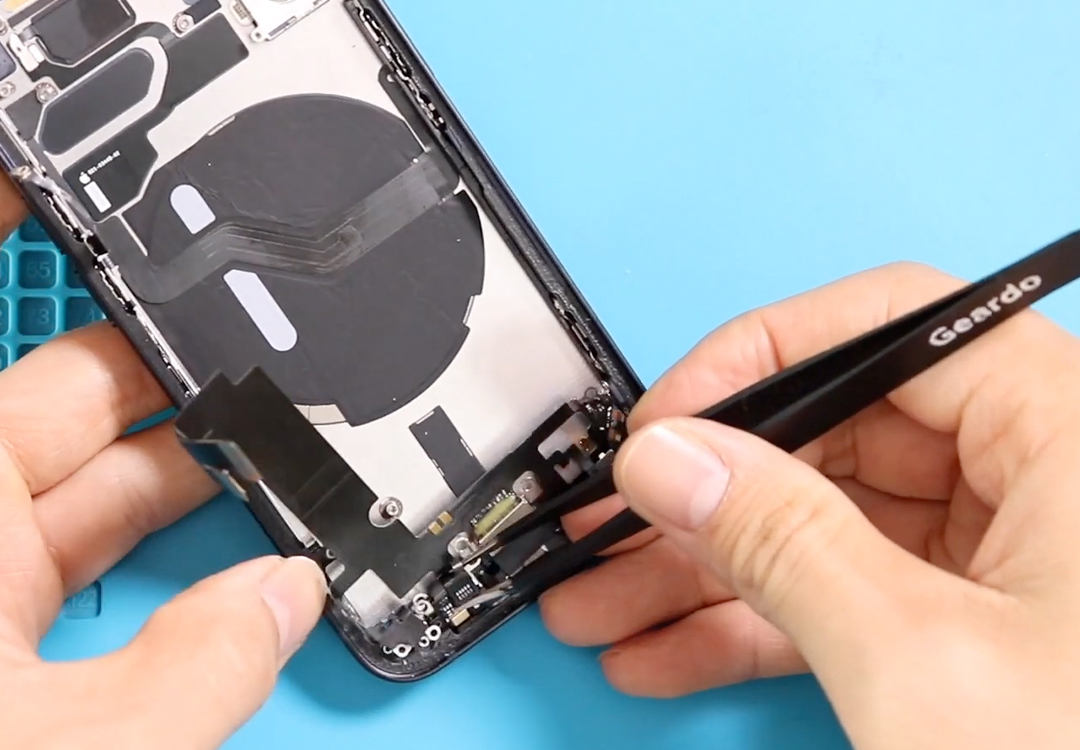
Step 4: Remove Rear Camera
Move to the top-right area:
- Disconnect two camera connectors
- Remove two screws securing the camera shield
- Lift the shield and remove the rear camera module
Step 5: Remove Broken Camera Lens
Apply a small amount of heat from the back side of the phone (camera area).
From inside the device:
- Gently push out the damaged lens
- Use a pry tool if needed
Step 6: Clean the Surface
Remove all broken glass pieces.
- Clean the lens area thoroughly
- Ensure no dust or debris remains
⚠️ Important: Any leftover particles can affect camera quality.
Step 7: Install New Camera Lens
Place the new lens with adhesive.
- Align it properly
- Press gently to secure
Step 8: Reinstall Rear Camera
Place the rear camera module back.
- Connect both connectors
- Reinstall the shield
- Secure with two screws
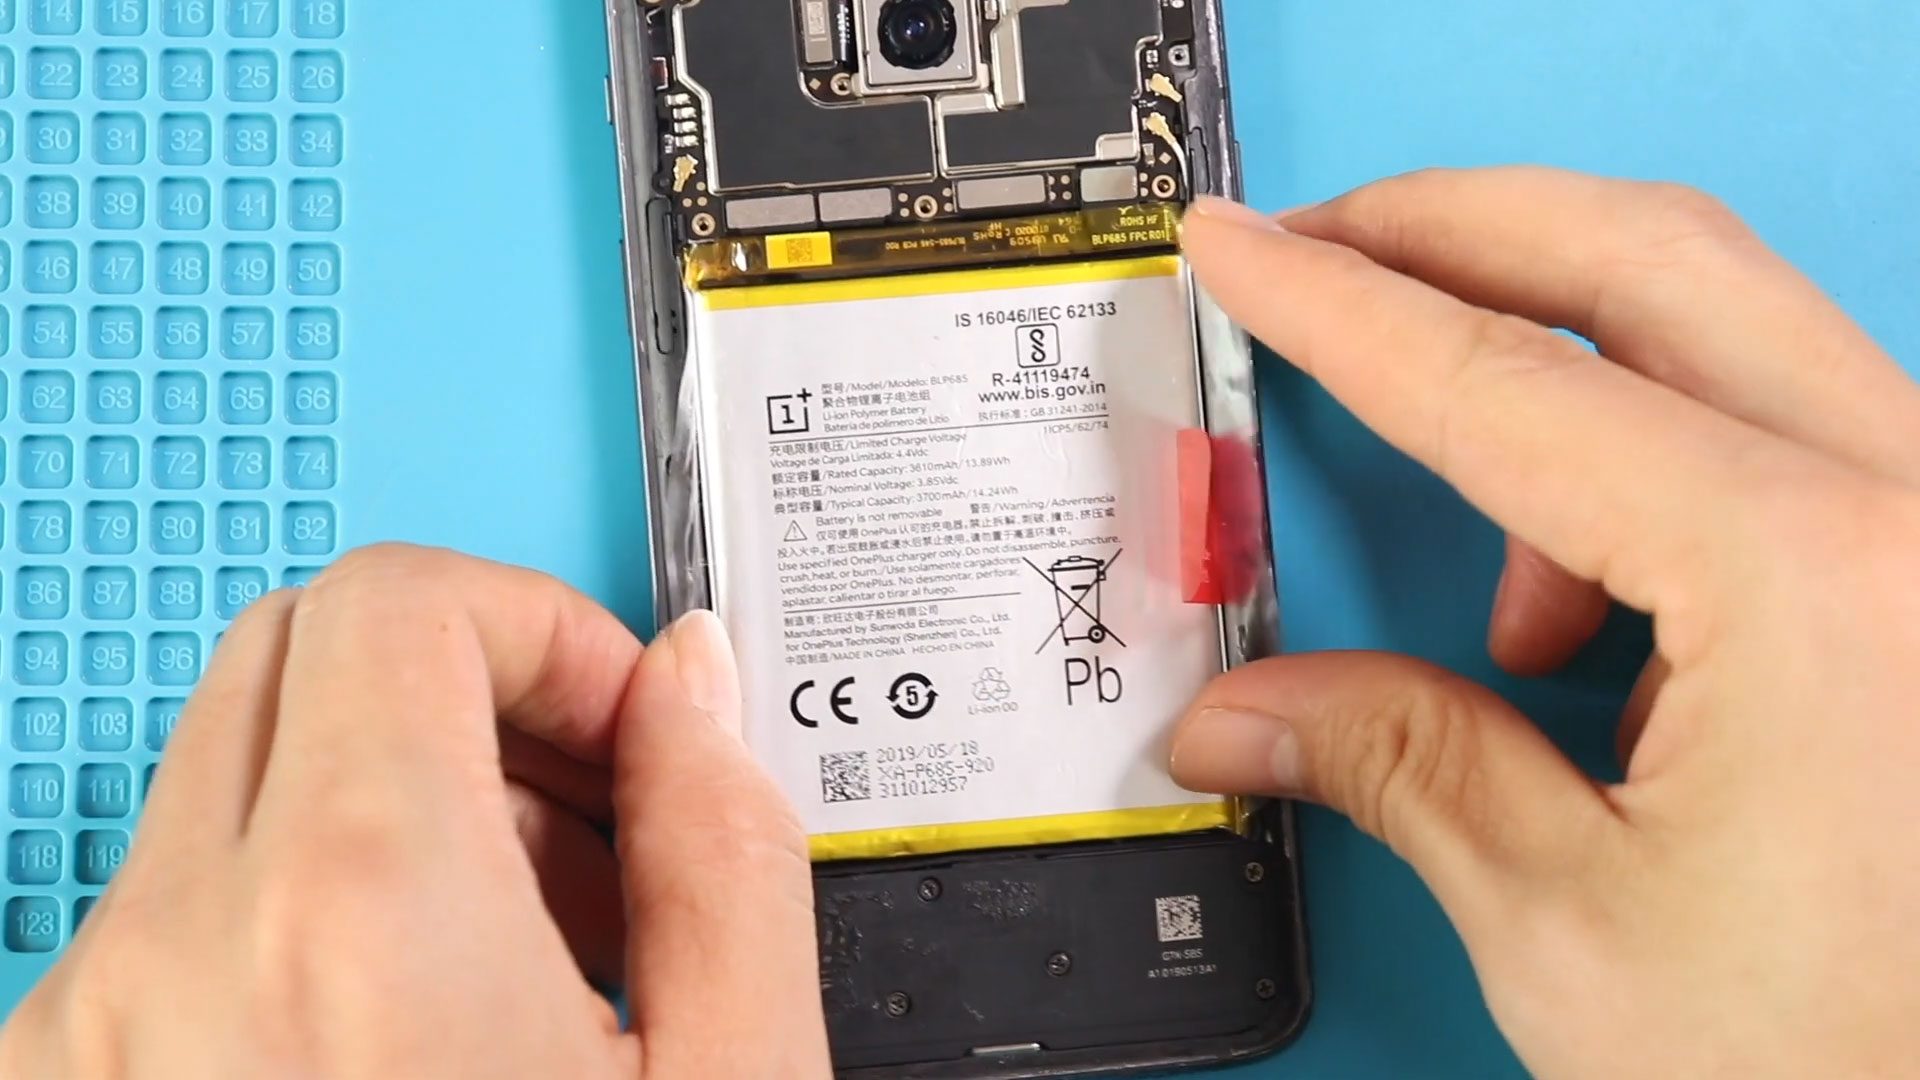
Step 9: Apply Adhesive Seal
Apply the pre-cut water seal adhesive around the frame.
⚠️ Note: This does not fully restore waterproofing.
Step 10: Reconnect Display
Reconnect:
- LCD connector
- Touch connector
- Earpiece assembly connector
Ensure all connections are secure.
Reinstall the shield using five screws.
Step 11: Close the Device
Press the display into place:
- Start from the top
- Then sides
- Then bottom
Apply even pressure along the frame.
Step 12: Final Assembly
Insert the SIM tray.
Tighten the two bottom screws.
FAQs
1. Can I replace only the camera lens without changing the camera?
Yes, if the camera module is working fine, you only need to replace the lens.
2. Will this fix blurry photos?
Yes, if the blur is caused by scratches or cracks on the lens.
3. Is this repair difficult?
Yes, it is considered advanced due to the risk of dust and alignment issues.
4. Do I need to remove the camera to replace the lens?
Yes, removing the camera helps avoid damage and prevents dust contamination.
5. Will the phone remain waterproof after repair?
No, the original seal is compromised. The new adhesive offers limited protection.
Troubleshooting
1. Dust inside camera after repair
- Reopen and clean lens area
- Ensure proper sealing
2. Blurry images after replacement
- Check lens alignment
- Clean both lens and camera sensor area
3. Camera not working
- Reconnect camera connectors
- Ensure proper seating of module
4. Lens not sitting properly
- Remove and realign
- Ensure adhesive is evenly applied
5. Light glare or haze in photos
- Clean lens thoroughly
- Check for leftover adhesive residue
Final Thoughts
That’s it! You’ve successfully replaced the camera lens on your iPhone XS.
This repair is a great way to restore photo quality without replacing the entire camera module. Just take your time, keep everything clean, and follow the steps carefully.
Hope you enjoyed the repair guide.
Let us know if you have any queries—please like, share, and comment on our videos.
And don’t forget to hit the subscribe button!
Related