Now Reading: Motorola Moto G Stylus 5G XT2131 Camera Lens Glass & Back Cover Replacement Guide | DIY Repair
-
01
Motorola Moto G Stylus 5G XT2131 Camera Lens Glass & Back Cover Replacement Guide | DIY Repair
Motorola Moto G Stylus 5G XT2131 Camera Lens Glass & Back Cover Replacement Guide | DIY Repair
Hi everyone, welcome back to Geardo 👋
Today, we will show you how to replace the camera lens glass on the Motorola Moto G Stylus 5G. If your camera glass is cracked, scratched, or affecting image quality, this simple repair can restore your phone without replacing the entire camera module.
The good news is that this repair is easier than a full camera replacement and can be done with basic tools.
🔧 Repair Overview
- Device Type: Smartphone
- Device Model: Motorola Moto G Stylus 5G
- Repair Type: Camera Lens Glass Replacement
⭐ Repair Difficulty : ★★★☆☆☆☆☆☆☆ (3/10 – Easy)
⏱️ Time Required – 30 – 45 minutes
🔍 Reasons for Camera Lens Glass Replacement
- Cracked or shattered camera glass
- Scratches affecting photo quality
- Dust entering through broken lens cover
- Blurry or hazy images due to damaged lens glass
Check The Latest Motorola Phones are in Clearance “up to 60% off” – https://amzn.to/480ho0w
Before You Begin
Compatibility and Model Numbers
- Motorola Moto Stylus 5G (2021)
Model Numbers | XT2131, XT2131DL, XT2131-1, XT2131-3, XT2131-4
Tools Required
- Mobile phone heating pad or hairdryer/heat gun
- Plastic pry tool / card pry
- Suction cups
- Phillips #00/#000 screwdrivers
- Torx T3 / T4 / T5 Screwdriver (Depends on the version)
- Flathead Screwdriver
- Tweezers (for connectors)
- B7000 glue or double-sided adhesive (for back cover)
- Rubber bands or bonding clips to secure the back cover
Using proper tools reduces the risk of damaging the phone.
How to Find Tools and Parts
- Heating pad – https://amzn.to/3H0tHzJ
- Portable Heat Gun – https://amzn.to/4mszih1
- Clamps https://amzn.to/3GYJT4w
- STREBITO 142 Piece Repair Tool Kit https://amzn.to/3UO1jUx
- Glue | Adhesive https://amzn.to/46exVxe
- Compatible Parts –
- Battery – https://amzn.to/46u7VNl
- Screen – https://amzn.to/47LQSbS
- Other Parts – https://amzn.to/3Vp6SZX
- Silicone Work Repair Mat https://amzn.to/45Emz5l
Step-by-Step Camera Lens Glass Replacement Guide
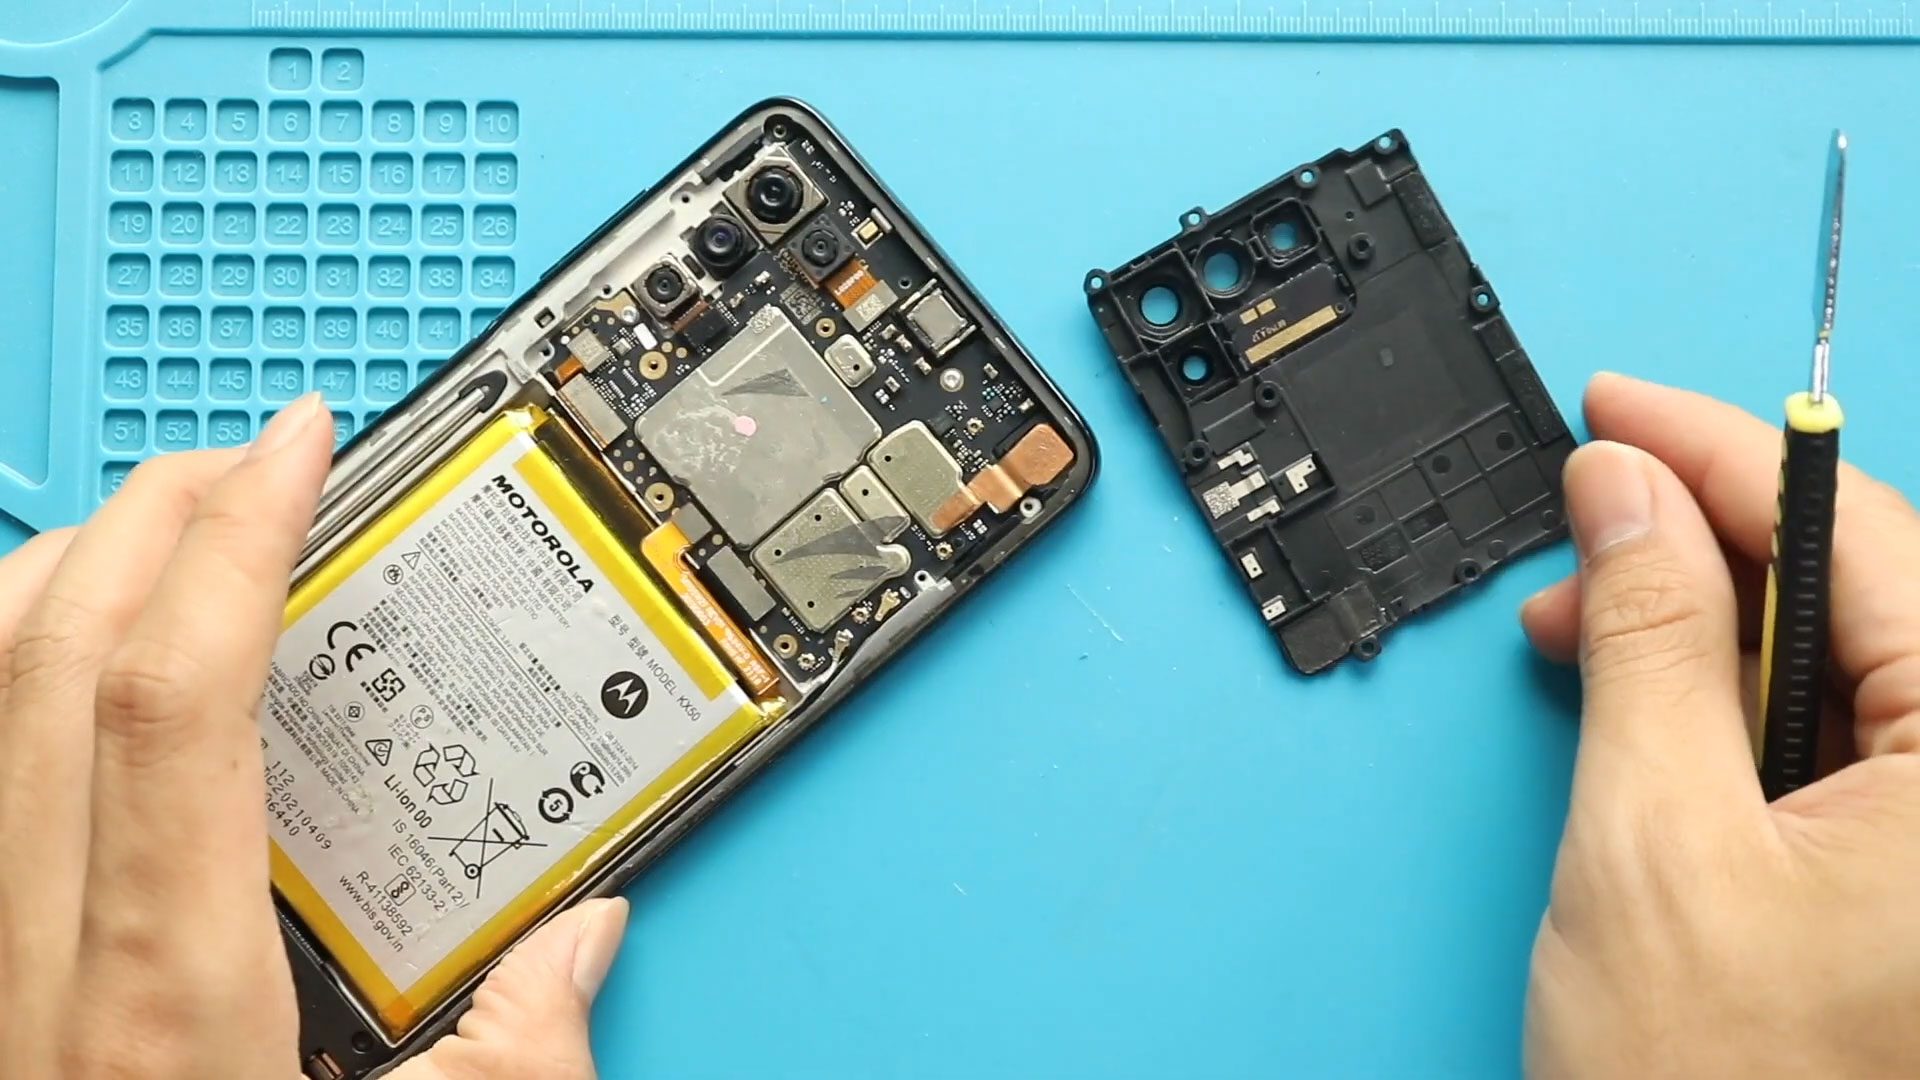
Step 1: Remove the Back Cover
Heat gently around the edges of the back cover to soften the adhesive.
Use a suction cup to create a gap, then insert a plastic pry tool to cut through the adhesive.
Carefully lift the back cover while holding the fingerprint button area.
Step 2: Remove the Logic Board Frame
Unscrew the eight screws securing the top frame.
Gently remove the frame that includes the camera lens housing.
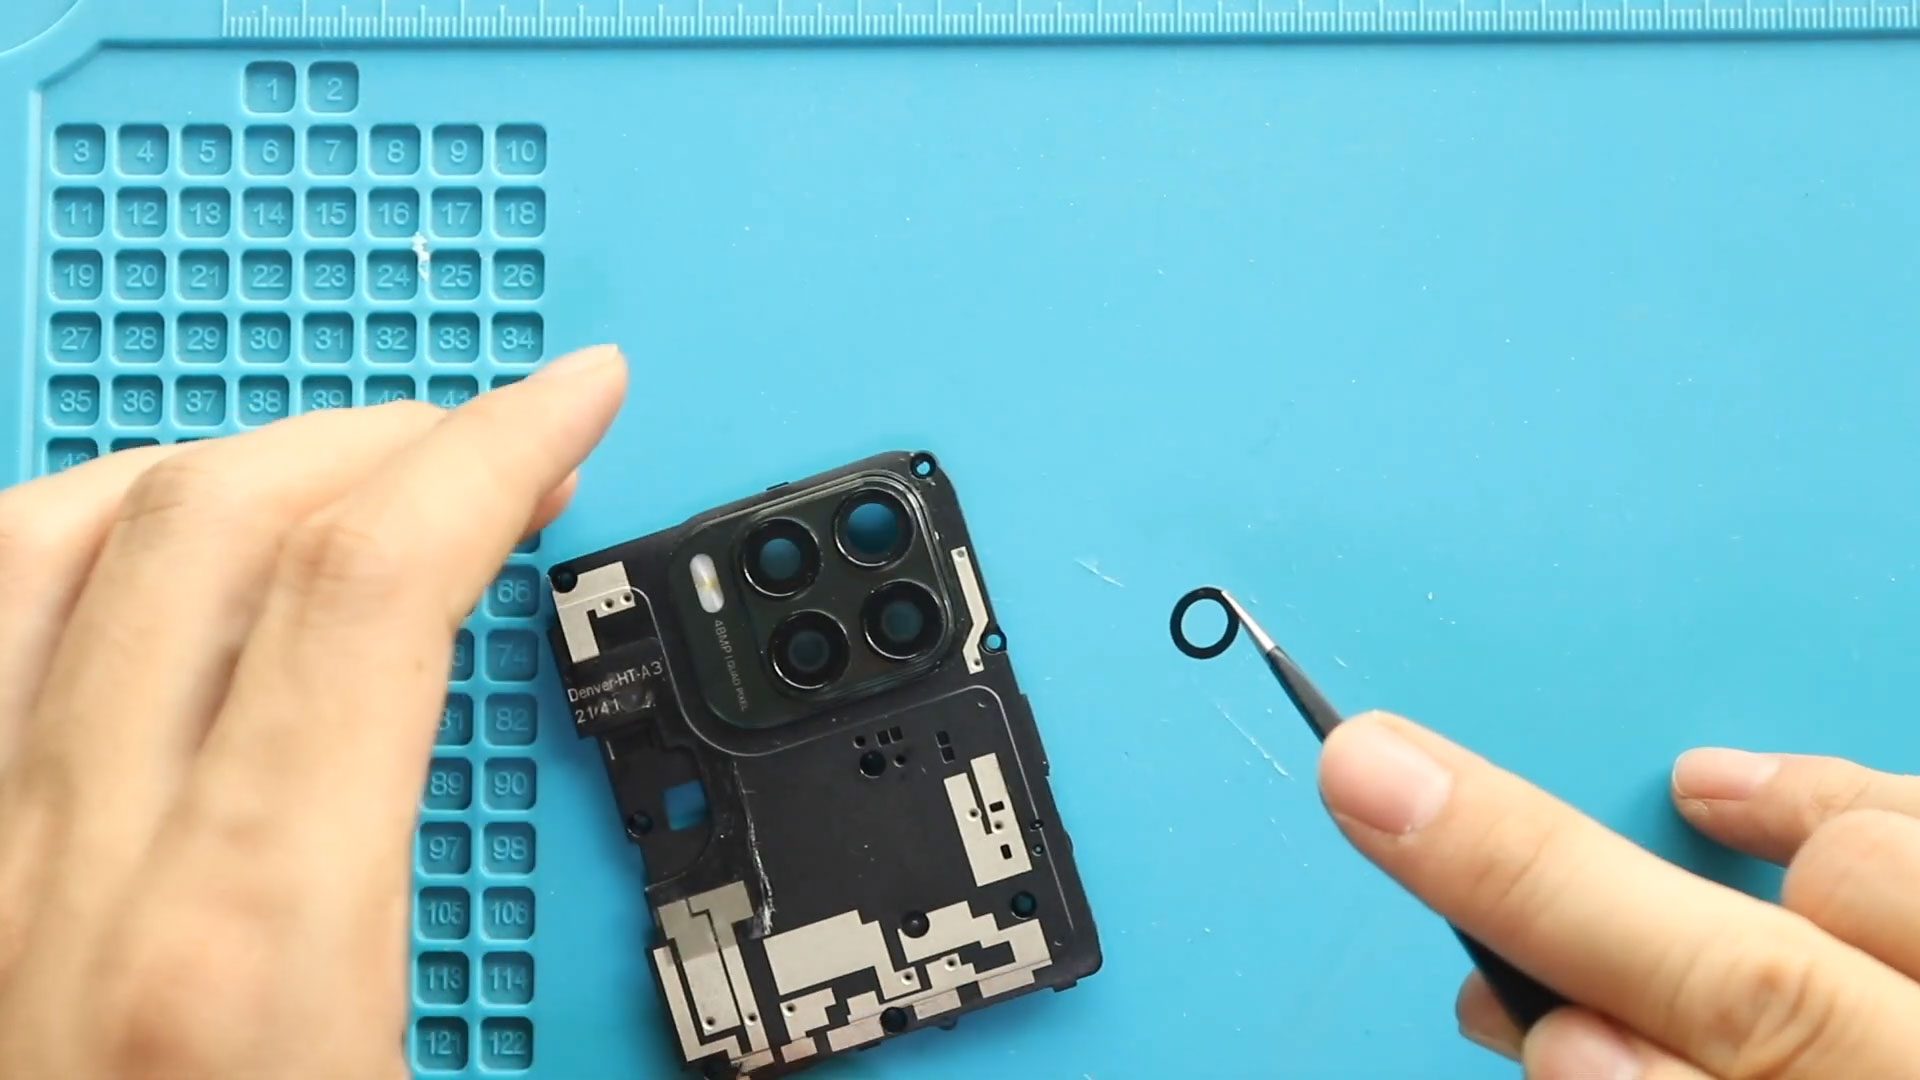
Step 3: Remove Broken Camera Lens Glass
Apply gentle heat directly to the broken camera lens glass.
This model has multiple (four) camera lens rings—identify the damaged one.
From the rear side, apply slight pressure to push out the broken glass.
⚠️ Be careful not to damage the camera module underneath.
Step 4: Install New Camera Lens Glass
Place the new camera lens ring with adhesive into position.
Ensure it is aligned properly and sits firmly in place.
Repeat the same process if multiple lens rings are damaged.
Step 5: Reassemble the Phone
Reinstall the logic board frame and tighten the eight screws.
Before closing:
- Check if the back cover adhesive is still good
- If not, apply B7000 glue or new adhesive
Press the back cover firmly into place.
Use bonding clips or rubber bands to hold it until the adhesive sets.
Frequently Asked Questions (FAQ)
1. Can I replace only the lens glass without changing the camera?
Yes, this repair is specifically for the outer glass and does not require replacing the camera module.
2. Will image quality improve after replacement?
Yes, if the issue was caused by scratches or cracks on the lens glass.
3. Is this repair safe for beginners?
Yes, it’s one of the easier smartphone repairs, but careful handling is still required.
4. What happens if I damage the camera underneath?
You may need to replace the entire camera module, which is a more advanced repair.
5. Do I need glue for the new lens glass?
Most replacements come with adhesive, but extra glue (like B7000) ensures a secure fit.
🛠️ Troubleshooting (Q&A Format)
1. Camera still blurry after replacing lens
- Clean the inside of the lens glass
- Check for dust or fingerprints
- Ensure proper alignment
2. Lens glass not sticking properly
- Use additional adhesive
- Apply firm pressure
- Let it cure with clips or rubber bands
3. Dust inside camera after repair
- Reopen and clean with microfiber cloth
- Avoid working in dusty environments
4. Back cover not sealing properly
- Apply new adhesive
- Use pressure clips for better bonding
5. Camera not focusing
- Ensure lens glass is correctly seated
- Check for obstructions or adhesive residue
✅ Final Thoughts
That’s it! You’ve successfully replaced the camera lens glass on your Motorola Moto G Stylus 5G 🎉
This quick repair can save you money and restore your camera clarity without replacing expensive components. Take your time, follow the steps carefully, and you’ll get great results.
If this guide helped you, feel free to share it and help others fix their devices 👍
Related Guides
Other Moto G Stylus 5G Repair Guides