Now Reading: OnePlus Nord N200 5G Fingerprint Replacement Guide – DIY Repair
-
01
OnePlus Nord N200 5G Fingerprint Replacement Guide – DIY Repair
OnePlus Nord N200 5G Fingerprint Replacement Guide – DIY Repair
If your OnePlus Nord n200 5G has a non-functional fingerprint scanner, replacing the fingerprint flex cable is one of the most effective fixes. This guide walks you through the full process—from opening the phone all the way to reassembly—while keeping everything simple, practical, and beginner-friendly.
Replacing the fingerprint flex on the Nord N200 5G is a fast and simple repair—perfect for beginners and DIY repair enthusiasts. In this guide, I’ll walk you through the complete step-by-step process so you can restore the fingerprint functionality on your device.
Repair Overview
- Device Type: Android Smartphone
- Model: OnePlus Nord N200 5G
- Type of Repair: Fingerprint Replacement
Repair Difficulty ★★★★☆☆☆☆☆ (4/10 – Moderate)
Estimated Time Required : 15–20 Minutes
Reasons You May Need This Repair
You may need to replace the fingerprint flex cable if you notice:
- Fingerprint sensor not responding
- “Fingerprint hardware not available” error
- Biometric unlock fails randomly
- Fingerprint sensor only works intermittently
- Phone doesn’t detect sensor after a drop
- Sensor ribbon cable torn or bent
- Moisture or dust damage
- Sensor works but fails to connect internally
If you’re experiencing any of these problems, replacing the fingerprint flex is usually the most reliable solution.
Before You Begin
Compatibility and Model Numbers
- Oneplus Nord N200 5G
- Oppo A93 5G – Simliar Design (Can use Reference to repair)
This repair guide based on OnePlus N200 5G.
Model Numbers | DE2118, DE2117
Tools Required
- Mobile phone heating pad or hairdryer/heat gun
- Plastic pry tool / card pry
- Suction cups
- Phillips #00/#000 screwdrivers
- Torx T3 / T4 Screwdriver
- Flathead Screwdriver
- Tweezers (for connectors)
- B7000 glue or double-sided adhesive (for back cover)
- Rubber bands or bonding clips to secure the back cover
Using proper tools reduces the risk of damaging the phone.
How to Find Tools and Parts
- Heating pad – https://amzn.to/3H0tHzJ
- Portable Heat Gun – https://amzn.to/4mszih1
- Clamps https://amzn.to/3GYJT4w
- STREBITO 142 Piece Repair Tool Kit https://amzn.to/3UO1jUx
- Glue | Adhesive https://amzn.to/46exVxe
- Compatible Parts –
- Battery – https://amzn.to/3IgZ75c
- Screen – https://amzn.to/46iYhNy
- Other Parts – https://amzn.to/47Hh2N3
- Silicone Work Repair Mat https://amzn.to/45Emz5l
✅ Protect Your Oneplus Nord N200 5G
- Protector For The Screen https://amzn.to/4mcsLq9
- Best Rated Case https://amzn.to/46acCf2
Step-by-Step Fingerprint Flex Replacement Guide
Step 1. Power Off the Device
Always turn off your phone before starting any repair to avoid electrical damage or accidental short circuits.
Step 2. Heat the Back Cover
The back cover is secured with adhesive, so it must be softened first.
- Place it on a heating pad (back side down)
- Select the mobile heating option
Alternative:
Use a heat gun or hairdryer to warm the edges evenly.
Step 3. Remove the Back Cover
Once the adhesive is softened:
- Use a suction cup to create a small gap
- Insert a plastic pry tool or card
- Slide around the edges to separate the adhesive
Lift off the back cover carefully and place it aside.
Step 4. Remove the Midframe
- Eject and remove the SIM tray
- Unscrew all 17 screws securing the midframe
- Use a plastic tool to release all surrounding clips
- Lift the midframe gently from the device
Step 5. Disconnect the Battery & Fingerprint Plug
For safety and to prevent accidental shorting:
- Disconnect the battery connector
- Disconnect the fingerprint sensor connector
This isolates the components for safe removal.
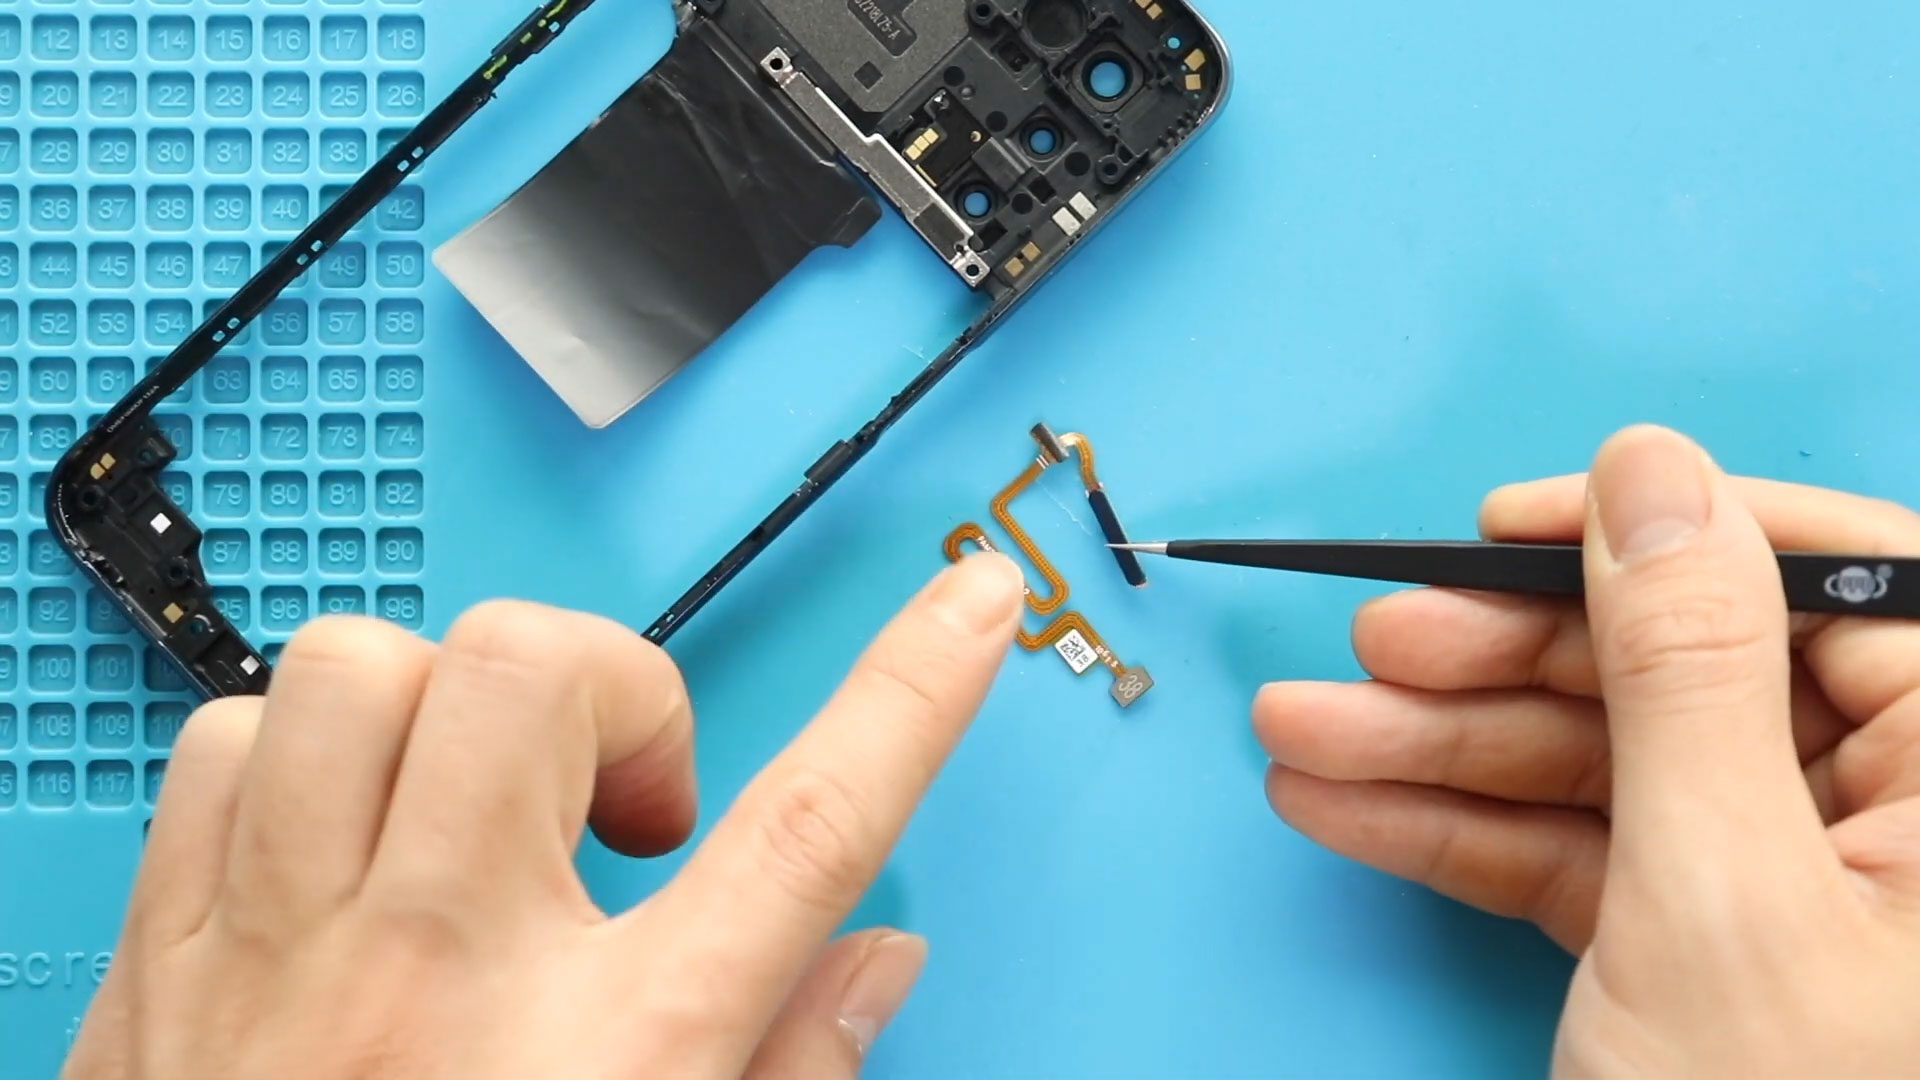
Step 6. Remove the Faulty Fingerprint Flex Cable
- Locate the fingerprint flex near the midframe area
- Carefully lift the adhesive securing the flex
- Remove the damaged fingerprint flex cable from its slot
Step 7. Install the New Fingerprint Flex
- Place the new fingerprint flex into its correct position
- Apply light pressure so the adhesive bonds properly
- Ensure the cable sits flat, without bends or twists
Step 8. Reconnect Battery & Fingerprint Connectors
Reconnect:
- The fingerprint flex plug
- The battery connector
Check that both are firmly seated.
Step 9. Reinstall the Midframe
- Align the midframe with the device
- Ensure all clips snap securely
- Reinstall all 17 screws
- Insert the SIM tray back in place
Step 10. Close the Back Cover
Check the adhesive:
- If it’s still strong, press the back cover into position
- If weak, apply B7000 glue or new double-sided adhesive
Use binding clips or rubber bands to maintain pressure while the adhesive cures.
Your Fingerprint Flex Replacement Is Complete!
Your OnePlus Nord N200 5G should now recognize fingerprints normally.
Test by adding a new fingerprint in the settings menu.
If this guide helped you, don’t forget to like, share, and subscribe to Geardo for more repair tutorials.
FAQ (Frequently Asked Questions)
Q1: Why isn’t my fingerprint sensor working even after replacing the flex?
You may need to re-seat the connector or restart the device. Also ensure that no dirt or adhesive is blocking the sensor.
Q2: Does replacing the fingerprint flex delete my saved fingerprints?
In most cases, yes. You’ll need to re-register your fingerprints after repair.
Q3: Can I reuse the old adhesive on the flex cable?
It’s better to rely on the new adhesive that comes pre-applied with the new flex, or add a small amount of B7000 if needed.
Q4: My phone shows “Fingerprint hardware not available.” What should I do?
- Recheck the connector
- Restart the device
- Make sure the new flex is the correct model for the Nord N200 5G
Troubleshooting Guide
Q1: Phone not turning on after reassembly.
- Battery connector may not be securely attached
- A cable may be trapped under the midframe
- Disconnect and reconnect the battery again
Q2: Fingerprint sensor still not responding.
- Check for dust between the sensor and back cover
- Ensure the fingerprint flex is seated flat
- Try clearing fingerprint data and re-registering
Q3: Back cover not closing properly.
- Remove any leftover adhesive residue
- Add new adhesive
- Use binding clips longer for a secure seal
Q4: Midframe clips not locking.
- Ensure the midframe is aligned evenly
- Check if any flex cables are preventing the frame from sitting flat
Replacing the fingerprint flex on your OnePlus Nord N200 is a moderate-level repair that can significantly restore your phone’s fingerprint recognition and security functionality. With patience, proper heating, and careful disassembly, this repair can be completed successfully at home.
Related Guides