
Now Reading: Power Button Fingerprint Replacement Guide – Xiaomi Mi 11i / 11i Hypercharge 5G / Redmi Note 11 Pro 5G
-
01
Power Button Fingerprint Replacement Guide – Xiaomi Mi 11i / 11i Hypercharge 5G / Redmi Note 11 Pro 5G
Power Button Fingerprint Replacement Guide – Xiaomi Mi 11i / 11i Hypercharge 5G / Redmi Note 11 Pro 5G
A faulty power button or fingerprint sensor can significantly affect everyday smartphone usability. Problems such as the device not locking or waking properly, fingerprint recognition failure, or buttons becoming unresponsive are often caused by worn flex cables or internal damage due to drops or moisture exposure.
In this repair guide, we will show you how to replace the power button and fingerprint sensor flex cable assembly on Xiaomi Redmi Note 11 Pro 5G, Xiaomi 11i, and Xiaomi 11i Hypercharge 5G smartphones.
These devices feature a side-mounted fingerprint scanner integrated directly into the power button flex cable, requiring internal disassembly to access and replace the component safely.
New Xiaomi Phone are in Clearance – https://amzn.to/3PbNsYs
Repair Overview
Device Type: Smartphone
Repair Type: Power Button & Fingerprint Sensor Replacement
Repair Difficulty: ⭐⭐⭐⭐☆ (Moderate to Advanced Repair)
Estimated Repair Time: 35 — 50 Minutes
Reasons for Power Button or Fingerprint Replacement
You may need this repair if you notice:
- Power button not responding or sticking.
- Fingerprint sensor not detecting fingerprints.
- Device not waking or locking properly.
- Fingerprint option missing from settings.
- Button working intermittently.
- Damage caused by water exposure or accidental drops.
Before You Begin
Compatibility and Model Numbers
- Xiaomi 11i
- Xiaomi 11i Hypercharge 5G
- Redmi Note 11 Pro+ 5G
Model Numbers : 21091116UI, MZB0A55IN, 21091116UG, 21091116UC, MZB0A5EIN
Tools Required
- Mobile phone heating pad or hairdryer/heat gun
- Plastic pry tool / card pry
- Suction cups
- Phillips #00/#000 screwdrivers
- Torx (T2/T3/T4) screwdrivers (Depends on the Region)
- Flathead screwdriver
- Tweezers (for connectors)
- B7000 glue or double-sided adhesive (for back cover)
- Rubber bands or bonding clips to secure the back cover
How to Find Tools and Parts
- Heating pad – https://amzn.to/3H0tHzJ
- Portable Heat Gun – https://amzn.to/4mszih1
- Clamps https://amzn.to/3GYJT4w
- STREBITO 142 Piece Repair Tool Kit https://amzn.to/3UO1jUx
- Glue | Adhesive https://amzn.to/46exVxe
- Silicone Work Repair Mat https://amzn.to/45Emz5l
Xiaomi Redmi Note 11 Pro 5G Power Button & Fingerprint Replacement — Step-by-Step Guide
Step 1 — Power Off the Device
Turn off the phone completely before beginning the repair.
Remove the SIM tray and accessories if necessary.
Step 2 — Heat the Back Cover
The rear cover is sealed using adhesive.
Place the back cover side down on a heating pad and select the mobile phone heating option.
Allow the heating cycle to complete fully.
Alternatively, apply gentle heat using:
- Hairdryer
- Heat gun.
Heat evenly around the edges.
Step 3 — Remove the Back Cover
Use a suction cup to create a small gap between the frame and rear cover.
Insert a plastic pry card.
Carefully slide around the edges to separate adhesive.
Lift and remove the rear cover slowly.
Step 4 — Remove the Board Frame
Locate and remove the screws securing the upper board frame.
Carefully lift the frame away and keep screws organized.
Step 5 — Disconnect and Remove the Battery
Disconnect battery connectors using a plastic pry tool.
Loosen battery adhesive strips carefully.
Pull adhesive tabs slowly and lift the battery gently.
If adhesive resists removal, apply mild heat underneath to soften glue.
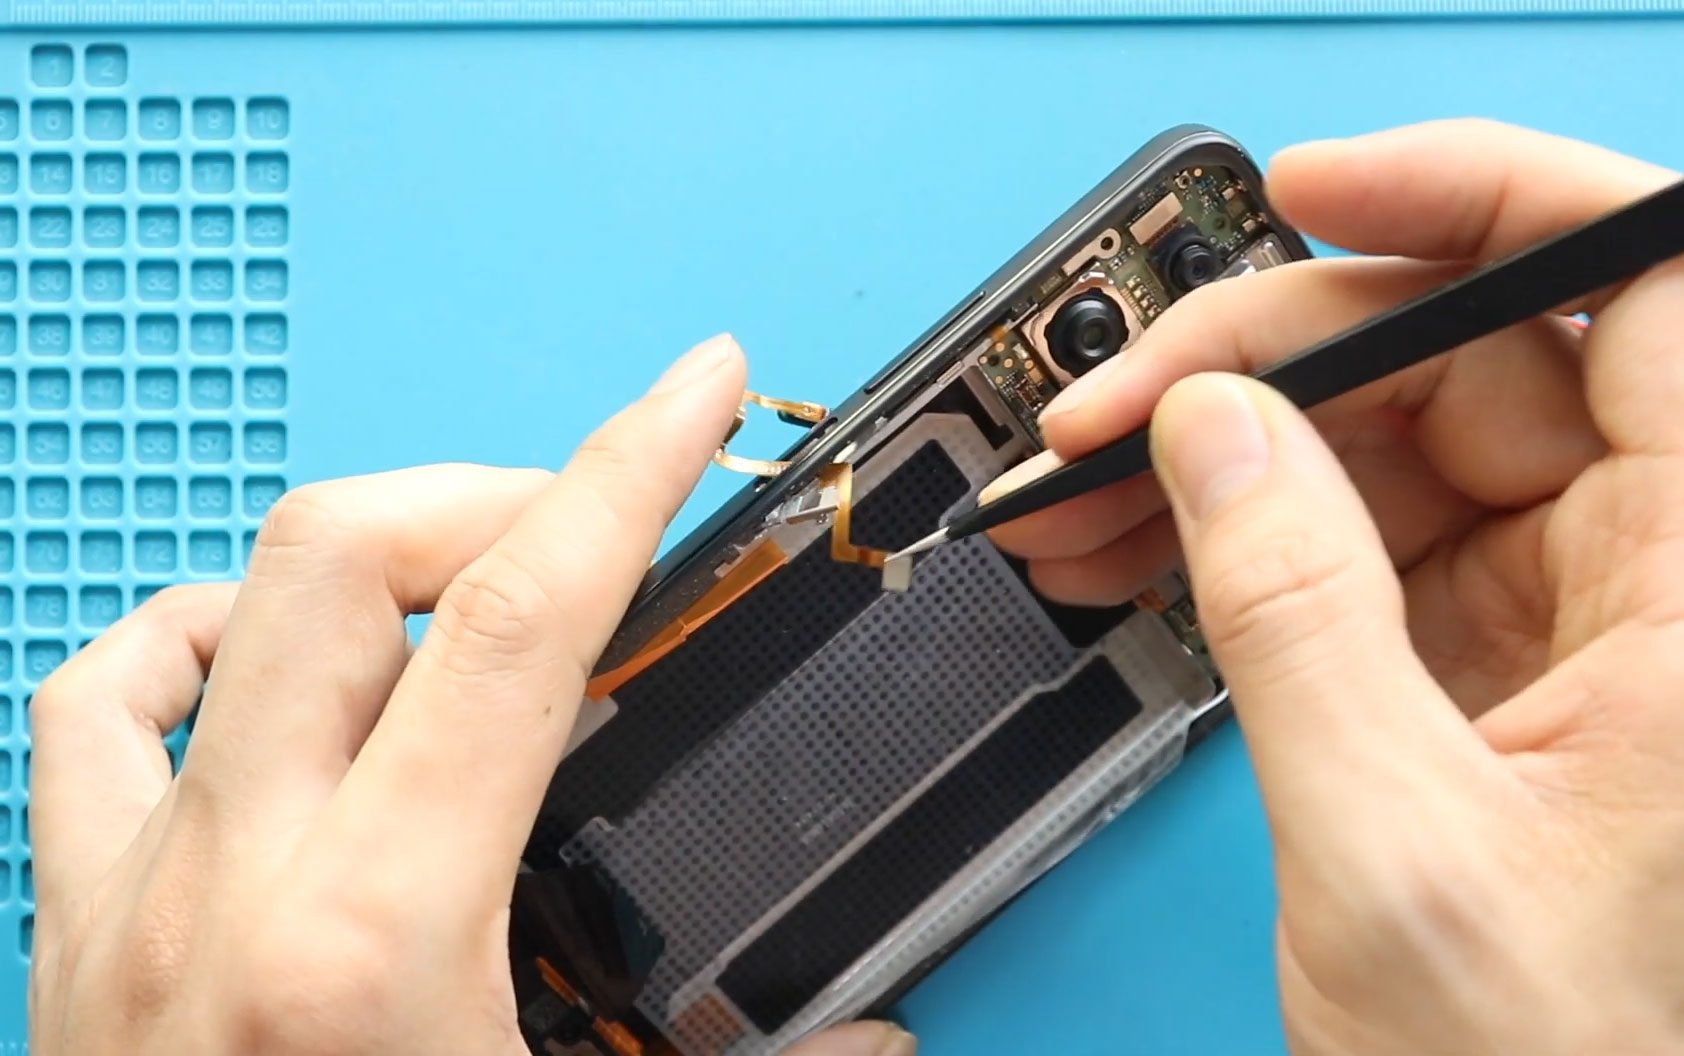
Step 6 — Remove the Faulty Power Button & Fingerprint Flex
Locate the side-mounted power button and fingerprint flex cable.
Apply gentle heat around the frame area to soften adhesive securing the flex.
Carefully peel the flex cable away from the frame using tweezers or a plastic tool.
Gently route the cable through its opening and remove the faulty assembly.
Avoid tearing or bending nearby cables.
Step 7 — Install the New Power Button & Fingerprint Assembly
Route the replacement flex cable through the frame opening.
Align the power button properly with the external button cutout.
Secure adhesive areas carefully.
Ensure the fingerprint connector sits correctly for motherboard connection.
Step 8 — Reinstall the Battery
Place the battery back into position.
Secure adhesive properly.
Reconnect battery connectors securely.
Step 9 — Reinstall the Board Frame
Place the board frame back into position.
Secure it using the screws removed earlier.
Step 10 — Test Before Closing
Power on the device before sealing the back cover.
Check:
- Power button functionality.
- Fingerprint registration.
- Screen wake and lock response.
Testing avoids reopening the device later.
Step 11 — Reattach the Rear Cover
Check adhesive condition.
If required:
- Apply B7000 glue, or
- Install new adhesive strips.
Press the rear cover evenly.
Use bonding clips or rubber bands to maintain pressure while adhesive cures.
Frequently Asked Questions (FAQ)
Q1. Why is my fingerprint sensor not detected?
The flex cable may be damaged or disconnected internally.
Q2. Can a damaged power button affect fingerprint unlocking?
Yes. Both functions are integrated into the same flex cable assembly.
Q3. Is heating required during this repair?
Yes. Heating softens adhesive and prevents flex cable damage.
Q4. Will replacing the fingerprint sensor erase data?
No. Personal data remains safe during this repair.
Q5. Can beginners perform this repair?
Yes, but careful adhesive removal and cable routing are required.
Troubleshooting (After The Repair)
Q1. Fingerprint sensor not working after replacement?
Reconnect the flex cable properly and restart the device.
Q2. Power button feels loose?
Check alignment inside the frame before sealing the back cover.
Q3. Phone not turning on?
Check battery connectors and charge the device before testing again.
Q4. Fingerprint option missing in settings?
Restart the device and verify flex cable connection.
Q5. Back cover not sealing properly?
Remove old adhesive residue and apply fresh adhesive or B7000 glue.
Related Guides


