
Now Reading: Samsung Galaxy A11 Earpiece Speaker Replacement Guide (Galaxy M11)
-
01
Samsung Galaxy A11 Earpiece Speaker Replacement Guide (Galaxy M11)
Samsung Galaxy A11 Earpiece Speaker Replacement Guide (Galaxy M11)
If you are experiencing low call volume, distorted sound, or no audio during phone calls, the earpiece speaker inside your Samsung Galaxy A11 may be damaged or blocked by dust and debris. Everyday usage, moisture exposure, accidental drops, or long-term wear can cause the earpiece to fail gradually.
The good news is that replacing the earpiece speaker is a relatively straightforward repair compared to major component replacements. With the correct tools and careful handling, you can restore clear call audio and extend the life of your device without expensive service costs.
This DIY repair guide explains how to safely replace the earpiece speaker using proper disassembly and reassembly techniques commonly followed for devices manufactured by Samsung Electronics.
Protect Your Galaxy A11
- Protector For The Screen https://amzn.to/4gcQxBg
- Best Rated Case https://amzn.to/45Tjoai
- Latest Samsung Phones are in Clearence https://amzn.to/4b9xBSM
Repair Difficulty ⭐⭐☆☆☆ (Easy to Moderate)
Estimated Repair Time: 20 — 30 Minutes
Device Type: Smartphone
Repair Type: Internal Earpiece Speaker Replacement
Reasons to Replace the Earpiece Speaker
You may need to replace the earpiece if you notice:
- Very low sound during phone calls
- Crackling or distorted audio
- No sound while calls are connected
- Audio cutting in and out
- Water or dust damage affecting sound clarity
Replacing the earpiece restores proper call audio quality and improves everyday usability.
Before You Begin
Compatibility and Model Numbers
- Samsung Galaxy A11
- Samsung Galaxy M11
This repair guide based on Samsung Galaxy A11 Model.
Model Numbers | SM-A115F/DS, SM-A115F, SM-A115M, SM-A115M/DS, SM-A115U, SM-A115A, SM-A115AZ, SM-A115U1, SM-A115W, SM-A115AP, SM-S115DL, SM-M115F, SM-M115F/DSN, SM-M115M, SM-M115M/DS
Tools Required
- Mobile phone heating pad or hairdryer/heat gun
- Plastic pry tool / card pry
- Suction cups
- Phillips #00/#000 screwdrivers
- Flat Screwdriver (Handy For Connectors)
- Tweezers (for connectors)
- B7000 glue or double-sided adhesive (for back cover)
- Rubber bands or bonding clips to secure the back cover
Using proper tools reduces the risk of damaging the phone.
How to Find Tools and Parts
- Heating pad – https://amzn.to/3H0tHzJ
- Portable Heat Gun – https://amzn.to/4mszih1
- Clamps https://amzn.to/3GYJT4w
- STREBITO 142 Piece Repair Tool Kit https://amzn.to/3UO1jUx
- Glue | Adhesive https://amzn.to/46exVxe
- Compatible Parts –
- Battery – https://amzn.to/41FdUgG
- Screen – https://amzn.to/4mSDJT6
- Other Parts – https://amzn.to/4gkS88c
- Silicone Work Repair Mat https://amzn.to/45Emz5l
Samsung Galaxy A11 Earpiece Speaker Replacement — Step-by-Step Guide
Step 1 — Power Off and Remove SIM Tray
Turn off the phone completely before starting the repair to prevent electrical damage.
Remove the SIM tray using a SIM ejector tool.
Step 2 — Remove the Back Cover
Create a small opening gap near the SIM slot or charging port using a plastic pry card or opening pick.
Insert the tool carefully between the frame and back cover.
Move slowly around the edges to release the plastic clips securing the back panel.
⚠️ Lift gently because the fingerprint sensor cable is attached to the back cover.
Step 3 — Remove the Upper Shield
Locate the protective shield covering internal connectors.
Undo the screws securing the shield using a Phillips screwdriver.
Carefully lift and remove the shield.
Disconnect the battery connector before continuing.
Step 4 — Remove Secondary Cover
Remove the secondary internal cover by undoing the required screws.
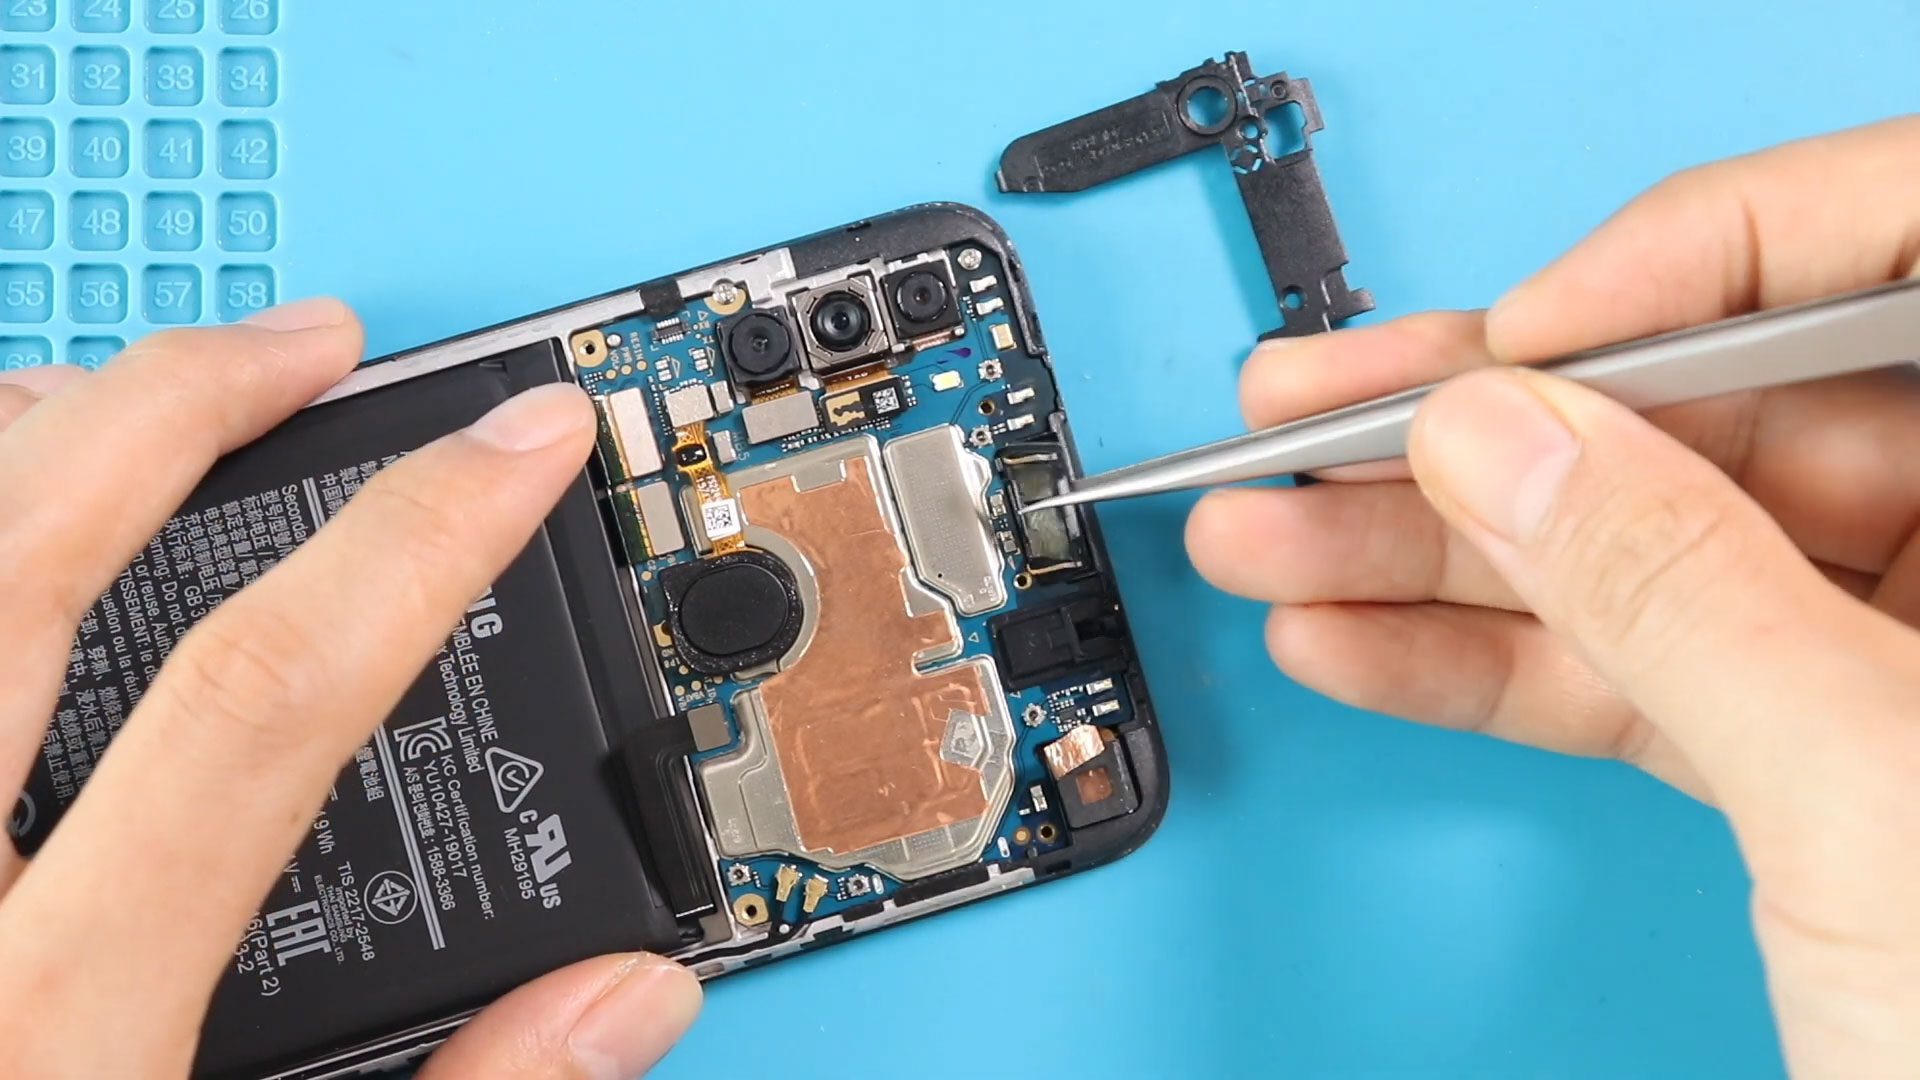
Lift the cover carefully to expose the earpiece speaker area.
Keep screws organized to avoid confusion during reassembly.
Step 5 — Remove the Faulty Earpiece Speaker
Locate the earpiece speaker near the top section of the device.
Gently lift the faulty earpiece using a plastic pry tool or tweezers.
If adhesive is present, apply a small amount of heat to soften it before removal.
Avoid damaging nearby flex cables.
Step 6 — Install the New Earpiece Speaker
Place the replacement earpiece speaker into its position.
Make sure it sits flat and properly aligned with the contact points.
Press gently to secure it.
Step 7 — Reinstall Secondary Cover
Place the secondary cover back into position.
Secure it using the screws removed earlier.
Check cable routing before tightening completely.
Step 8 — Reinstall Shield
Reconnect the battery connector.
Place the protective shield back over the board.
Secure it using the screws.
Step 9 — Close the Device
Align the back cover with the frame carefully.
Press along all edges to snap the clips securely into place.
Insert the SIM tray.
Power on the device and test call audio quality.
Frequently Asked Questions (FAQ)
How do I know if my earpiece speaker is damaged?
If media sound works normally but you cannot hear callers clearly during phone calls, the earpiece speaker is likely faulty.
Can dust cause low call volume?
Yes. Dust buildup inside the earpiece mesh can block sound output. Cleaning may help, but replacement is often required for severe blockage.
Is heat necessary for this repair?
Usually only minimal heat is required if adhesive holds the earpiece or internal covers.
Will replacing the earpiece erase my data?
No. This repair does not affect stored data. However, backing up important files is always recommended.
Can beginners perform this repair?
Yes. Compared to screen or motherboard repairs, this procedure is beginner-friendly if done carefully.
Troubleshooting After Earpiece Replacement
No sound during calls after repair
Check whether the internal covers and connectors are properly secured.
Sound is still low
Inspect the earpiece mesh opening for dust or debris blocking sound output.
Phone not powering on
Confirm the battery connector was reconnected before closing the device.
Back cover not snapping properly
Check cable placement and confirm no components are sitting unevenly.
Related Guides
Check Other Samsung Galaxy A11 Guides


-
 01Samsung Galaxy A16 5G Battery Replacement | Full DIY Repair Guide
 -
02Samsung Galaxy A16 5G Screen Replacement | Step-by-Step Guide
-
03Google Pixel 6 Power Button Replacement Guide | Volume Button Flex Repair Guide- DIY Repair
-
04Samsung Galaxy A16 5G Back Cover & Camera Lens Frame Replacement Guide | DIY Repair
-
05Why a Heating Pad Is Essential for Mobile Phone Repairs (And How to Use it)
-
06How to Use a Heat Gun or Hair Dryer for Phone/Tablet Repairs
-
07Essential Repair Tools for Phone, Tablet & Laptop Repairs


