Now Reading: Samsung Galaxy A52 5G Teardown | Screen Replacement Guide
-
01
Samsung Galaxy A52 5G Teardown | Screen Replacement Guide

If you want to perform screen replacement, battery replacement, or other internal repairs on the Samsung Galaxy A52 5G, a proper teardown of the device is essential. This guide walks you through carefully disassembling the phone to access all internal components.
⚠️ Note: This is a full teardown guide. It can be used as a foundation for screen replacement with frame, battery replacement, charging port repair, camera module replacement, or motherboard repairs.
Repair Difficulty
Device Type: Smartphone
Type of Repair: Full Tear Down / Disassembly
Repair Difficulty: ⭐⭐⭐⭐☆ (Moderate to Advanced)
Estimated Time: 60–90 Minutes
Reasons to Perform a Full Tear Down
- Screen replacement with frame
- Battery replacement
- Charging port repair
- Microphone or speaker repair
- Camera module replacement
- Logic board inspection or repair
- Vibrator motor replacement
A full teardown gives you access to all components and ensures safe repairs without damaging connectors or modules.
Before You Begin
Compatibility and Model Numbers
- Samsung Galaxy A52 5G
- Samsung Galaxy A52
- Samsung Galaxy A52s 5G
This repair guide based on Samsung Galaxy A52 5G Model.
Model Numbers | SM-A525F, SM-A525F/DS, SM-A525M, SM-A525M/DS, SM-A526B, SM-A526B/DS, SM-A5260, SM-A526W, SM-A526U, SM-A526U1, SM-A528B, SM-A528B/DS, SM-A528N
Tools Required
- Mobile phone heating pad or hairdryer/heat gun
- Plastic pry tool / card pry
- Suction cups
- Phillips #00/#000 screwdrivers
- Tweezers (for connectors)
- B7000 glue or double-sided adhesive (for back cover)
- Rubber bands or bonding clips to secure the back cover
Using proper tools reduces the risk of damaging the phone.
How to Find Tools and Parts
- Heating pad – https://amzn.to/3H0tHzJ
- Portable Heat Gun – https://amzn.to/4mszih1
- Clamps https://amzn.to/3GYJT4w
- STREBITO 142 Piece Repair Tool Kit https://amzn.to/3UO1jUx
- Glue | Adhesive https://amzn.to/46exVxe
- Compatible Parts –
- Battery – https://amzn.to/4fSiTAz
- Screen – https://amzn.to/45RzEY3
- Other Parts – https://amzn.to/3HrvhuG
- Silicone Work Repair Mat https://amzn.to/45Emz5l
Protect Your Samsung Galaxy A52 5G
- Protector For The Screen https://amzn.to/3VcdiLJ
- Best Rated Case https://amzn.to/4mzbjNU
Step-by-Step Samsung Galaxy A52 5G Teardown
Step 1: Power Off and Remove SIM Tray
Turn off the device completely.
Remove the SIM tray using a SIM ejector tool.
Step 2: Heat and Remove the Back Cover
- Gently heat around the edges using a heating pad, heat gun, or hairdryer.
- This softens the adhesive securing the back cover.
- Use a suction cup to create a small gap.
- Insert a plastic card or pry tool to cut the adhesive around the edges.
- Lift and remove the back cover carefully.
Step 3: Remove Main Board Frame
- Unscrew the 10 screws securing the mainboard protector frame.
- Lift the frame using a pry tool.
- Set it aside safely.
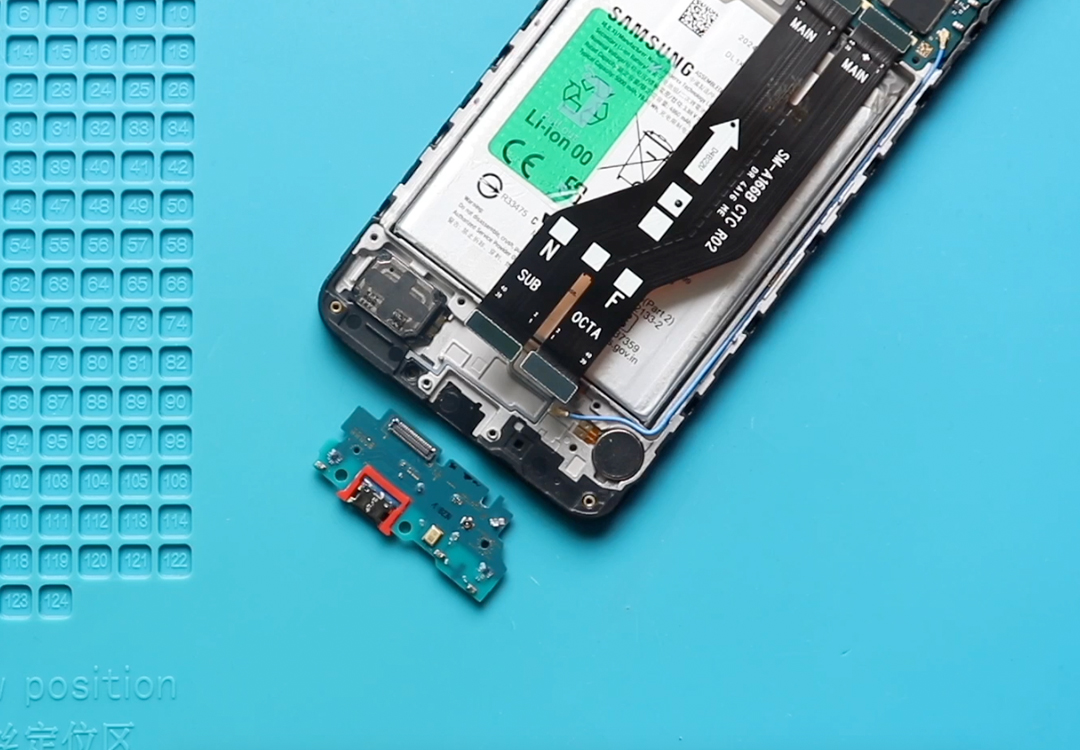
Step 4: Disconnect Battery and Remove Logic Board
- Disconnect the battery connector from the left-hand side.
- Remove the screw securing the logic board.
- Disconnect the main flex cable and antenna connectors.
- Carefully lift and remove the logic board using a plastic pry tool.
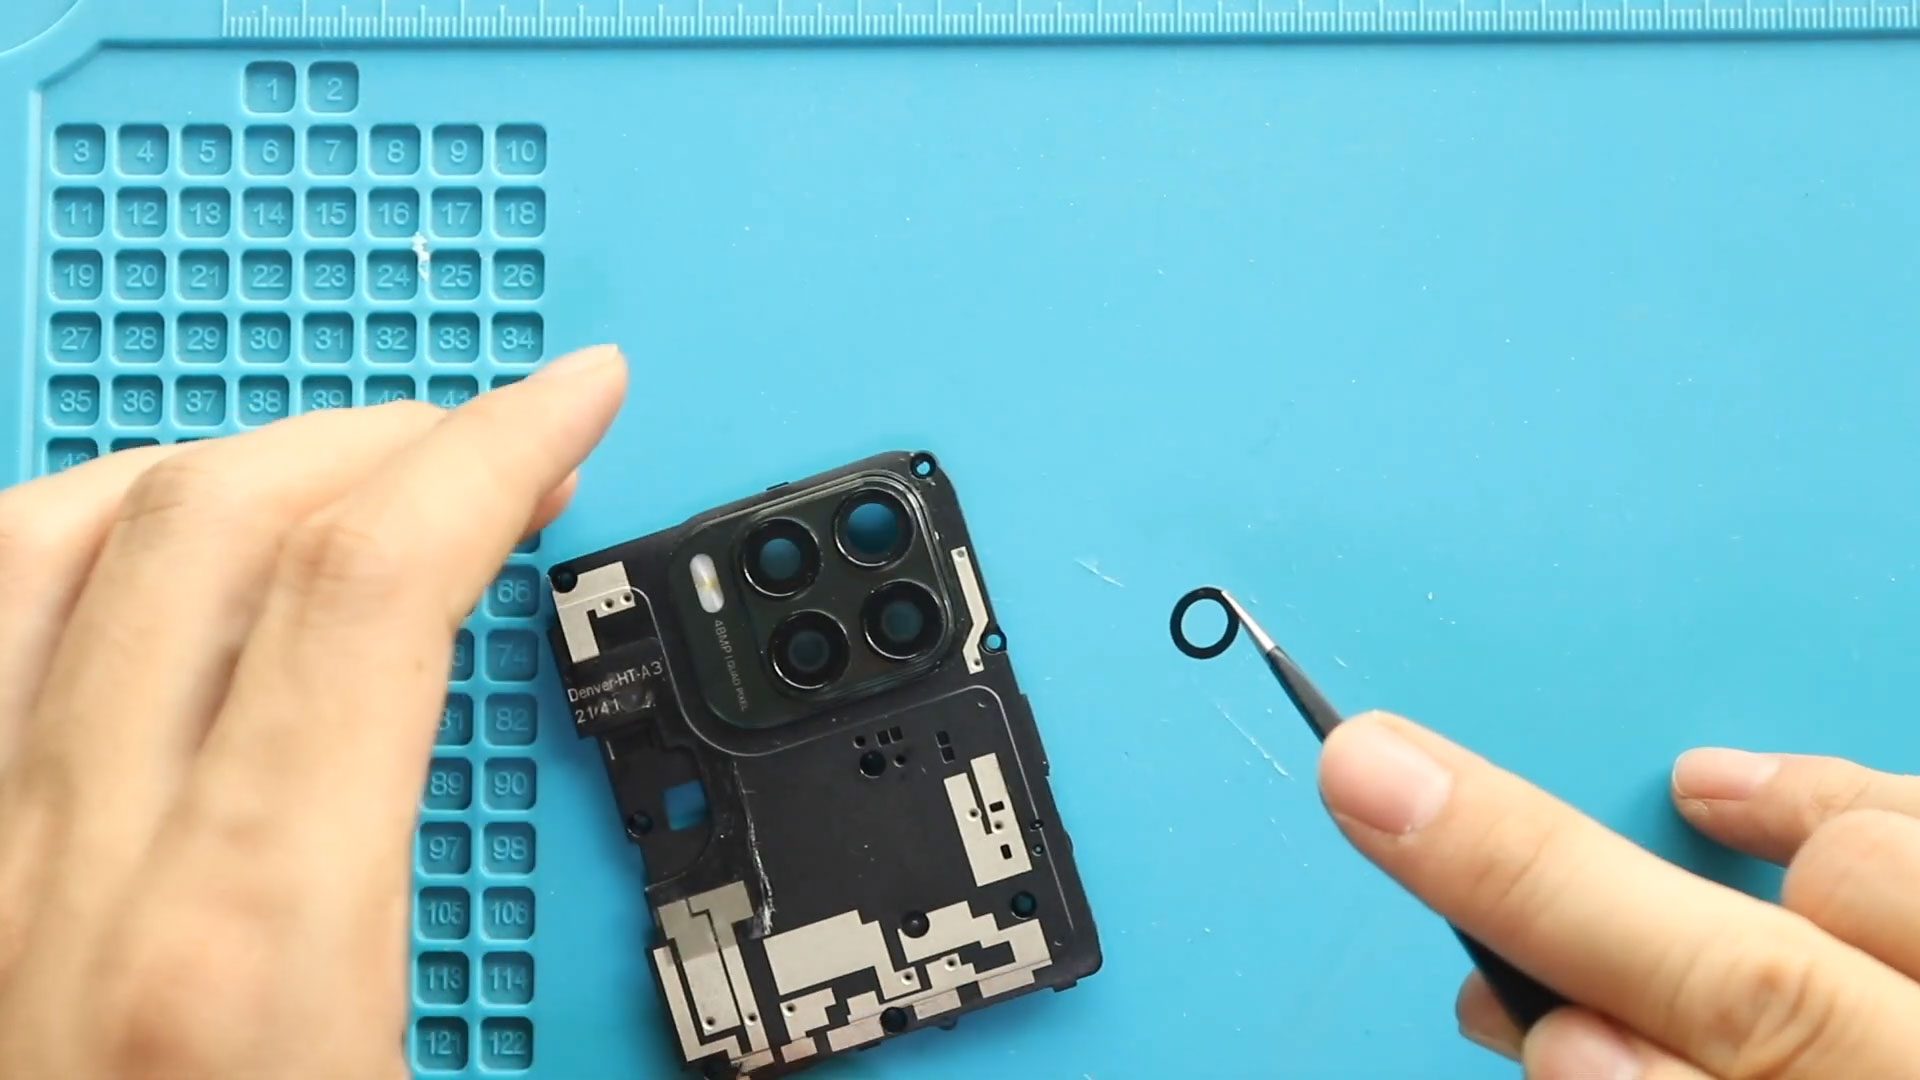
Step 5: Remove Camera Modules
Front Side of Logic Board:
- Disconnect and remove the front, macro, and depth cameras.
Rear Side of Logic Board:
- Disconnect and remove the main rear and ultra-wide cameras.
Step 6: Remove Bottom PCB Cover
- Move to the bottom section.
- Remove 6 screws securing the PCB cover.
- Lift and remove the cover carefully.
Step 7: Disconnect Bottom Components
- Remove the main ribbon cable.
- Disconnect and remove the touch ID sensor, rear camera connector, and both antennas.
Step 8: Remove Secondary Board
- Remove the screw securing the secondary board (includes charging port and headphone jack).
- Use a pry tool to carefully lift and remove the secondary board.
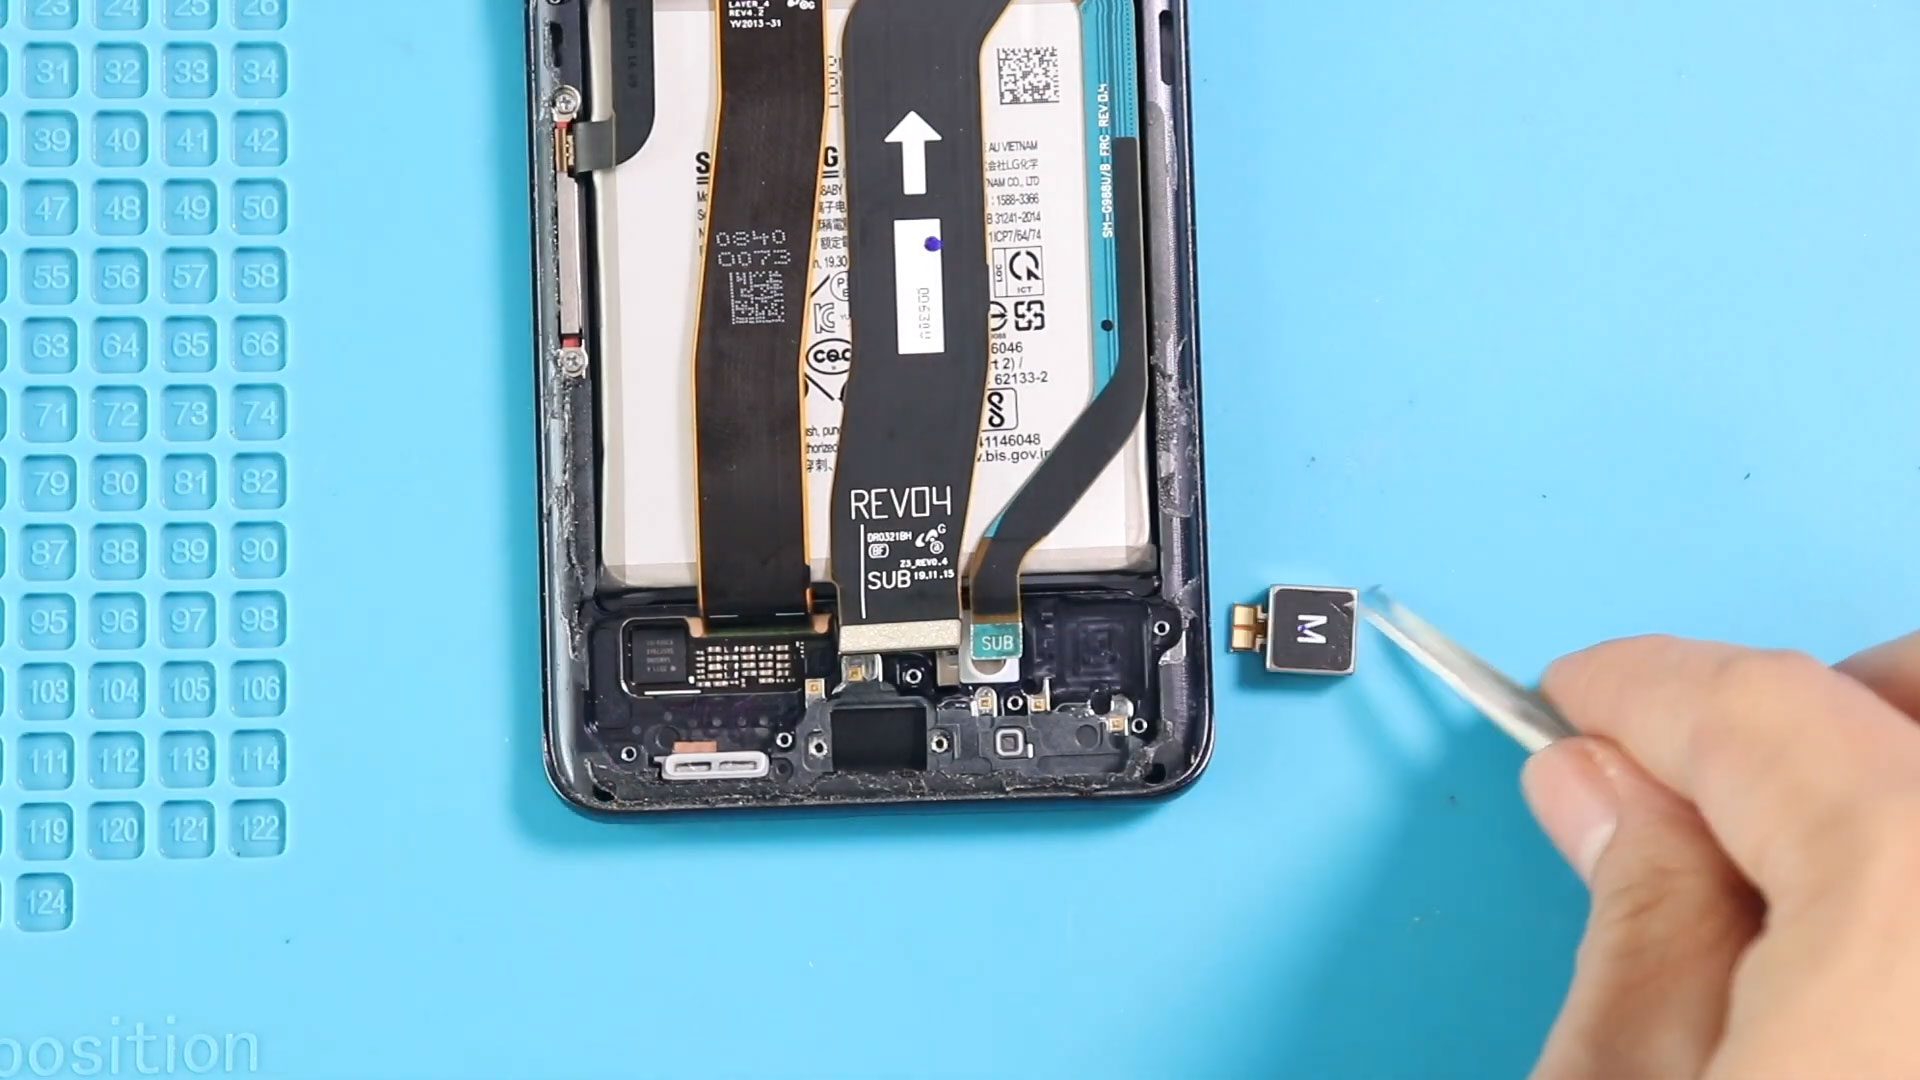
Step 9: Remove Vibrator Motor
- Apply slight heat around the vibrator motor area.
- Carefully lift and remove the vibrator.
Step 10: Remove the Battery
- Apply heat under the battery to soften the adhesive.
- Insert a plastic pry tool and carefully cut the adhesive.
- Lift and remove the battery gently using a pry tool.
⚠️ Be very gentle to avoid bending or puncturing the battery.
FAQ – Samsung Galaxy A52 5G Teardown
Q1: Can this teardown be used for screen replacement?
Yes. The full teardown allows safe removal of the screen with frame.
Q2: Will I lose data during this process?
No. This is a hardware disassembly guide; internal storage remains intact.
Q3: Do I need special tools for this teardown?
Yes. A heating pad, plastic pry tools, and precision screwdrivers are recommended to prevent damage.
Q4: Is this guide compatible with battery replacement?
Yes. The teardown fully exposes the battery for safe removal.
Q5: Can I reuse the back cover adhesive?
It is recommended to use new B7000 glue or double-sided adhesive for proper sealing.
Troubleshooting After Teardown
Q1: Device won’t turn on after reassembly.
Check that the battery and logic board connectors are properly seated.
Q2: Screen does not respond.
Ensure the display connectors are fully inserted and free from dust.
Q3: Components not working (camera, microphone, speaker).
Check that all flex cables are connected properly.
Q4: Back cover not sticking.
Apply fresh adhesive and secure with bonding clips or rubber bands for at least 30–60 minutes.
Conclusion
Performing a full teardown of the Samsung Galaxy A52 5G is essential for screen replacement, battery replacement, and other internal repairs. Following this guide ensures safe disassembly and protects delicate components, allowing you to repair or replace internal parts efficiently.
Other Guides
View Samsung Galaxy A51 Repair Guides