Now Reading: Samsung Galaxy A50 Camera Lens Glass Replacement | Back Cover Change Guide (Galaxy A50s)
-
01
Samsung Galaxy A50 Camera Lens Glass Replacement | Back Cover Change Guide (Galaxy A50s)
Samsung Galaxy A50 Camera Lens Glass Replacement | Back Cover Change Guide (Galaxy A50s)
Hi everyone, welcome back to Geardo!
If your Samsung Galaxy A50 or Galaxy A50s has a cracked back cover or damaged camera lens glass, it can affect both the appearance and camera performance of your device. A broken lens can lead to blurry photos, dust entering the camera module, or even further internal damage.
In this guide, we will show you how to replace the back cover and camera lens glass on the Samsung Galaxy A50. This method is also fully compatible with the Samsung Galaxy A50s, as both devices share a similar design.
This is a beginner-friendly guide, so follow along carefully to complete the repair safely.
Repair Overview
- Device Type: Smartphone
- Repair Type: Back Cover & Camera Lens Glass Replacement
Repair Difficulty: ⭐⭐☆☆☆ (Easy–Moderate)
Estimated Time: ⏱️ 30–45 minutes
Reasons for This Repair
- Cracked or scratched back cover
- Broken or shattered camera lens glass
- Blurry or hazy camera photos
- Dust entering the camera module
- Cosmetic damage affecting resale value
Before You Begin
Compatibility and Model Numbers
- Samsung Galaxy A50
- Samsung Galaxy A50s
This repair guide based on Samsung Galaxy A50 Model.
Model Numbers | SM-A505F, SM-A505FN, SM-A505GN, SM-A505G, SM-A505FM, SM-A505YN, SM-A505W, SM-A505X, SM-A505U, SM-A505GT, SM-A505U1, SM-A505G, SM-A505N, SM-S506DL, SM-A507F, SM-A507FN, SM-A5070
Tools Required
- Mobile phone heating pad or hairdryer/heat gun
- Plastic pry tool / card pry
- Suction cups
- Phillips #00/#000 screwdrivers
- Tweezers (for connectors)
- B7000 glue or double-sided adhesive (for back cover)
- Rubber bands or bonding clips to secure the back cover
Using proper tools reduces the risk of damaging the phone.
How to Find Tools and Parts
- Heating pad – https://amzn.to/3H0tHzJ
- Portable Heat Gun – https://amzn.to/4mszih1
- Clamps https://amzn.to/3GYJT4w
- STREBITO 142 Piece Repair Tool Kit https://amzn.to/3UO1jUx
- Glue | Adhesive https://amzn.to/46exVxe
- Compatible Parts –
- Battery – https://amzn.to/4fUSCSb
- Screen – https://amzn.to/4fUvjrC
- Other Parts – https://amzn.to/3ULpQtt
- Silicone Work Repair Mat https://amzn.to/45Emz5l
Step-by-Step Repair Guide
Step 1: Power Off the Device
Turn off your Galaxy A50 / A50s completely before starting.
Step 2: Heat the Back Cover
Gently heat around the edges of the back cover to soften the adhesive.
- Use a heating pad (mobile heating mode)
- Or use a heat gun / hairdryer
Step 3: Remove the Back Cover
- Use a suction cup to create a gap
- Insert a plastic pry tool or card
- Carefully slide around the edges to cut the adhesive
Step 4: Remove the Back Cover Completely
Carefully lift and remove the rear cover from the device.
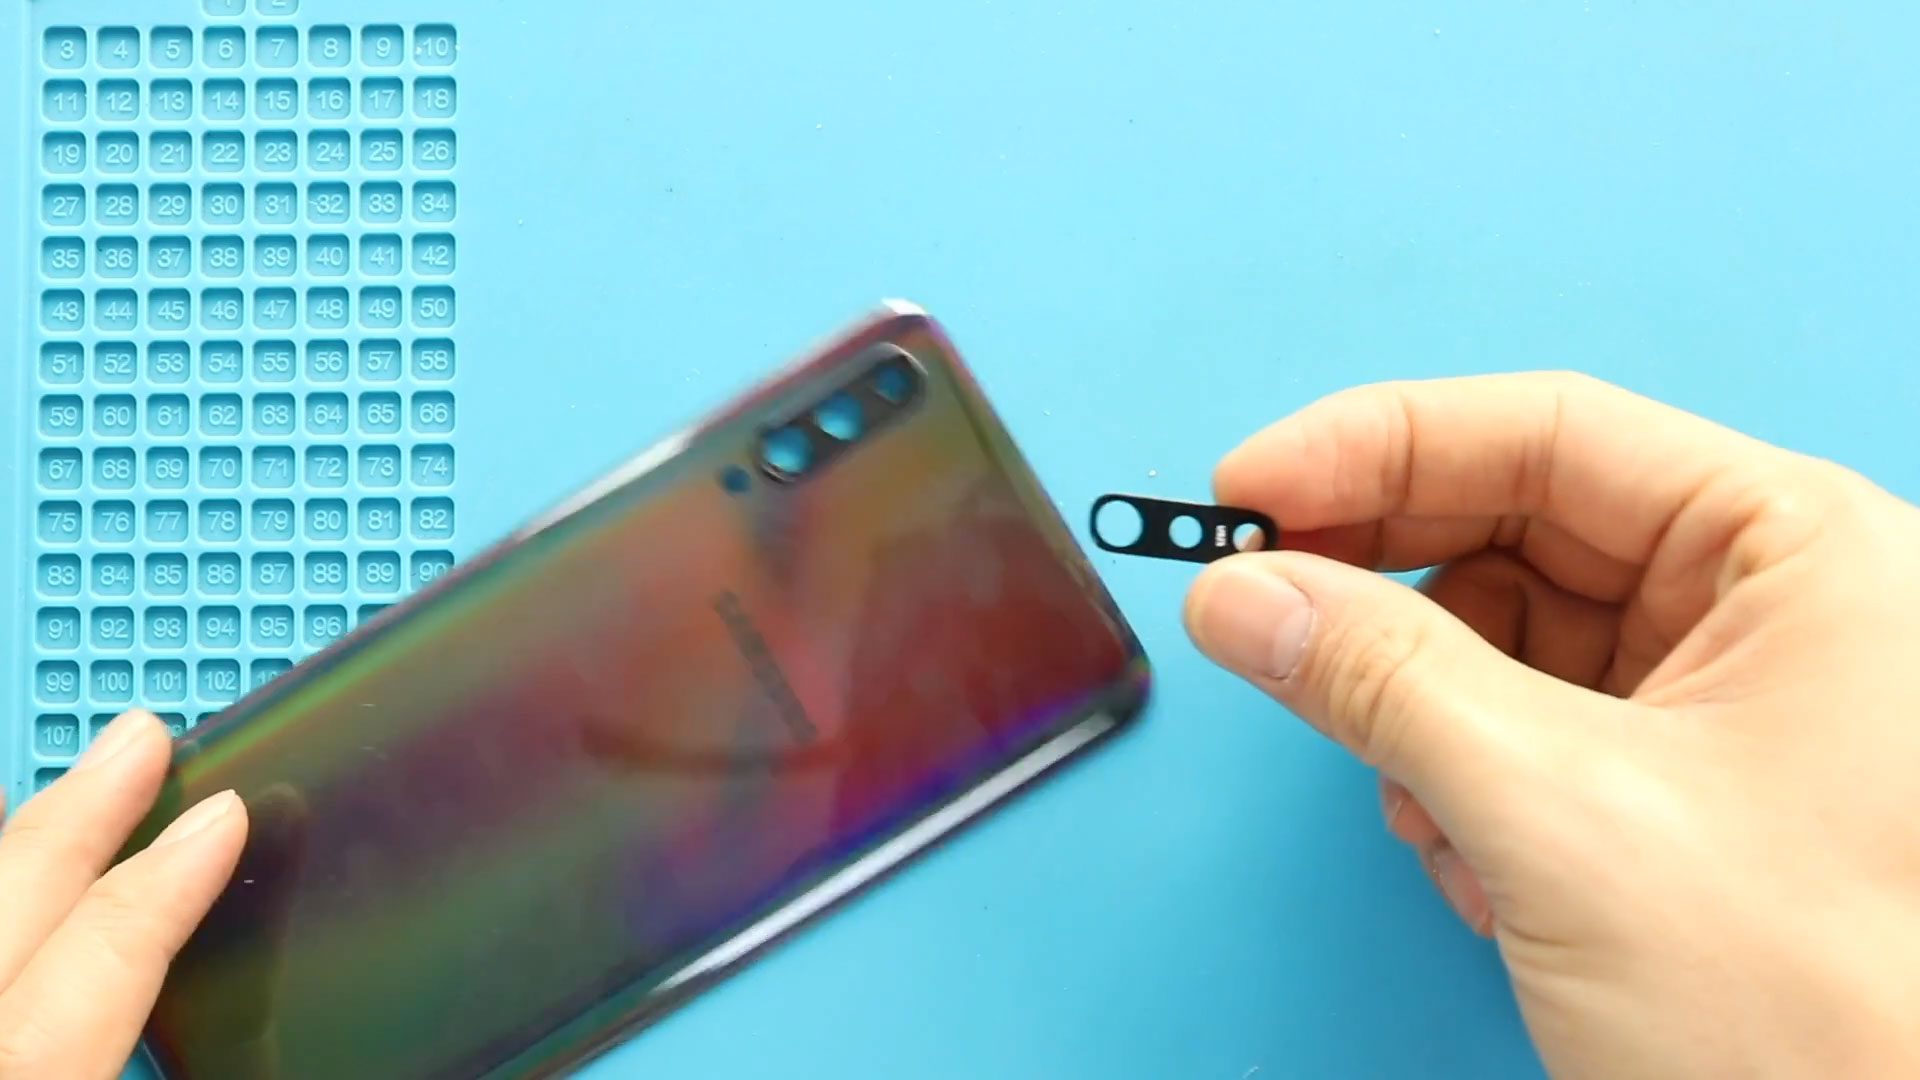
Step 5: Remove the Broken Camera Lens Glass
You have two repair options:
Option 1: Replace Only the Camera Lens Glass
- Apply slight heat from the front side of the lens
- Once adhesive softens, gently push from the rear side
- Remove the cracked glass
- Place the new lens using adhesive
Option 2: Replace Lens with Frame
- Apply heat from the rear side to loosen adhesive
- Gently push from the front side
- Remove the lens with frame
- Install the new lens frame with adhesive
💡 Tip: You can also purchase a back cover with pre-installed lens, which simplifies the process.
Step 6: Prepare the Back Cover
Before reinstalling, ensure:
- Adhesive is still usable
- Or apply new adhesive (B7000 or double-sided tape)
Step 7: Reinstall the Back Cover
- Align the back cover properly
- Press firmly along the edges
Step 8: Secure the Back Cover
- Use clips or rubber bands
- Leave it for some time to ensure proper bonding
FAQs (Frequently Asked Questions)
Q1: Is this guide compatible with Galaxy A50s?
Yes, both A50 and A50s have similar designs, so the same steps apply.
Q2: Can I replace only the camera lens without removing the back cover?
It’s possible but not recommended, as removing the back cover ensures a safer and cleaner repair.
Q3: Which option is better: lens only or lens with frame?
Replacing the lens with frame is easier and more reliable for beginners.
Q4: Will a cracked lens affect camera quality?
Yes, it can cause blurry images, glare, or dust inside the camera.
Q5: Do I need special adhesive?
B7000 glue or pre-cut adhesive strips work best.
Troubleshooting (After Repair)
Q1: Camera images still blurry
- Ensure lens is clean and properly installed
- Check for dust inside before sealing
Q2: Back cover not sticking properly
- Apply new adhesive
- Use clips or rubber bands for better bonding
Q3: Dust inside camera after repair
- Open and clean carefully before resealing
Q4: Lens not fitting properly
- Ensure correct model compatibility (A50/A50s)
- Re-align before adhesive sets
Q5: Adhesive not holding
- Use stronger adhesive like B7000
- Allow enough curing time
Final Thoughts
Replacing the back cover and camera lens glass on your Samsung Galaxy A50 or A50s is a simple and effective way to restore both the look and functionality of your device.
Take your time, follow each step carefully, and you’ll achieve a clean, professional result.
I hope you enjoyed this guide! If you have any questions, feel free to ask.
Related