- Mobile Phones
- Apple
- Samsung Galaxy
- Google PixelExplore step-by-step DIY repair guides for Google Pixel devices. From screen replacements to battery swaps, camera solutions to charging fixes and many more, learn how to repair your Pixel at home.”
- Motorola
- Stylus SeriesDiscover step-by-step repair guides for the Motorola G Stylus lineup. Follow clear instructions to replace damaged parts, stylus issues, resolve battery problems, screen problems and many more. Perfect for DIY users who want to keep their G Stylus working like new.
- G SeriesFind simple and clear DIY repair guides for Motorola G series phones. Including Moto G 5G, Moto G 4G devises from 2020 to 2025 and more. Learn how to fix charging, screen display, battery issues and many more using easy and trusted methods. Save money and time by repairing your Moto G device yourself.
- Play SeriesLearn how to repair your faulty Motorola G Play series smartphone with our easy DIY guides. Replace cracked screens, weak batteries, faulty charging ports and many more using step-by-step instructions. Perfect for Moto G Play users who want affordable fixes and lasting performance.
- Power SeriesFix your faulty Motorola G Power series phone with our detailed repair and troubleshooting guides. From battery replacements to screen and charging port to camera fixes and many more. follow simple DIY methods to restore performance and extend your Moto Power device’s life.
- Edge SeriesFix and maintain your Motorola Edge smartphone with our detailed DIY repair tutorials. Whether it’s the Edge 20, Edge 30, or the latest Edge+ model, learn how to replace screens, batteries, cameras, charging ports and more. Restore top performance and extend your phone’s life with easy and reliable repair steps.
- Other MotoLearn how to repair and maintain your Motorola Moto E , One, RAZR series smartphone with our easy DIY guides. Replace cracked screens, weak batteries, faulty charging ports and many more using step-by-step instructions.
- Xiaomi
- MI Series
- Redmi Note SeriesExplore our complete Redmi Note series DIY repair guides, covering popular models like Redmi Note 7, Note 8, Note 9, Note 10,Note 11,Note 12, and Note 13. Step-by-step tutorials show you how to replace screens, batteries, cameras, charging port and other components safely at home. Each guide includes easy-to-follow videos, tips, and tools needed, making it simple for DIY enthusiasts to fix their phones themselves. New models and repair tutorials are added regularly to keep your Redmi Note repair library up to date.
- Redmi SeriesDiscover our complete Redmi series DIY repair guides, including Redmi 8, 9, 10 and many more latest versions. Learn how to fix screens, replace batteries, repair cameras, change faulty charging ports and handle other common issues with step-by-step videos and instructions. Whether you’re a beginner or experienced DIYer, our tutorials make phone repairs simple and safe. New guides are added weekly to ensure you have the latest tips for all Redmi devices.
- Poco Series
- Mix Series
- OnePlus
- Nord SeriesFix your OnePlus Nord smartphone easily with our complete DIY repair guides. From screen, battery, charging port, camera and many more replacements to common issues. Follow simple instructions for Nord, Nord 2, Nord N100, and many other Nord models. Perfect for users who want affordable and reliable OnePlus Nord repairs at home.
- Flagship SeriesExplore detailed DIY repair guides for OnePlus flagship mobile phones. Devices including the OnePlus 6,7,8,9, 10, 11, and all latest models. Learn how to replace screens, fix charging issues, repair batteries and many more with clear, step-by-step tutorials. Keep your premium OnePlus performing like new with trusted repair methods.
- Tablets
- AppleiPhone Repair Guides
- iPad Air SeriesiPad Air Repair Guides
- iPad Pro SeriesiPad Pro Repair Guides
- iPad SeriesFind easy DIY repair tutorials for your Apple iPad. From screen and battery replacements to charging port fixes, DIYGeardo provides simple step-by-step guides, tool lists, and repair videos for all major iPad generations.
- Samsung Galaxy Tab
- Tab A SeriesRepair your Samsung Galaxy Tab A tablet with our simple repair guides. Whether it’s a broken screen, dead battery, charging issue or any other problem, follow our step-by-step tutorials and videos to restore your tablet’s full performance.
- Tab FE Series
- Tab S Series
- Microsoft SurfaceFind full DIY repair tutorials for Microsoft Surface devices. From Pro to Go and laptop models, learn how to replace screens, batteries, charging ports, power, flex cables and more with clear step-by-step instructions.
- Amazon Fire HDBroken or not-working Fire HD Tablet? Browse repair guides for Amazon Fire tablets. Step-by-step instructions to fix cracked screens, battery problems, charging and many more issues.
- Lenovo Tab
- Macbook
- Air M1 A2337Fix your MacBook Air M1 (A2337) using simple, tested repair methods. Our step-by-step tutorials cover screen, keyboard, touchpad, battery replacements and many more. DIY guides help you save time and money while keeping your M1 running like new.
- GamingOur gaming console repair section helps you fix controllers, Joy Con, Display, buttons, antenna and many more issues. Each guide includes detailed steps, repair tools, and safety notes so you can bring your console back to life without a technician.
- Nintendo SwitchFix your Nintendo Switch with simple DIY guides. Learn how to replace the screen, Joy-Con drift, battery, display and many more problems using our user friendly guides. Save time and restore your loved Nintendo switch today.
- Blog
- Contact
- AppleiPhone Repair Guides
Now Reading: DIY OPPO Find X2 Lite | Reno 3 5G Camera Lens Glass & Back Cover Repair Guide
-
01
DIY OPPO Find X2 Lite | Reno 3 5G Camera Lens Glass & Back Cover Repair Guide
- Mobile Phones//
- Apple//
- Samsung Galaxy//
- Google Pixel//Explore step-by-step DIY repair guides for Google Pixel devices. From screen replacements to battery swaps, camera solutions to charging fixes and many more, learn how to repair your Pixel at home.”
- Motorola//
- Stylus Series//Discover step-by-step repair guides for the Motorola G Stylus lineup. Follow clear instructions to replace damaged parts, stylus issues, resolve battery problems, screen problems and many more. Perfect for DIY users who want to keep their G Stylus working like new.
- G Series//Find simple and clear DIY repair guides for Motorola G series phones. Including Moto G 5G, Moto G 4G devises from 2020 to 2025 and more. Learn how to fix charging, screen display, battery issues and many more using easy and trusted methods. Save money and time by repairing your Moto G device yourself.
- Play Series//Learn how to repair your faulty Motorola G Play series smartphone with our easy DIY guides. Replace cracked screens, weak batteries, faulty charging ports and many more using step-by-step instructions. Perfect for Moto G Play users who want affordable fixes and lasting performance.
- Power Series//Fix your faulty Motorola G Power series phone with our detailed repair and troubleshooting guides. From battery replacements to screen and charging port to camera fixes and many more. follow simple DIY methods to restore performance and extend your Moto Power device’s life.
- Edge Series//Fix and maintain your Motorola Edge smartphone with our detailed DIY repair tutorials. Whether it’s the Edge 20, Edge 30, or the latest Edge+ model, learn how to replace screens, batteries, cameras, charging ports and more. Restore top performance and extend your phone’s life with easy and reliable repair steps.
- Other Moto//Learn how to repair and maintain your Motorola Moto E , One, RAZR series smartphone with our easy DIY guides. Replace cracked screens, weak batteries, faulty charging ports and many more using step-by-step instructions.
- Xiaomi//
- MI Series//
- Redmi Note Series//Explore our complete Redmi Note series DIY repair guides, covering popular models like Redmi Note 7, Note 8, Note 9, Note 10,Note 11,Note 12, and Note 13. Step-by-step tutorials show you how to replace screens, batteries, cameras, charging port and other components safely at home. Each guide includes easy-to-follow videos, tips, and tools needed, making it simple for DIY enthusiasts to fix their phones themselves. New models and repair tutorials are added regularly to keep your Redmi Note repair library up to date.
- Redmi Series//Discover our complete Redmi series DIY repair guides, including Redmi 8, 9, 10 and many more latest versions. Learn how to fix screens, replace batteries, repair cameras, change faulty charging ports and handle other common issues with step-by-step videos and instructions. Whether you’re a beginner or experienced DIYer, our tutorials make phone repairs simple and safe. New guides are added weekly to ensure you have the latest tips for all Redmi devices.
- Poco Series//
- Mix Series//
- OnePlus//
- Nord Series//Fix your OnePlus Nord smartphone easily with our complete DIY repair guides. From screen, battery, charging port, camera and many more replacements to common issues. Follow simple instructions for Nord, Nord 2, Nord N100, and many other Nord models. Perfect for users who want affordable and reliable OnePlus Nord repairs at home.
- Flagship Series//Explore detailed DIY repair guides for OnePlus flagship mobile phones. Devices including the OnePlus 6,7,8,9, 10, 11, and all latest models. Learn how to replace screens, fix charging issues, repair batteries and many more with clear, step-by-step tutorials. Keep your premium OnePlus performing like new with trusted repair methods.
- Tablets//
- Apple//iPhone Repair Guides
- iPad Air Series//iPad Air Repair Guides
- iPad Pro Series//iPad Pro Repair Guides
- iPad Series//Find easy DIY repair tutorials for your Apple iPad. From screen and battery replacements to charging port fixes, DIYGeardo provides simple step-by-step guides, tool lists, and repair videos for all major iPad generations.
- Samsung Galaxy Tab//
- Tab A Series//Repair your Samsung Galaxy Tab A tablet with our simple repair guides. Whether it’s a broken screen, dead battery, charging issue or any other problem, follow our step-by-step tutorials and videos to restore your tablet’s full performance.
- Tab FE Series//
- Tab S Series//
- Microsoft Surface//Find full DIY repair tutorials for Microsoft Surface devices. From Pro to Go and laptop models, learn how to replace screens, batteries, charging ports, power, flex cables and more with clear step-by-step instructions.
- Amazon Fire HD//Broken or not-working Fire HD Tablet? Browse repair guides for Amazon Fire tablets. Step-by-step instructions to fix cracked screens, battery problems, charging and many more issues.
- Lenovo Tab//
- Apple//iPhone Repair Guides
- Macbook//
- Air M1 A2337//Fix your MacBook Air M1 (A2337) using simple, tested repair methods. Our step-by-step tutorials cover screen, keyboard, touchpad, battery replacements and many more. DIY guides help you save time and money while keeping your M1 running like new.
- Gaming//Our gaming console repair section helps you fix controllers, Joy Con, Display, buttons, antenna and many more issues. Each guide includes detailed steps, repair tools, and safety notes so you can bring your console back to life without a technician.
- Nintendo Switch//Fix your Nintendo Switch with simple DIY guides. Learn how to replace the screen, Joy-Con drift, battery, display and many more problems using our user friendly guides. Save time and restore your loved Nintendo switch today.
- Blog//
- Contact//

DIY OPPO Find X2 Lite | Reno 3 5G Camera Lens Glass & Back Cover Repair Guide
![]() RCOppo Repair Guide, Oppo Reno Series, OPPO Find Series, Oppo Find X2 Lite 5G, Oppo Reno 3 5G2 years ago155 Views
RCOppo Repair Guide, Oppo Reno Series, OPPO Find Series, Oppo Find X2 Lite 5G, Oppo Reno 3 5G2 years ago155 Views
- Home
- Oppo Repair Guide
- Oppo Reno Series
- DIY OPPO Find X2 Lite | Reno 3 5G Camera Lens Glass & Back Cover Repair Guide
Before Starting, we need the right tools to proceed with the repair, which You can find in the description.
First, Take out the back cover from the body.
To remove the back cover, it needs to heat gently around the back cover edges until the pasted adhesive becomes soft.
For this, we are using a heating pad. Place the rear cover side on the heating pad. Select the mobile phone heating option and leave it till it completes. Alternatively, you can use a heat gun or hairdryer.
Once the heating completes, Use a suction cup to create an opening between the frame and rear cover. Next, insert a plastic card pry tool or something similar to cut the adhesive around the back cover.
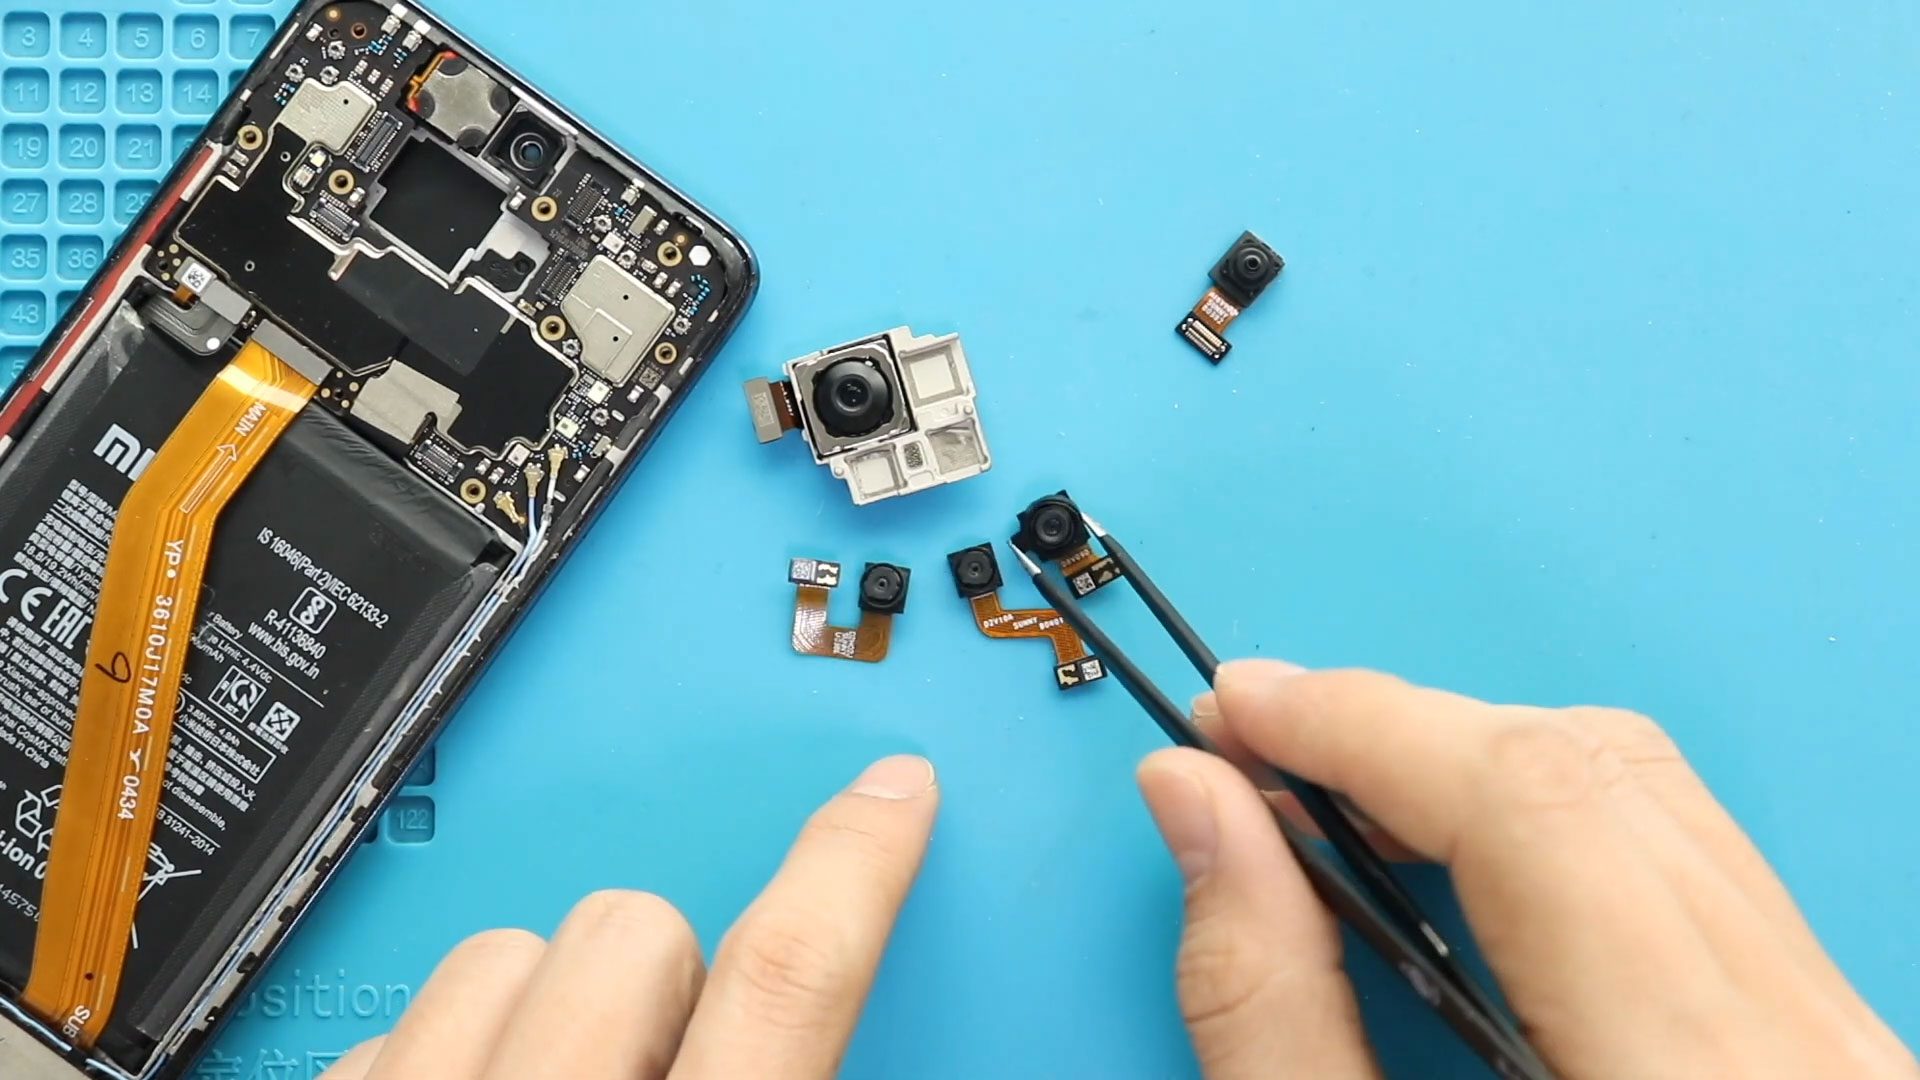
There are a few different replacement parts available for this repair. You can select the camera lens with the frame or lens without the frame or back cover with the camera lens installed.
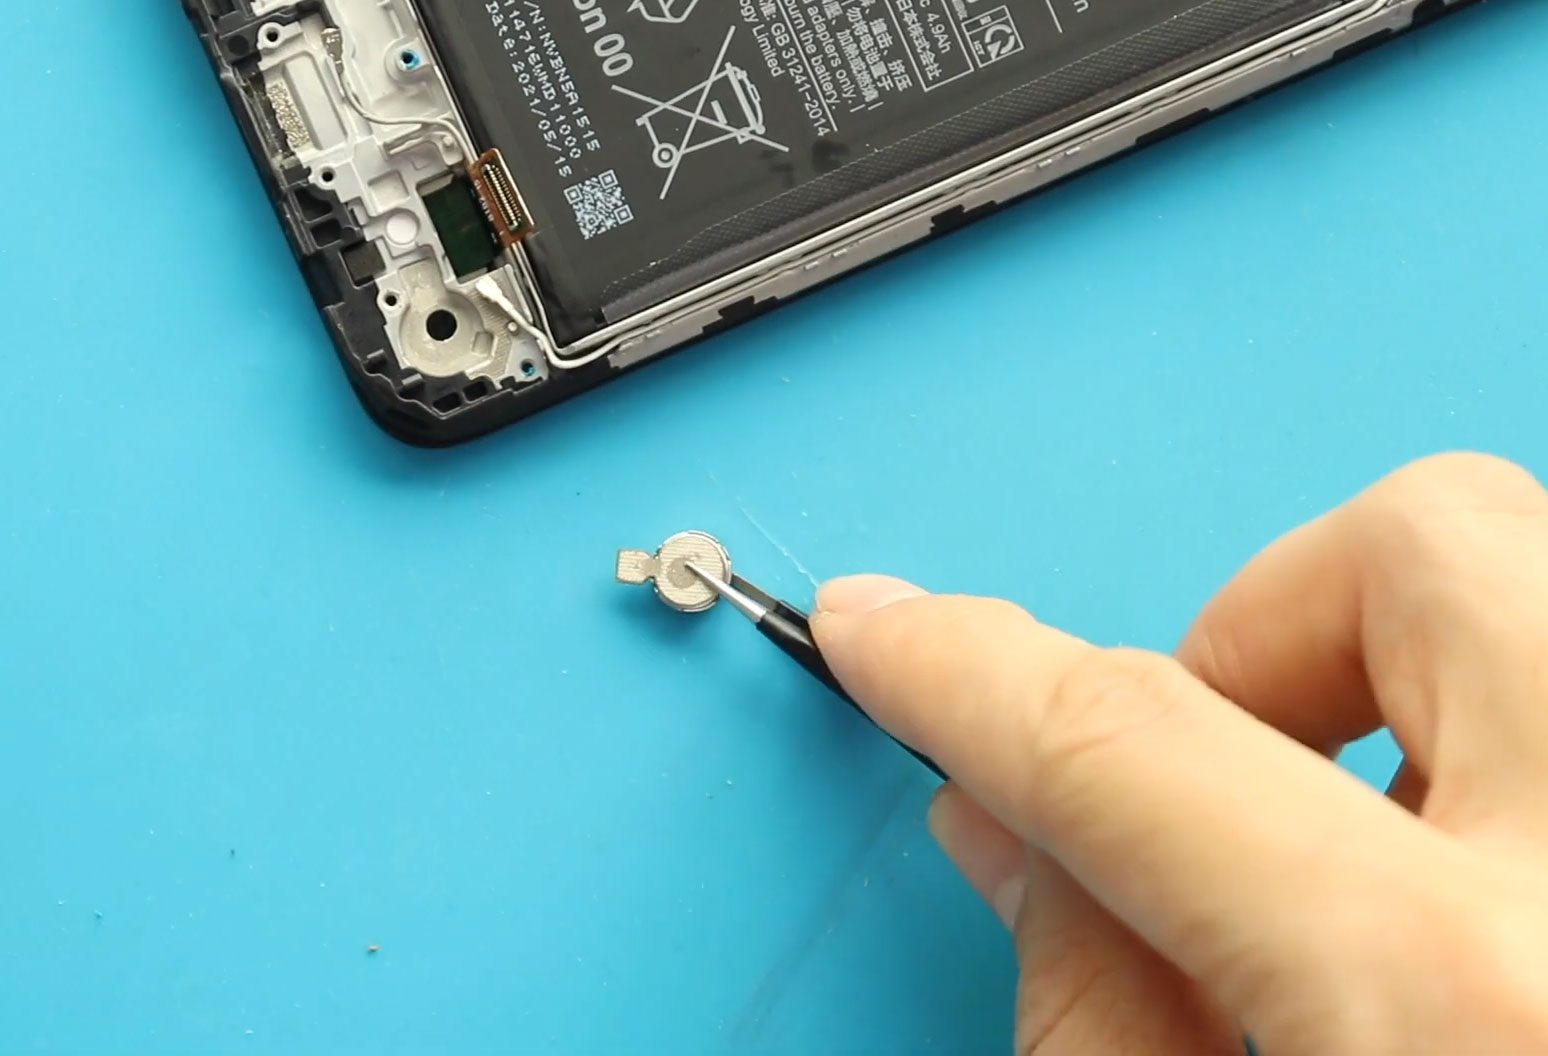
Take out the back cover, and Next, Apply heat to the camera lens glass. And then, slightly apply pressure from the rear side to remove the broken lens.
Next, Place the new camera lens with adhesive.
Also, if needed can take out the lens with the frame. Apply heat to the camera lens frame from the rear side and then slightly apply pressure from the front side to take out the lens with the frame.
Next, secure the new camera lens with the frame by applying adhesive.
Next, Before installing the main back cover, ensure it has enough glue; if not, use B7000 glue or a new double-sided back cover adhesive.
Finally, we are adding bonding clips to tighten the rear cover with the body. If not, you can use some rubber bands and Leave them for some time.
I hope you have enjoyed the repair guide. Let us know if you have any questions.