Now Reading: Google Pixel 6 Camera Replacement Guide | Front & Rear
-
01
Google Pixel 6 Camera Replacement Guide | Front & Rear
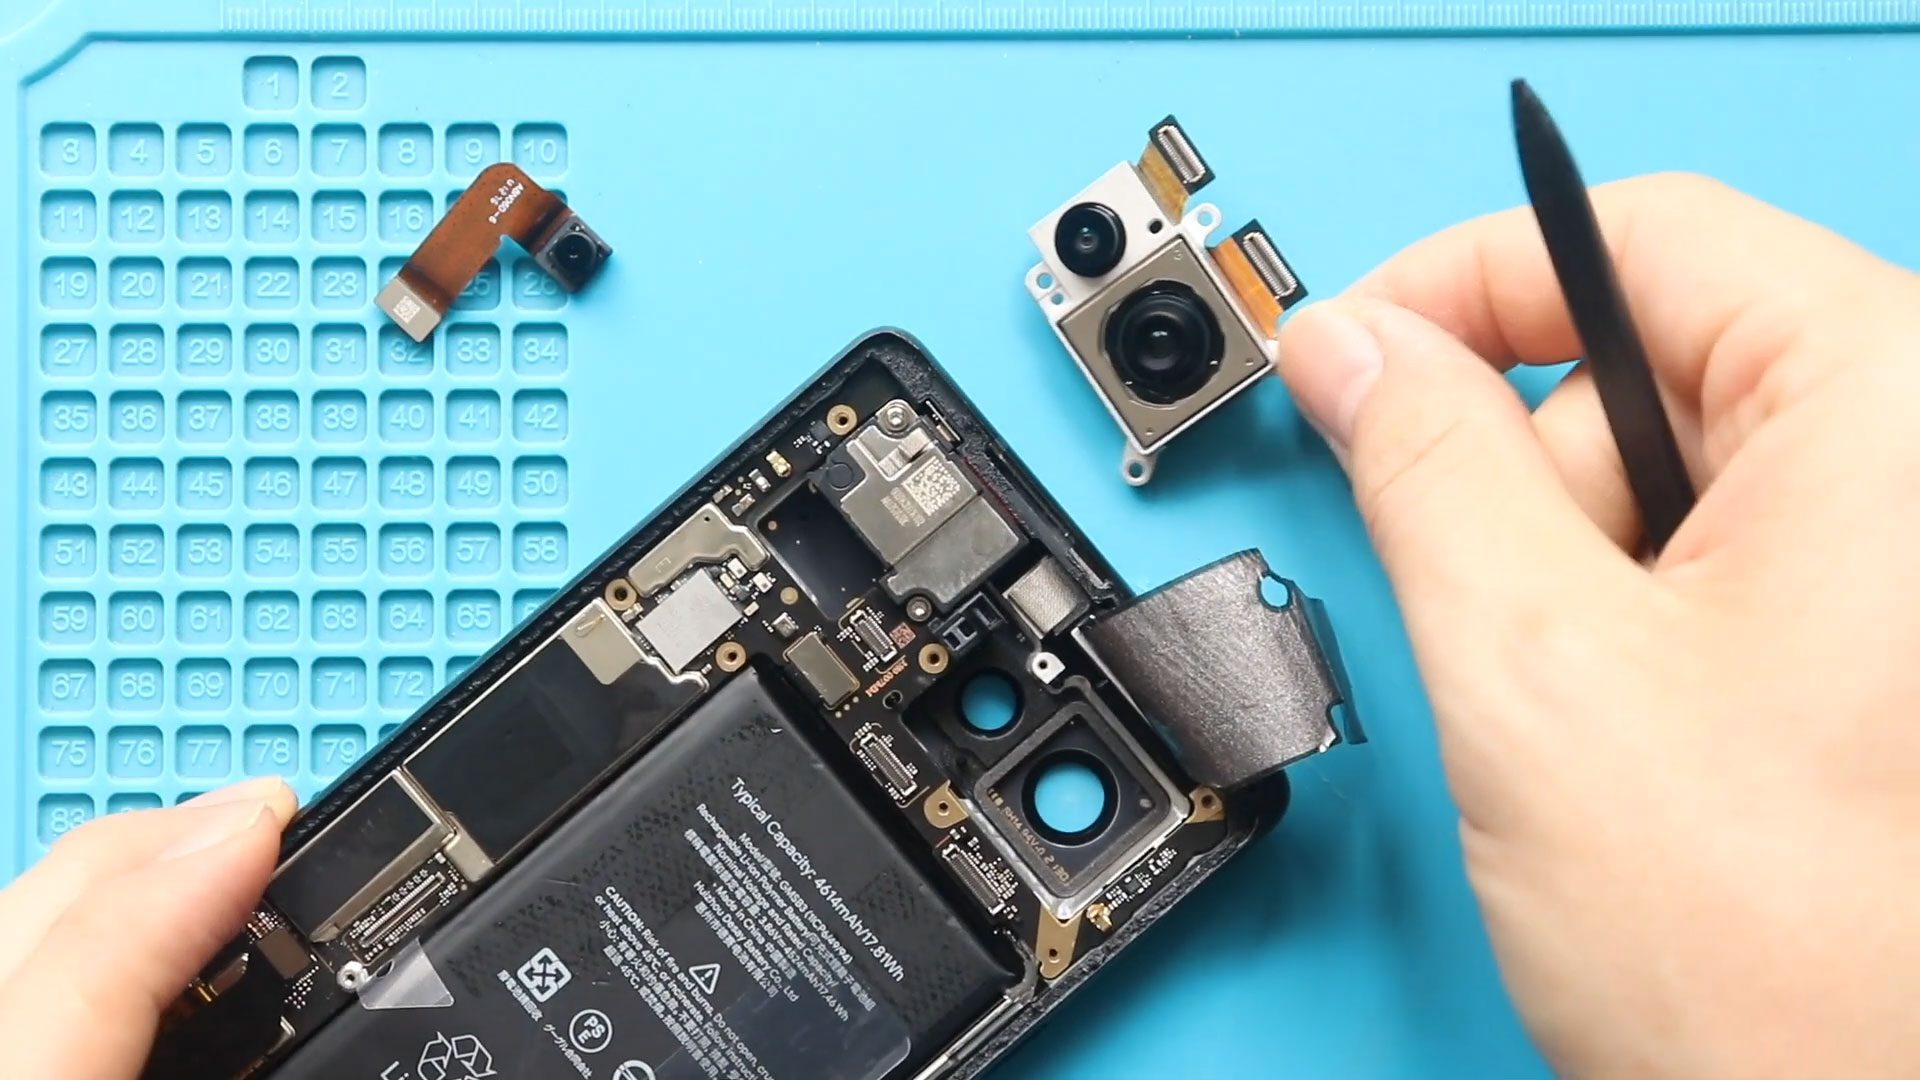
Google Pixel 6 Camera Replacement Guide | Front & Rear
If your Google Pixel 6 rear & front camera is producing blurry images, failing to focus, or not working at all, replacing the camera module can restore full camera performance. In this DIY repair guide, we’ll walk you through the complete process of replacing the rear & front camera on the Google Pixel 6 using safe, step-by-step instructions.
This guide is suitable for DIY users with basic repair experience. You’ll need common smartphone repair tools such as a heating pad, suction cup, plastic pry tools, tweezers, and a precision screwdriver set. Using the correct tools and following the steps carefully will help you avoid damage to internal components.
Reasons to Replace the Google Pixel 6 Rear & Front Camera
- Rear camera not opening or showing a black screen
- Blurry or unfocused photos
- Camera app crashes or freezes
- Physical damage after a drop
- Camera lens works intermittently
- Camera shows error messages
- Front Camera not working
- Selfie camera problems
Repair Difficulty: ★★★☆☆ (Medium)
Estimated Time: 35–55 minutes
Before You Begin
Compatibility and Model Numbers
This repair guide based on Google Pixel 6 Mobile Phone.
Model Numbers | GB7N6, G9S9B16, G9S9B, GR1YH
Tools Required
- Heating pad / heat gun / hairdryer
- Suction cup
- Plastic card pry tools / opening picks / Tweezers
- Phillips PH000/PH00 screwdriver
- Torx T3 Screwdriver
- Adhesive (B7000 or double-sided back cover adhesive)
- Bonding clips or rubber bands (optional but recommended)
Make sure the device is turned off and the SIM tray is removed before starting.
How to Find Tools and Parts
- Heating pad – https://amzn.to/3H0tHzJ
- Portable Heat Gun – https://amzn.to/4mszih1
- Clamps https://amzn.to/3GYJT4w
- STREBITO 142 Piece Repair Tool Kit https://amzn.to/3UO1jUx
- Glue | Adhesive https://amzn.to/46exVxe
- Compatible Parts –
- Battery – https://amzn.to/4oCudEY
- Screen – https://amzn.to/4orJkRn
- Other Parts – https://amzn.to/45eHHPC
- Silicone Work Repair Mat https://amzn.to/45Emz5l
Protect Your Google Pixel 6
- Protector For The Screen https://amzn.to/4oxn48E
- Best Cases For Your Pixel 6 https://amzn.to/4fwwSMl
Step-by-Step Google Pixel 6 Rear Camera Replacement
Step 1: Heat the Front Screen
- Place the Pixel 6 screen-side down on a heating pad.
- Select the mobile phone heating option and allow it to complete.
- Alternatively, use a heat gun or hairdryer to soften the screen adhesive.
Step 2: Lift and Open the Screen
- Use a suction cup to lift the screen from the right-hand side.
- Insert a plastic pry tool to cut through the adhesive around the screen edges.
- Be gentle—the LCD flex cable is located on the left side.
- Open the screen from right to left like a book.
Step 3: Disconnect the Display
- Remove the connector bracket using tweezers.
- Disconnect the LCD connector from the logic board.
- Fully remove the screen and set it aside safely.
Step 4: Access Internal Components
- Remove the nine screws securing the logic board bracket.
- Carefully lift the bracket while loosening the graphite tapes.
- Disconnect the battery connector to prevent short circuits.
Step 5: Remove Cameras
- Disconnect and remove the faulty front camera.
- Undo the two screws securing the rear camera module.
- Disconnect the two rear camera plugs and remove the faulty rear camera.
Step 6: Install the New Rear Camera
- Place the new rear camera module into position.
- Connect both camera plugs securely.
- Fasten the rear camera using the two screws.
Step 7: Reinstall Front Camera and Components
- Reinstall and connect the front camera to the board.
- Reconnect the battery connector.
- Reinstall the logic board bracket and secure it with nine screws.
Step 8: Test and Reassemble
- Connect the LCD screen temporarily and test the camera functionality.
- If everything works, secure the display connector bracket.
- Apply new adhesive or B7000 glue if needed.
- Slide the screen into place from bottom to top and apply gentle pressure.
- Use bonding clips or rubber bands until the adhesive sets.
Troubleshooting (After The Repair)
Q: Rear camera still not working after replacement
A: Check that both rear camera connectors are firmly seated and not damaged.
Q: Camera app crashes after reassembly
A: Reboot the phone and ensure the battery and camera connectors are secure.
Q: Blurry images after camera replacement
A: Remove the camera and check for dust or misalignment before reinstalling.
Q: Phone does not power on
A: Recheck the battery connector and ensure no flex cables were damaged.
Frequently Asked Questions (FAQ)
Q: Is rear camera replacement on Pixel 6 difficult?
A: It’s a medium-level repair that requires patience and careful handling of connectors.
Q: Do I need to remove the screen to replace the camera?
A: Yes, the Pixel 6 rear camera is accessed from the front after screen removal.
Q: Can I reuse the old screen adhesive?
A: No, it’s best to use new adhesive or B7000 glue for proper sealing.
Q: Will replacing the rear camera affect image quality?
A: If you use a genuine or high-quality replacement, image quality will be restored.
Related Guides