Now Reading: OnePlus Nord N200 5G Charging Port Replacement Guide – DIY Repair
-
01
OnePlus Nord N200 5G Charging Port Replacement Guide – DIY Repair
If your OnePlus Nord N200 5G is not charging properly, the issue may be a faulty charging port board. Replacing it can restore proper charging and connectivity without needing a full phone replacement. This guide shows you step by step how to remove the old charging port board and install a new one safely.
Repair Overview
- Device Type: Android Smartphone
- Model: OnePlus Nord N200 5G
- Type of Repair: Charging Port Replacement
Repair Difficulty ★★★★☆☆☆☆☆ (4/10 – Moderate)
Estimated Time Required : 40–60 Minutes
Reasons for Replacement
- Phone not charging or charging intermittently
- USB-C port loose or physically damaged
- Connection issues with peripherals or OTG
- Water or dust damage to charging port area
- Phone not recognized by PC during data transfer
Before You Begin
Compatibility and Model Numbers
- Oneplus Nord N200 5G
- Oppo A93 5G – Simliar Design (Can use Reference to repair)
This repair guide based on OnePlus N200 5G.
Model Numbers | DE2118, DE2117
Tools Required
- Mobile phone heating pad or hairdryer/heat gun
- Plastic pry tool / card pry
- Suction cups
- Phillips #00/#000 screwdrivers
- Torx T3 / T4 Screwdriver
- Flathead Screwdriver
- Tweezers (for connectors)
- B7000 glue or double-sided adhesive (for back cover)
- Rubber bands or bonding clips to secure the back cover
Using proper tools reduces the risk of damaging the phone.
How to Find Tools and Parts
- Heating pad – https://amzn.to/3H0tHzJ
- Portable Heat Gun – https://amzn.to/4mszih1
- Clamps https://amzn.to/3GYJT4w
- STREBITO 142 Piece Repair Tool Kit https://amzn.to/3UO1jUx
- Glue | Adhesive https://amzn.to/46exVxe
- Compatible Parts –
- Battery – https://amzn.to/3IgZ75c
- Screen – https://amzn.to/46iYhNy
- Other Parts – https://amzn.to/47Hh2N3
- Silicone Work Repair Mat https://amzn.to/45Emz5l
✅ Protect Your Oneplus Nord N200 5G
- Protector For The Screen https://amzn.to/4mcsLq9
- Best Rated Case https://amzn.to/46acCf2
Step-by-Step Charging Port Board Replacement
Step 1. Power Off the Device
- Power off the device.
- Remove the SIM tray before any disassembly.
Step 2. Removing Back Cover
- Gently heat the rear edges to soften the adhesive.
- Use a suction cup to lift the back cover.
- Insert a plastic card or pry tool to carefully separate the back cover from the frame.
Step 3. Removing Mid Frame
- Remove all screws securing the midframe.
- Gently pry the midframe using a plastic tool to disengage clips.
Step 4. Removing Battery & Fingerprint Plug
- Disconnect the battery connector.
- Disconnect the fingerprint sensor flex cable carefully.
Step 5. Removing Speaker Cover
- Remove the speaker protective cover to access internal flex cables.
Step 6. Removing Main & Antenna Flex
- Carefully detach the main and antenna flex connectors to free the logic board area.
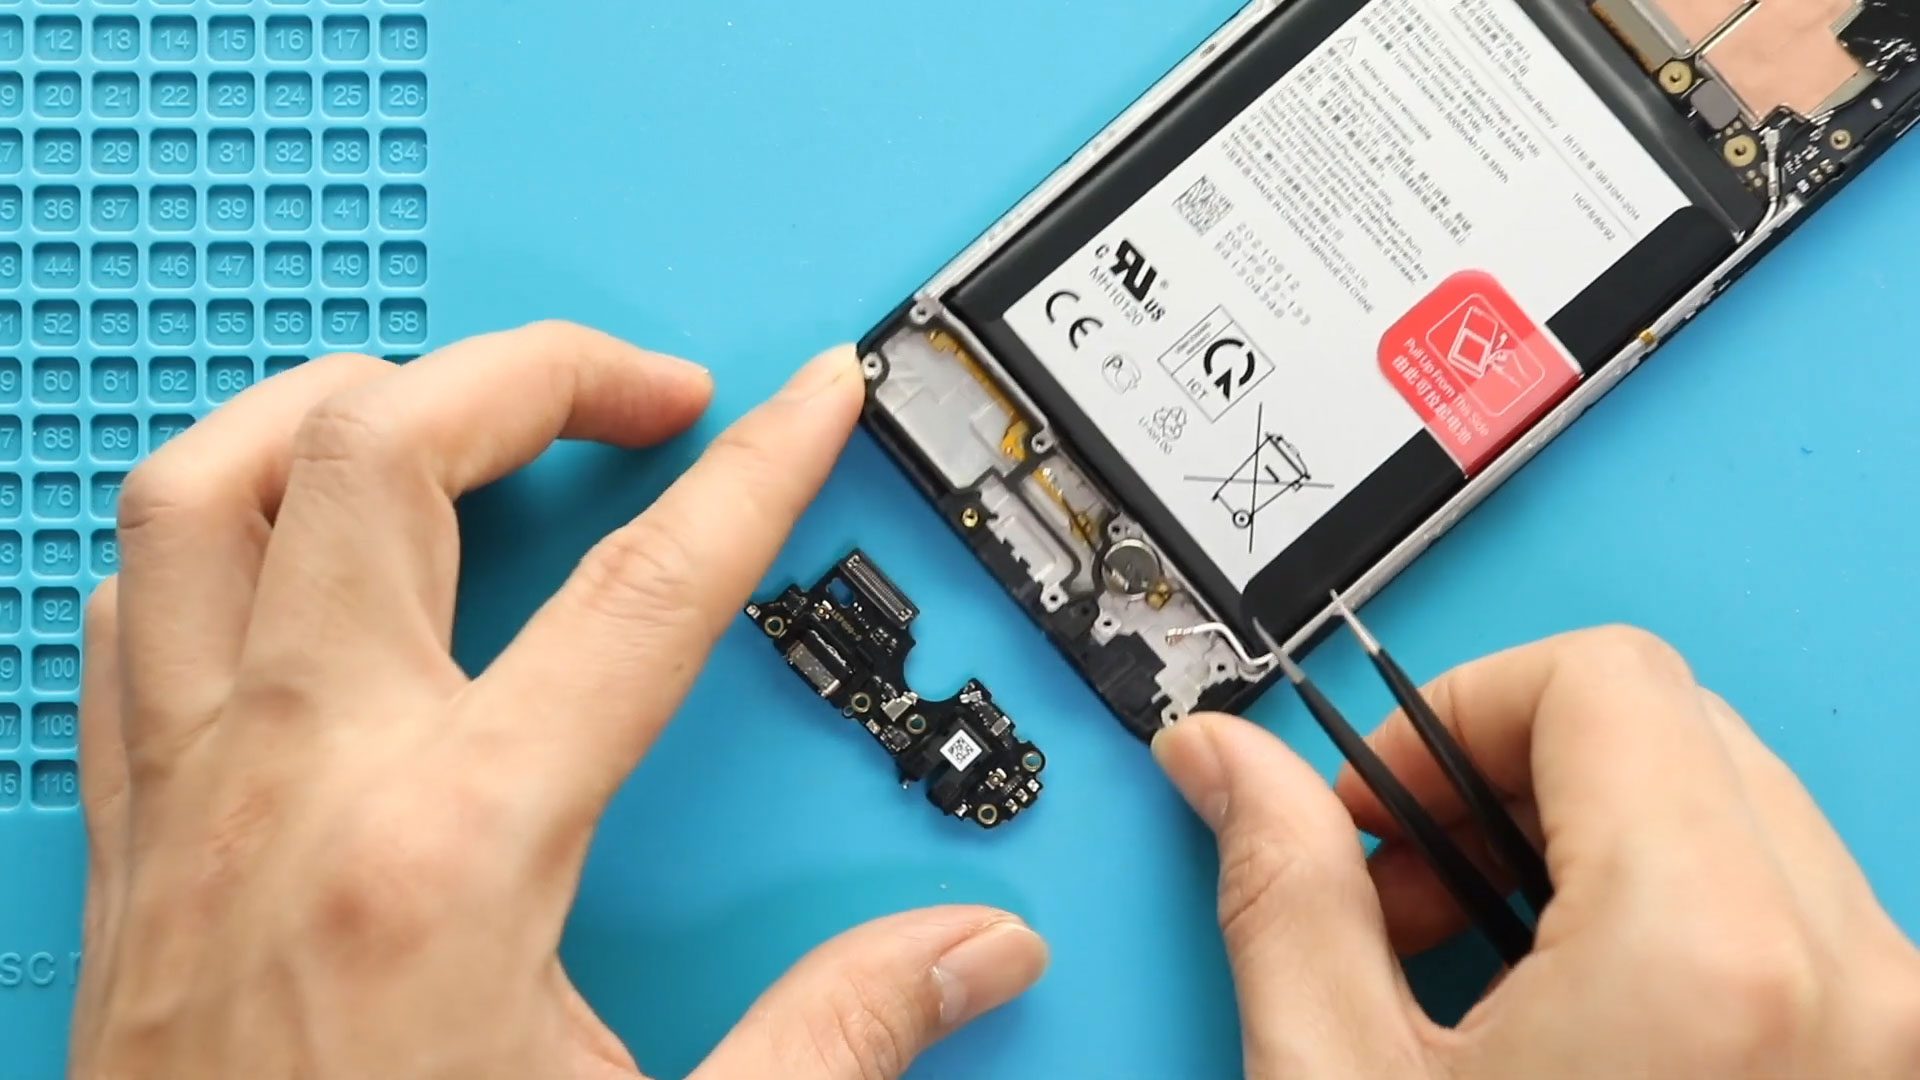
Step 7. Removing Not Working Nord N200 5G Charging Port Board
- Unscrew and lift the faulty charging port board from the device.
- Be gentle to avoid damaging surrounding components.
Step 8. Placing New Nord N200 5G Charging Port Board
- Place the new charging port board in the correct position.
- Secure screws and ensure the board sits flush with the frame.
Step 9. Placing Main & Antenna Flex
- Reconnect the main and antenna flex cables carefully.
- Ensure each connector clicks into place.
Step 10. Placing Speaker Cover
- Reinstall the speaker cover over the flexes to protect components.
Step 11. Placing Battery & Fingerprint Plug
- Reconnect the fingerprint sensor and battery connectors.
- Double-check for proper seating.
Step 12. Placing the Mid Frame
- Reposition the midframe and fasten all screws.
- Ensure all clips are fully engaged before proceeding.
Step 13. Closing & Back Cover Installation, Binding
- Check adhesive on the back cover; add B7000 glue or double-sided tape if needed.
- Align and press the back cover onto the phone.
- Use binding clips or rubber bands to hold the cover in place while the adhesive cures.
Frequently Asked Questions (FAQ)
Q1: Can I replace the charging port board myself?
Yes, with proper tools and patience, this is a moderate-level DIY repair.
Q2: How do I know if the charging port board is faulty?
Symptoms include no charging, intermittent charging, loose USB connection, or PC not detecting the device.
Q3: Do I need heat to remove the back cover?
Yes, heating softens the adhesive and prevents cracking the back cover.
Q4: Can I reuse the old back cover adhesive?
It’s recommended to use new adhesive or B7000 glue for secure sealing.
Troubleshooting
Q1: Phone not charging after replacement?
Ensure battery and charging port connectors are properly seated.
Q2: Device not recognized by PC?
Check the main flex and antenna connectors are firmly connected.
Q3: Fingerprint sensor not working?
Confirm the flex cable is properly attached to the logic board.
Q4: Back cover not sealing properly?
Apply additional adhesive and use binding clips for longer curing time.
Replacing the charging port board on your OnePlus Nord N200 is a moderate-level repair that can significantly restore your phone’s charging and connectivity functionality. With patience, proper heating, and careful disassembly, this repair can be completed successfully at home.
Related Guides