Now Reading: Samsung Galaxy A42 5G Fingerprint Sensor Replacement Guide | M42 5G
-
01
Samsung Galaxy A42 5G Fingerprint Sensor Replacement Guide | M42 5G
If your Samsung Galaxy A42 5G is not recognizing your fingerprint, failing to register new fingerprints, or the sensor is unresponsive, the fingerprint sensor may be faulty. Replacing the fingerprint sensor can restore proper biometric unlocking functionality without replacing the entire phone.
This detailed DIY guide explains how to replace the Fingerprint Sensor on the Samsung Galaxy A42 5G safely and correctly.
Repair Difficulty
- Device Type: Smartphone
- Type of Repair: Charging Port & Headphone Jack Board Replacement
- Repair Difficulty: 5/10 – Moderate
- Estimated Time: 45–60 Minutes
Reasons Why You May Need This Repair
- Fingerprint not detecting or registering
- “Fingerprint sensor not working” system error
- Moisture or dust damage
- Hardware failure due to drop or impact
- Malfunction after third-party screen replacement
- Flex cable tear or adhesive failure
Before You Begin
Compatibility and Model Numbers
- Samsung Galaxy A42 5G
- Samsung Galaxy M42 5G
This repair guide based on Samsung Galaxy A42 5G Model.
Model Numbers | SM-A426B, SM-A426B/DS, SM-A4260, SM-A426U, SM-A426U1, SM-A426N, SM-M426B, SM-M426B/DS
Tools Required
- Mobile phone heating pad or hairdryer/heat gun
- Plastic pry tool / card pry
- Suction cups
- Phillips #00/#000 screwdrivers
- Tweezers (for connectors)
- B7000 glue or double-sided adhesive (for back cover)
- Rubber bands or bonding clips to secure the back cover
Using proper tools reduces the risk of damaging the phone.
How to Find Tools and Parts
- Heating pad – https://amzn.to/3H0tHzJ
- Portable Heat Gun – https://amzn.to/4mszih1
- Clamps https://amzn.to/3GYJT4w
- STREBITO 142 Piece Repair Tool Kit https://amzn.to/3UO1jUx
- Glue | Adhesive https://amzn.to/46exVxe
- Compatible Parts –
- Battery – https://amzn.to/469eXqF
- Screen – https://amzn.to/48bD8XU
- Other Parts – https://amzn.to/4m0Ki4D
- Silicone Work Repair Mat https://amzn.to/45Emz5l
Protect Your Galaxy A42 5G
- Protector For The Screen https://amzn.to/4gbx7Nb
- Best Rated Case https://amzn.to/3JSjwyg
How to Replace Samsung Galaxy A42 5G Fingerprint Sensor – Step by Step
Step 1. Open the Samsung Galaxy A42 5G
Begin by gently heating the back cover to soften the adhesive. Use a heating pad, heat gun, or hair dryer.
Create an opening using a suction cup and slide a plastic pry tool around the edges to release the adhesive.
Step 2. Remove the Back Cover
Carefully lift the back cover away from the frame. Ensure you do not damage the wireless charging pad inside.
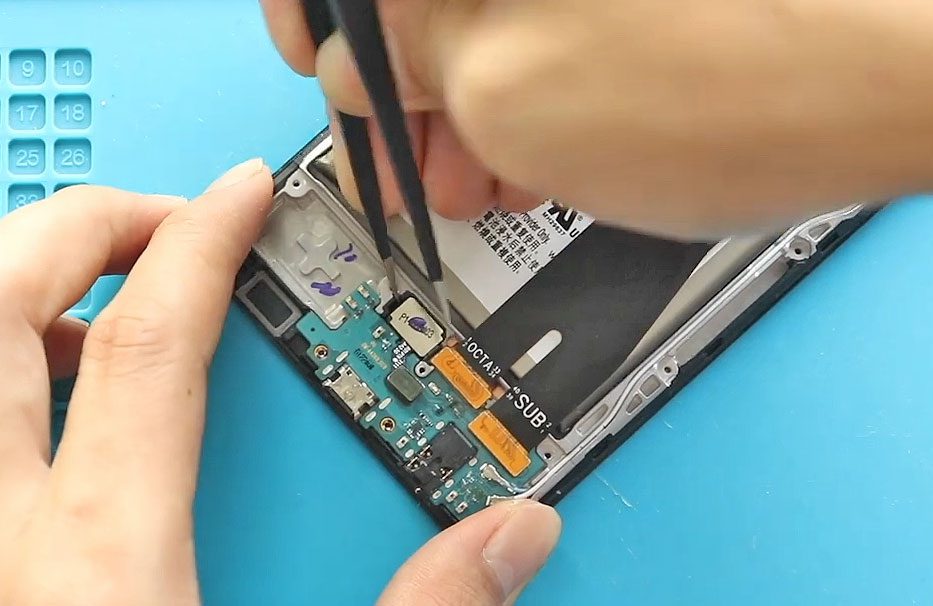
Step 3. Remove the Mid-Frame
Unscrew and detach the plastic mid-frame that locks the logic board and components in place. Keep all screws organized, as Samsung uses varying sizes.
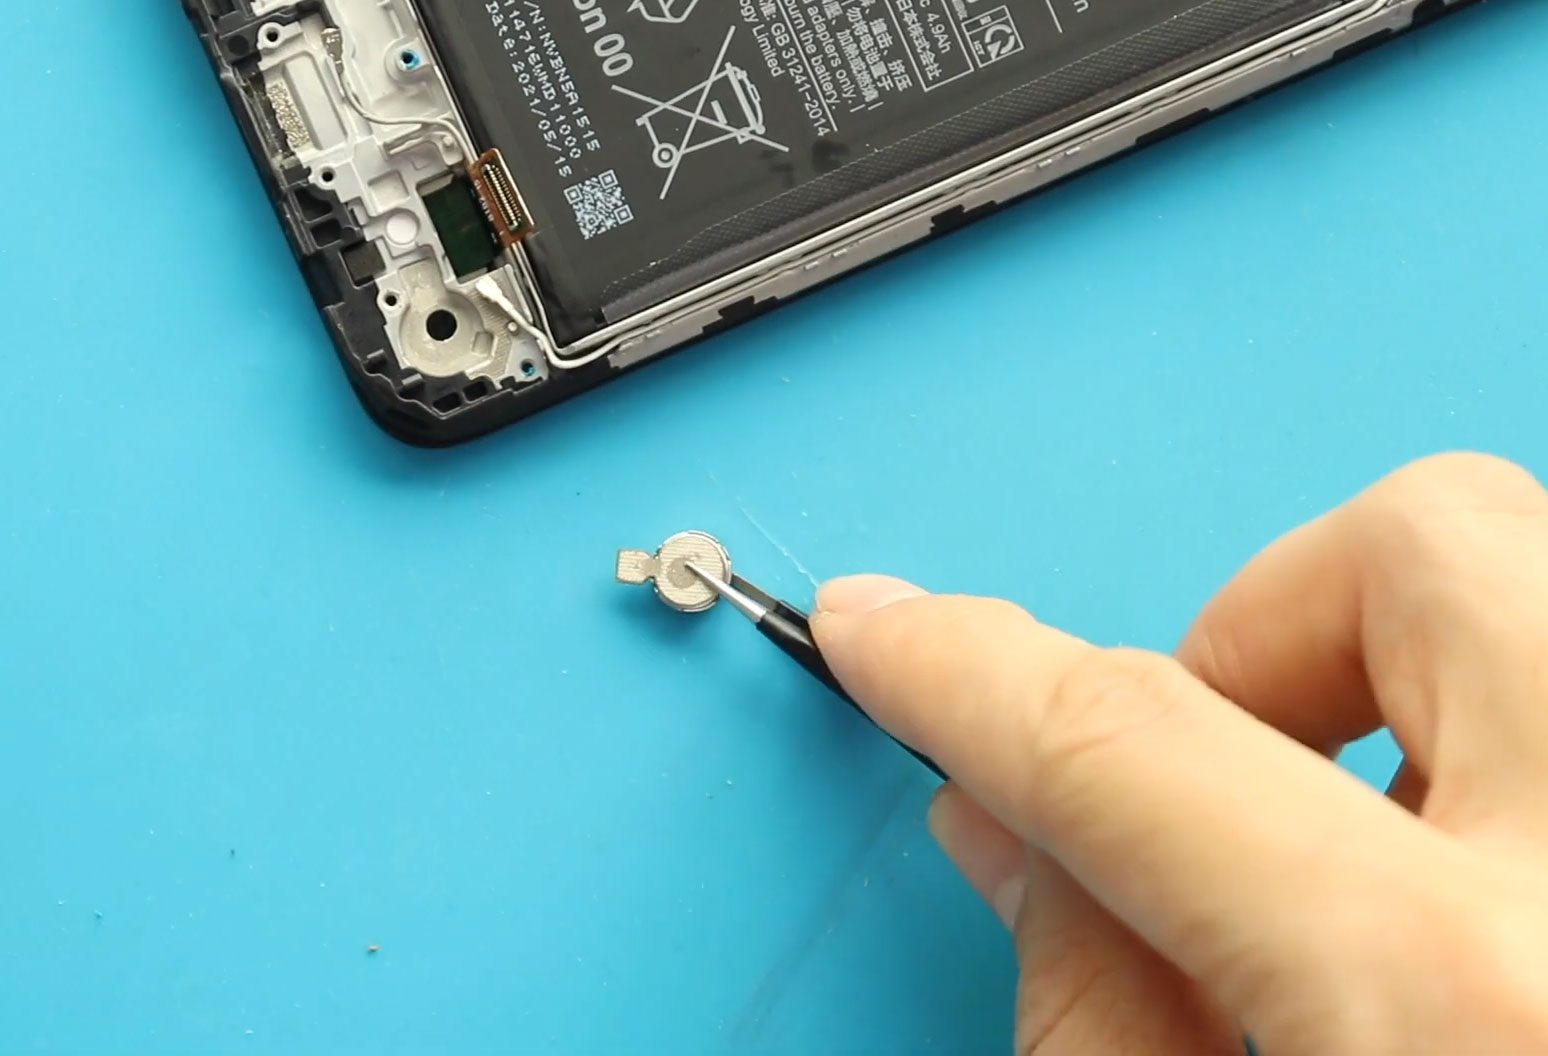
Step 4. Remove the Faulty Fingerprint Sensor
Disconnect the fingerprint flex cable from the motherboard.
Lift the fingerprint scanner from its housing. It may be secured with light adhesive, so gentle lifting is recommended.
Step 5. Install the New Fingerprint Sensor
Place the new sensor in the correct orientation and position it firmly in the frame.
Reconnect the fingerprint flex cable to the motherboard.
Step 6. Reinstall the Mid-Frame
Align and snap the mid-frame back into place, then reinstall all screws securely.
Step 7. Install the Back Cover
Before placing the back cover, ensure adhesive is sufficient. If the original adhesive is weak, apply B7000 glue or a new double-sided adhesive strip.
Step 8. Close and Bind the Back Cover
Press around the edges to bond the cover. Using rubber bands or bonding clips is recommended to create a strong seal.
Leave it clamped for a short period for optimum adhesion.
Repair complete!
FAQ (Frequently Asked Questions)
Q1: Will the new fingerprint sensor work immediately?
In most cases, yes. However, you may need to re-register your fingerprints in the device settings.
Q2: Does replacing the fingerprint sensor erase my data?
No. The fingerprint reader is independent of your internal storage.
Q3: Can I use a third-party fingerprint sensor?
It is recommended to use OEM or high-quality compatible parts to ensure proper calibration and functionality.
Q4: Is heating mandatory to remove the back cover?
Yes, because the adhesive is strong. Heating prevents cracks or accidental damage.
Q5: Do I need to disconnect the battery for this repair?
If the mid-frame covers the battery connector, it is automatically disconnected once removed. This ensures safe handling.
Troubleshooting
Q1: Fingerprint not registering after replacement
- Reboot the device
- Remove old fingerprint records
- Re-register fingerprints
- Ensure the flex cable is fully seated
Q2: “Fingerprint sensor not responding” error
- Recheck flex cable connection
- Ensure the mid-frame isn’t pressing incorrectly on the cable
- Verify the new sensor is not defective
Q3: Fingerprint unlock is slower than before
- Clean the screen surface
- Re-register fingerprints in multiple angles
- Reset biometric data from settings
Q4: Touchscreen feels unresponsive after repair
This typically happens if the back cover is not sealed properly. Press around the perimeter or re-adhere the cover.
This completes your Samsung Galaxy A42 5G Fingerprint Sensor replacement guide. Follow the steps carefully and your device should charge and function normally again. If you have questions, feel free to add them to your blog’s comment section.
Related Guides