Now Reading: Samsung Galaxy S20 Ultra 5G Battery Replacement | Step-by-Step DIY Guide
-
01
Samsung Galaxy S20 Ultra 5G Battery Replacement | Step-by-Step DIY Guide

Samsung Galaxy S20 Ultra 5G Battery Replacement | Step-by-Step DIY Guide
Hi everyone, welcome back to DIYGEARDO!
In this guide, we’ll show you how to safely replace a faulty or fast drainning battery in your Samsung Galaxy smartphone. Before starting the repair, make sure you have all the required tools ready, which you can find linked in the description.
Compatibility and Model Numbers
This repair guide based on Samsung Galaxy S20 Ultra 5G mobile phone, but it is also compatible with Galaxy S20 Ultra 4g version too.
Compatible Mode Numbers l SM-G988, SM-G988U, SM-G988U1, SM-G9880, SM-G988B/DS, SM-G988N, SM-G988B, SM-G988W SM-G988B/DS
Tools You Need
- Heating pad / heat gun / hairdryer
- Suction cup
- Plastic card pry tools / opening picks
- Phillips PH000 screwdriver
- Philips PH00 screwdriver – For smaller internal screws (optional)
- Adhesive (B7000 or double-sided back cover adhesive)
- Bonding clips or rubber bands (optional but recommended)
How to Find Tools and Parts
- Heating pad – https://amzn.to/3H0tHzJ
- Portable Heat Gun – https://amzn.to/4mszih1
- Clamps https://amzn.to/3GYJT4w
- STREBITO 142 Piece Repair Tool Kit https://amzn.to/3UO1jUx
- Glue | Adhesive https://amzn.to/46exVxe
- Compatible Battery https://amzn.to/45SGU5W
- Silicone Work Repair Mat https://amzn.to/45Emz5l
Learn How to Safely Remove the Back Cover Using Heating Pad
Step 1 – Remove the SIM Tray
Begin by powering off the phone completely. Use the SIM eject tool to remove the SIM tray and set it aside. This prevents damage during the repair and makes it easier to open the back panel.
Step 2 – Heat the Back Cover
To remove the back cover, the factory adhesive needs to be softened. Place the phone face down on a heating pad and select the mobile phone heating mode. Let the cycle complete fully.
If you don’t have a heating pad, you can use a heat gun or hair dryer to warm the edges evenly. Do not overheat the glass — gentle and steady heat is enough.
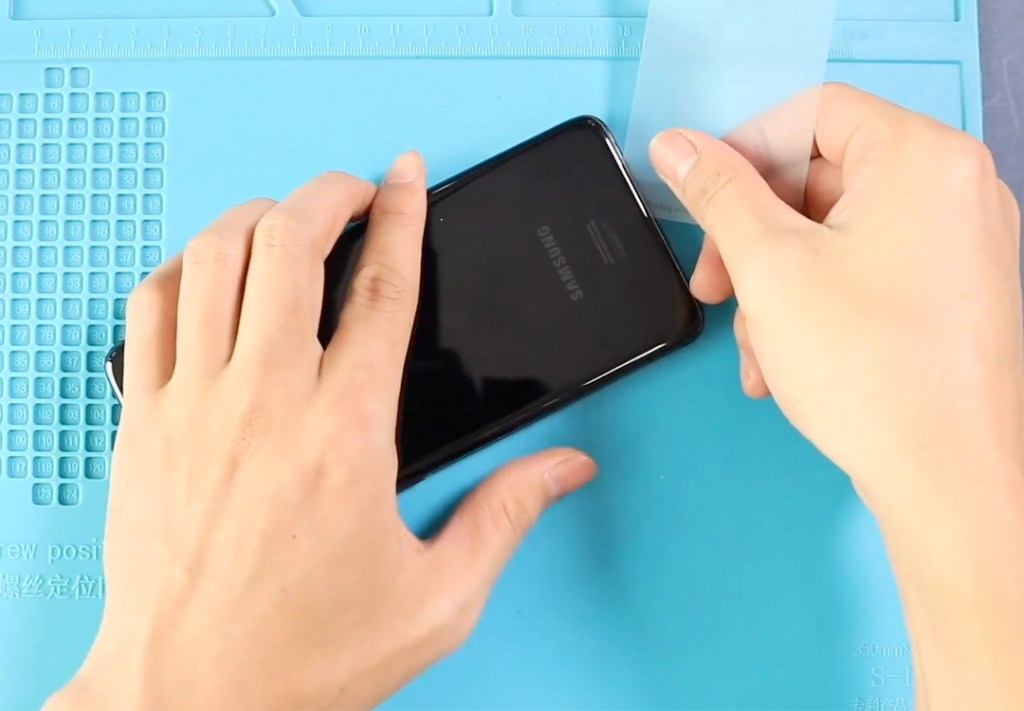
Step 3 – Open the Back Cover
Once the adhesive is soft, place a suction cup near the bottom edge to create a small gap between the frame and the rear glass. Insert a plastic card or pry tool into the gap and carefully slide it around the edges to cut the adhesive.
Slowly lift and remove the back cover and place it safely aside.
Step 4 – Remove the Wireless Charging Pad
Using a small screwdriver, remove the five screws that hold the wireless charging pad. Gently disconnect the pad’s connector and lift the pad out of the device.
Next, disconnect the battery connector from the logic board for safety.
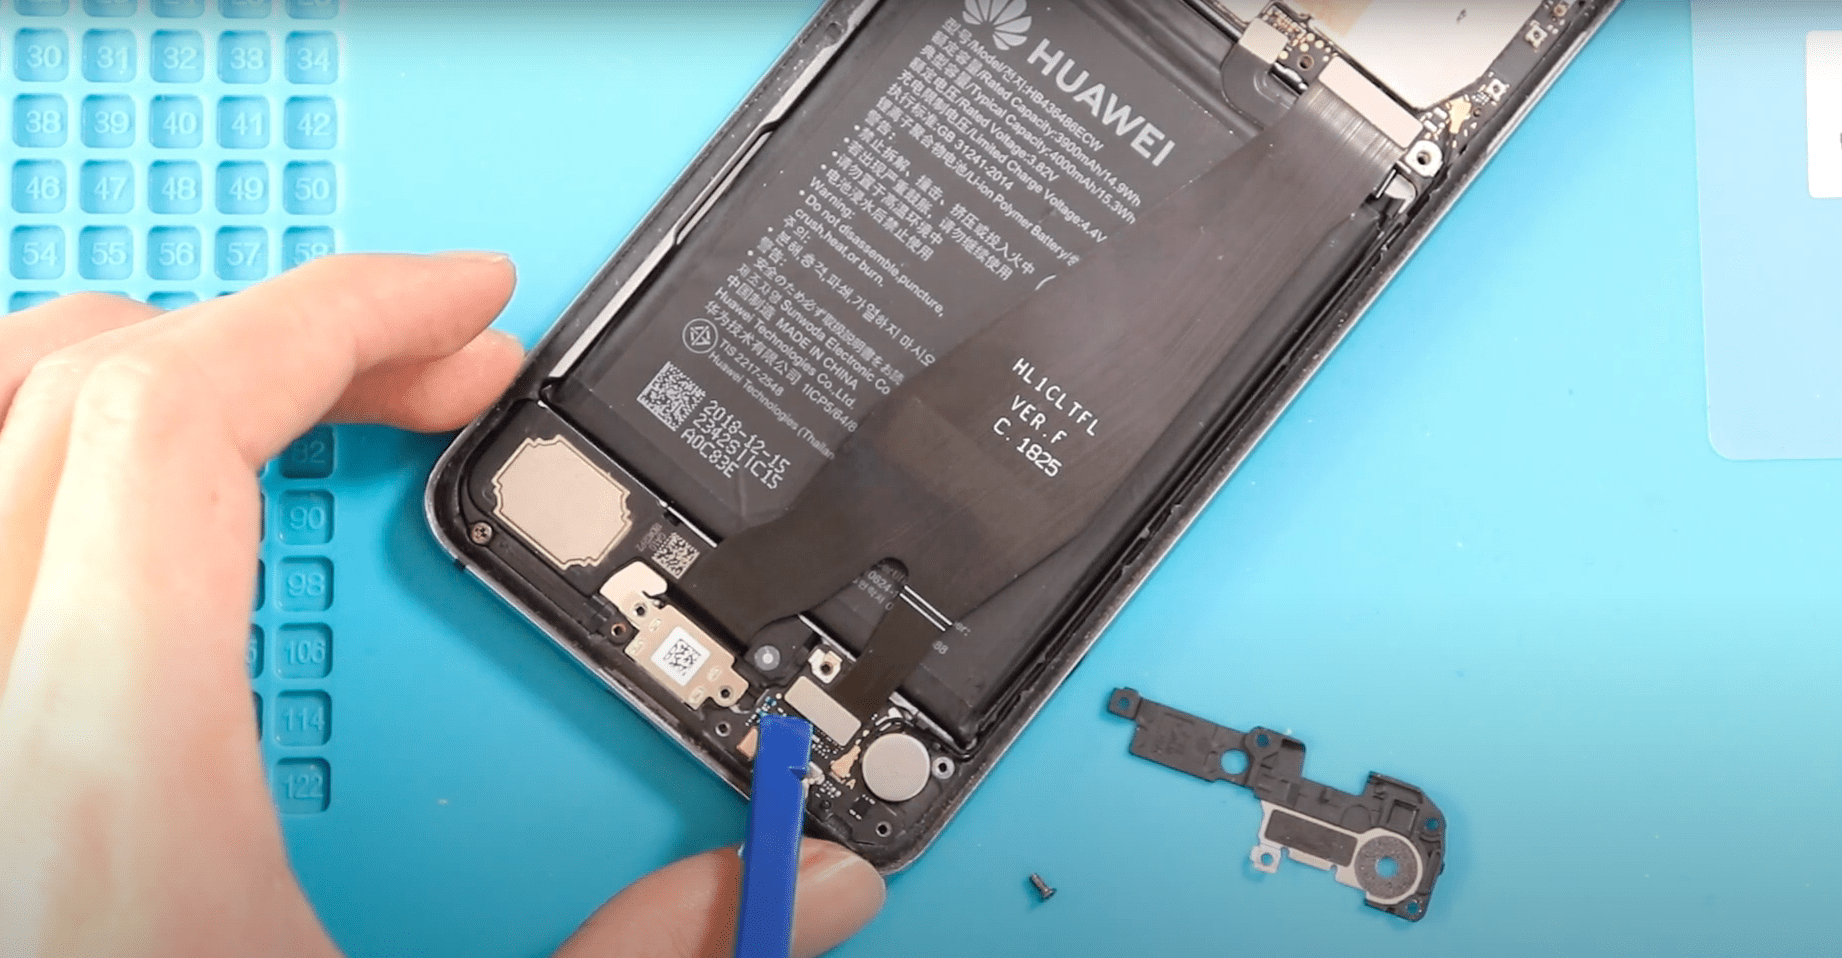
Step 5 – Disconnect Logic Board Connectors
Carefully disconnect the four ribbon cables attached to the logic board. These cables link the battery and other key components. Work slowly to avoid damaging the socket connectors.
Step 6 – Remove the Old Battery
The battery is secured with strong adhesive. To soften it, gently apply heat to the battery area using a heat gun.
Once warm, slide a plastic card or pry tool under the battery to cut through the adhesive. When you have enough space, carefully lift the battery out of the phone. Never use metal tools for this step.
Step 7 – Install the New Battery
Place the new replacement battery into the phone body. If your replacement battery does not come with pre-installed adhesive, apply thin battery adhesive strips or a small amount of glue to secure it.
Make sure it sits flat and aligned perfectly.

Step 8 – Reconnect All Cables
Reconnect the four logic board connectors carefully. Then reconnect the battery connector plug to restore power to the device.
Double-check that all cables are seated firmly.
Step 9 – Reinstall the Wireless Pad and SIM Tray
Place the wireless charging pad back into position, reconnect its cable, and secure it using the five screws.
Reinsert the SIM tray into the phone.
Step 10 – Reseal the Back Cover
Before closing the phone, inspect the adhesive around the back cover. If the glue is weak, apply B7000 glue or use a new double-sided back cover adhesive.
Position the back cover and press it firmly around all edges.
Step 11 – Secure and Finish
To ensure strong bonding, use screen binding clips to hold the back cover in place. If you don’t have clips, rubber bands work as a good alternative. Leave the phone secured for some time so the adhesive can fully set.
Power on the device and make sure the new battery is charging and working correctly.
Final Note
That’s it for this Samsung Galaxy battery replacement guide. We hope this step-by-step tutorial helped you complete your repair safely.
If you have any questions, feel free to leave them in the comments — we’re always happy to help!
Frequently Asked Questions
Q1: How do I know if my Samsung Galaxy battery needs replacement?
Signs include fast battery drain, unexpected shutdowns, overheating, swelling battery, or the phone not reaching 100% charge.
Q2: Can I use a higher capacity battery than the original?
No. You should always install a battery designed specifically for your model. Higher capacity batteries can cause overheating and damage to the logic board.
Q3: Why is double-sided battery adhesive important?
Proper adhesive prevents battery movement, reduces vibration damage, and ensures correct contact pressure inside the phone.
Q4: My phone doesn’t power on after battery replacement. What could be wrong?
This usually happens if the battery connector is not fully seated, logic board connectors are loose, or the battery is defective.
Q5: Is it safe to reuse the old battery adhesive?
No. Old adhesive loses strength. Always use new adhesive or B7000 glue for a secure installation.
Q6: Can heat damage the new battery during installation?
Yes. Never apply direct heat to the new battery. Heat should only be used to loosen the old battery adhesive.
Related Repair Guides